
19 min read ·
Choose the Right Flowable Epoxy—and Know What It Will Not Fix
Mixed resin flows after distribution. "Self-leveling" is no substitute for preparation, repair or controlled curing, nor is it a universal product category.
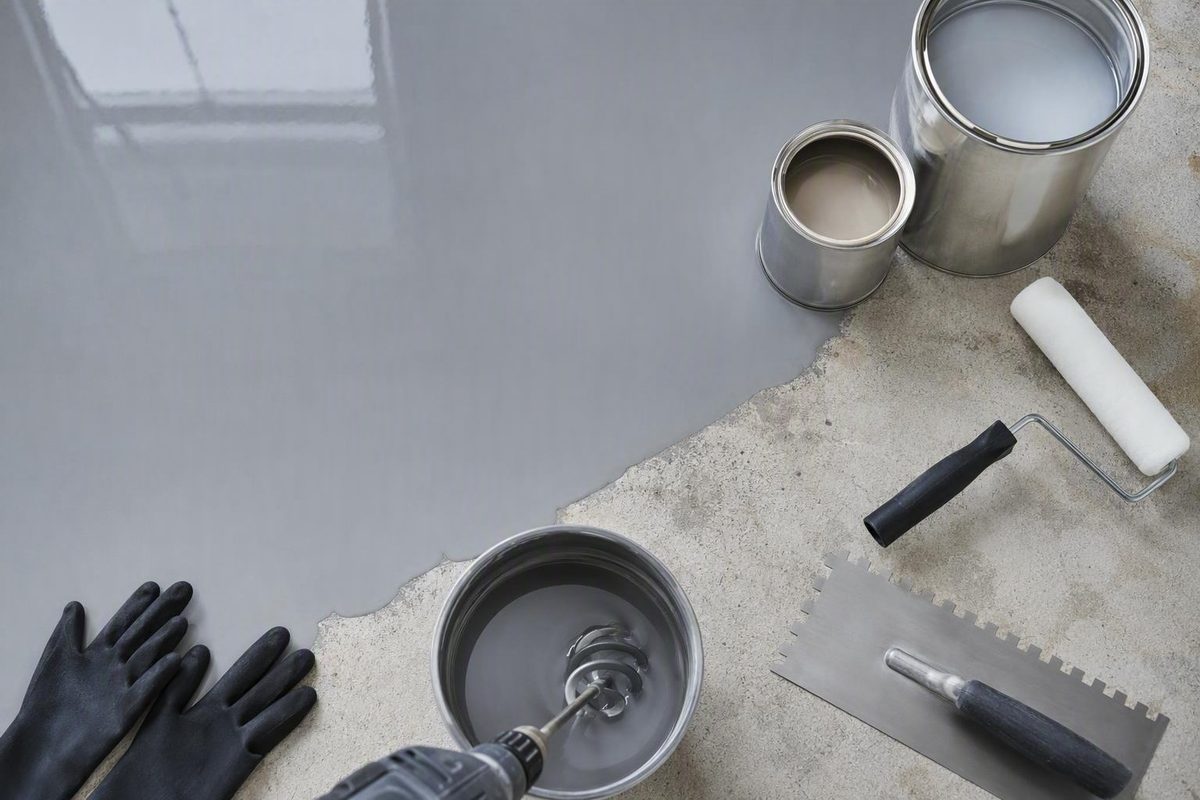
Self leveling epoxy resin can create a smooth, seamless surface, but it will not automatically flatten a defective base. “Self-leveling” describes how a mixed resin flows after distribution—not a universal product category or a substitute for preparation, repair, tools, and controlled curing.
Most buyers are choosing between two project paths:
- Opaque or decorative floor systems for prepared concrete in garages, warehouses, production areas, and commercial spaces.
- Clear tabletop or countertop flood coats for broad, horizontal surfaces.
Choose the category first. Then compare substrate compatibility, service conditions, approved thickness, coverage, working time, preparation requirements, and cure milestones. The selected product’s technical data sheet, application instructions, and safety data sheet should govern the work.
What “self-leveling” epoxy actually means
Self-leveling epoxy can flow and relax after it has been distributed. With the required quantity, suitable conditions, and enough working time, it may reduce marks left by a squeegee, roller, or trowel.
It does not mean “pour and walk away.” For example, POUR-N-WALK specifies a V-notched squeegee followed by an air-release roller. See the manufacturer’s POUR-N-WALK application method.
Just as importantly, smooth is not the same as level. A coating can hide minor texture and application marks while following the floor’s existing slope, broad waviness, and depressions. A tabletop flood coat behaves similarly: it may settle into a glossy film, but an unlevel workpiece encourages uneven thickness and runoff toward the low edge.
Flow depends on connected variables:
- Formulation and viscosity
- Approved layer thickness
- Quantity applied per unit of area
- Material, substrate, and ambient temperature
- Time available to pour, spread, and finish
- Substrate texture and porosity
- Edge containment
- Tool condition and geometry
A coat applied below its intended rate may lack enough material to relax as designed. Cold resin generally flows less readily, while warmer conditions may shorten the working window. Rough or porous surfaces can consume material that would otherwise contribute to a continuous film.
Another common term is “100% solids.” One Stop Epoxy defines its product as 100% solids by volume, meaning it contains no added water or solvent that must evaporate during curing. That is a product description, not proof that preparation, controlled application, cure instructions, or safety precautions can be skipped. See One Stop Epoxy’s product specifications.
The practical definition is therefore narrow: self-leveling is a flow characteristic within a specified application system, not a promise that epoxy will repair or flatten every horizontal surface.
Choose the resin category before comparing products
Begin with the intended application rather than the phrase “self-leveling” on a label. Products described that way can differ substantially in viscosity, approved depth, cure behavior, appearance, and service requirements.
Self-leveling floor epoxy
Floor formulations serve as body coats, receiver coats, or resurfacing layers over prepared concrete. Typical settings include garages, warehouses, production areas, commercial interiors, showrooms, and decorative flooring systems.
Some are relatively thin pigmented body coats. Others are high-build systems supplied with aggregate. Do not compare them by gallons or kit price alone: target thickness and required system layers may be entirely different.
Tabletop or countertop epoxy
Tabletop epoxy is generally a clear flood-coat formulation for broad, flat, horizontal surfaces. Important selection criteria include:
- Flow and clarity
- Appearance at exposed edges
- Bubble-release instructions
- Approved flood-coat depth
- Working time
- Substrate compatibility
- Seal-coat requirements
- Recoat and finishing instructions
Because these products flow toward open edges, self-leveling behavior creates a containment and runoff challenge as well as a finish benefit.
Deep-pour resin
Deep-pour or casting epoxy is intended for thick, contained placements such as river-table channels and embedded-object castings. It should not replace a tabletop flood coat merely because it is fluid. Cure speed, viscosity, depth limits, and finish behavior are designed around a different task.
Likewise, applying an unapproved tabletop resin in thick layers is not a substitute for casting resin. Fiberglass Warehouse distinguishes tabletop coatings for flat surfaces, deep-pour resin for thick castings, and laminating epoxy for bonding and reinforcement. See its comparison of epoxy categories.
Laminating epoxy
Laminating epoxy is primarily used for bonding reinforcement and wetting fabric or composite layers. Its ability to wet a surface does not make it a glass-like flood coat.
Trowel-grade epoxy
Trowel-grade material is distinct from a regular flowable body coat. Naming differs between brands: Duraamen, for example, identifies Perdure-SLE as its regular version and Perdure-SLE-T as trowel grade. Do not assume other manufacturers use the same categories or naming system. See Duraamen’s category description.
Novolac and other specialty systems
Novolac epoxy is marketed for demanding acid and alkali exposure. However, “chemical resistant” is not a complete specification. Selection must be based on the actual exposure and the selected product’s documented resistance data and limitations.
| Resin category | Intended job | Relative layer type | Containment needed? | Typical finish objective | Key technical-data checks |
|---|---|---|---|---|---|
| Self-leveling floor epoxy | Prepared concrete floors and decorative or industrial body coats | Thin to high-build, depending on system | Boundaries and openings may need control | Seamless pigmented or decorative floor | Thickness, coverage, primer, profile, moisture limits, traffic cure |
| Aggregate-filled resurfacer | Prepared concrete requiring a heavier floor build | High-build layer | Usually at boundaries and transitions | Dense resurfacing layer | Aggregate ratio, tools, thickness, substrate limits, topcoat |
| Tabletop/countertop epoxy | Broad, flat horizontal surfaces | Relatively thin flood coat | Yes at openings; runoff must be managed | Clear or decorative glossy finish | Flood depth, seal coat, edges, bubble guidance, recoat window |
| Deep-pour resin | River channels and thick castings | Thick, slow-curing casting layer | Yes—a suitable mold or dam | Clear or pigmented casting | Depth, total volume, mold compatibility, cure instructions |
| Laminating epoxy | Bonding and reinforcement | Thin bond or laminate layers | Assembly-dependent | Wet-out and bond rather than flood-coat build | Reinforcement compatibility, bond line, cure requirements |
| Trowel-grade epoxy | Manually placed system layers | Non-flowing or manually distributed | Placement-dependent | Controlled build | Trowel method, aggregate, thickness, overcoat compatibility |
| Novolac or specialty epoxy | Documented aggressive chemical exposure | System-specific | Site-specific | Protective floor or lining | Resistance data, exposure limits, temperature, primer, complete system |
What self-leveling epoxy can—and cannot—repair
Self-leveling flow may conceal minor texture and soften application marks. It should not be treated as a universal concrete-repair method.
Before choosing a coating, classify the condition:
- Cosmetic roughness: A sufficiently thick approved coat may conceal shallow texture or tool marks.
- Localized pits or damaged areas: Check whether the system requires a separate compatible repair product.
- Broad low areas or slope: These are elevation conditions, not merely surface texture.
- Cracks, joints, recurring displacement, or unexplained damage: Obtain the selected system’s repair detail or qualified assessment rather than covering them by default.
- Moisture symptoms or water entry: Stop and investigate before coating.
- Extensive or unexplained slab movement: Treat this as an assessment problem, not a resin-selection problem.
A thin resin layer largely follows the substrate beneath it. Flooring practitioner Akis Apostolopoulos recommends starting with a flat floor and using a suitable cementitious leveling compound where substantial elevation correction is required. He also warns that adding epoxy to low areas can increase consumption and cost without producing the intended result. Read the LearnCoatings practitioner guidance.
Some resurfacers are marketed for worn, pitted, cracked, spalled, or uneven concrete. That identifies an intended market, but it does not establish that the body coat alone can correct every defect. The allowable condition and repair procedure must come from the selected system’s documentation.
Use this pre-pour decision path:
- Identify the condition. Is it texture, a localized defect, a broad depression, slope, crack, joint, moisture symptom, or recurring movement?
- Determine whether coating is appropriate. If the cause or stability is uncertain, pause and obtain qualified advice.
- Use the approved preparation or repair method. Follow the selected system’s instructions rather than selecting a generic patch or joint treatment.
- Allow preparatory materials to reach the required condition.
- Confirm compatibility. Check moisture requirements, surface profile, primer, and overcoat preparation.
- Apply epoxy only after the substrate meets the coating system’s stated requirements.
Professional assessment is appropriate when movement is unexplained, water is actively entering, cracking is severe or widespread, an existing coating has failed extensively, or substantial elevation correction is needed.
How to compare thickness, coverage, working time, and cure
Product comparisons are useful only when the numbers describe equivalent conditions. Build a specification sheet covering:
- Kit volume and usable mixed yield
- Number of components, including aggregate
- Resin-to-hardener ratio and whether measured by volume or weight
- Target wet- or dry-film thickness
- Coverage at that thickness
- Minimum and maximum layer depth
- Pot life at a stated temperature
- Practical working time on the surface
- Recoat window
- Light-use or light-foot-traffic time
- Heavy-traffic or vehicle time
- Full-cure and chemical-service time
- Required primer or moisture-control layer
- Compatible aggregate, pigment, broadcast, and topcoat
- Material, substrate, and application-condition limits
**** Use the manufacturer’s definitions. The project schedule must leave enough time for pouring, spreading, edge work, any specified air-release step, and connection to the next batch.
Cure milestones must also be separated. A floor open to limited foot traffic may not yet be ready for vehicles, concentrated loads, washdown, chemical exposure, or full service.
Vendor-listed products illustrate how widely specifications vary:
- POUR-N-WALK is listed as a three-component, 100% solids system consisting of resin, hardener, and aggregate. Its stated application range is 62–125 mils in one pass, with light foot traffic at approximately 10–18 hours at 70°F. See the POUR-N-WALK specifications.
- QuestMark CM8120SL lists a 30–40 minute pot life at 70°F, 6–14 hour recoat time, 14–24 hours to light foot traffic, and 2–7 days to full cure for heavy traffic. See QuestMark’s CM8120SL specifications.
- One Stop Epoxy lists a 3-gallon, two-component kit, a 2:1 ratio, approximately 45 minutes of working time on the floor at 75°F, theoretical builds of 10.7–16 mils, and application-dependent coverage of 100–150 square feet per gallon. See the seller’s application and coverage figures.
These are vendor specifications for the named products, not independently verified comparisons. None can be transferred to another resin merely because its label also says “self-leveling” or “100% solids.”
Theoretical versus practical coverage
Theoretical coverage assumes that a known volume is distributed uniformly at a stated thickness without loss. Actual use may rise because of:
- Substrate profile and porosity
- Surface defects and prepared repairs
- Perimeter and edge work
- Material left in containers or on tools
- Roller, squeegee, or trowel losses
- Batch transitions
- Uneven application
- Tabletop edge runoff
- Installer technique
Never estimate from the largest coverage number on a sales page without confirming the thickness and application for which it is stated.
A practical quantity calculation
- Measure the net area. Divide irregular spaces into rectangles and subtract only genuine exclusions.
- Select the approved coat and thickness.
- Find the manufacturer’s coverage at that application rate.
- Divide the project area by the coverage per kit.
- Round up to whole kits.
- Add a project-specific contingency for profile, porosity, edges, tools, layout, and unavoidable loss.
- Check batch logistics. Have enough material and labor to maintain the required application sequence without stretching the coat.
If one kit is approved to cover a stated area at the required thickness, use that figure—not its maximum thin-coat coverage.
Compare the complete system cost, including preparation, repairs, primer, moisture-control layers where specified, aggregate, body coat, decorative media, topcoat, tools, protection, and material loss. Raw kit price alone is rarely a meaningful comparison.
Prepare the substrate before opening the resin
Complete preparation before combining resin and hardener. Once mixed, the product-defined working period begins.
Concrete preparation sequence
1. Inspect the slab
Record visible defects, contamination, existing coatings, damp areas, and elevation changes. If damage, movement, or moisture conditions are not understood, pause before selecting the coating.
2. Complete approved preparation and repairs
Use the selected system’s documented details. Do not assume the body coat can replace every preparatory material or procedure.
3. Mechanically profile when specified
The required profile depends on the product and system. As one product-specific example, One Stop Epoxy recommends mechanical preparation to approximately Concrete Surface Profile 3, unless the complete system specifies otherwise. That recommendation is not universal.
4. Remove dust and contamination
Use the cleaning process specified for the coating.
5. Evaluate moisture as directed
Porous concrete may release air into a fresh coat, while One Stop Epoxy warns that excessive slab moisture may contribute to flooring failure. Obtain the required test method, locations, conditioning procedure, and acceptance limit from the selected system’s technical documents. Do not substitute a generic threshold.
6. Apply the specified primer or barrier
Use only the layer specified for the diagnosed condition and coating system.
Primer requirements vary. QuestMark specifies compatible primers for CM8120SL, while One Stop Epoxy states that suitably prepared concrete may accept direct application but some slabs require primer or a moisture-vapor barrier. This is why the selected system—not generic advice—must decide the preparation sequence. See QuestMark’s primer requirement.
Wood, tabletops, and countertops
The base should be clean, dry, sound, and level. Porous wood may require a seal coat, but the approved method, recoat interval, and preparation depend on the chosen product.
A countertop seller advises scuff-sanding glossy laminate and sealing raw wood before pouring, but those steps remain product- and substrate-dependent. Verify compatibility and abrasion requirements with the coating manufacturer. See the vendor’s countertop preparation guidance.
Before mixing:
- Level the workpiece in both directions.
- Secure loose parts.
- Mask or dam openings.
- Protect floors, cabinets, walls, and equipment.
- Plan edge drips and runoff collection.
- Remove dust from the substrate, room, clothing, and tools.
- Ensure tools and approved additives are dry.
- Confirm that the planned edge treatment can manage the pour.
Stop-work checklist
Do not mix the resin while any of these conditions remains unresolved:
- Moisture status has not been evaluated as required
- Water is actively entering the slab or workpiece
- Damage, cracking, joints, or displacement require assessment
- Oil, silicone, wax, or another contaminant remains
- An existing coating is incompatible or poorly bonded
- Repairs have not reached the required condition
- Edges, drains, gaps, or penetrations are uncontrolled
- The workpiece is not level enough for the planned flood coat
- Application conditions are outside the product limits
- Required primer, tools, labor, or material is unavailable
Mix, pour, spread, and contain the epoxy
Read the complete application instructions before opening either component. Confirm:
- Resin-to-hardener ratio
- Whether measurement is by weight or volume
- Induction instructions, if any
- Maximum batch size
- Mixing time and mixer type
- Transfer procedure
- Approved additives and their limits
Ratios differ among products. Incorrect proportioning can produce sticky, cloudy, or uneven curing.
Mixing sequence
A general workflow is:
- Condition unopened materials only as permitted.
- Combine complete prepackaged components or measure the exact stated ratio.
- Mix for the prescribed time using the specified tool and speed.
- Scrape the sides and bottom as directed.
- Add aggregate, pigment, or other approved materials only at the stated stage and quantity.
- Transfer or pour when instructed.
- Do not scrape visibly unmixed residue onto the finished surface.
For example, One Stop Epoxy specifies two minutes of mixing at 300–450 RPM with a cage- or box-style mixer for its product. Those figures are not instructions for other systems.
General floor application sequence
Plan manageable batches before mixing the first kit:
- Assign mixing, carrying, spreading, edging, and any required air-release roles.
- Calculate the area each batch must cover.
- Pour in strips or ribbons as directed.
- Spread promptly with the specified notched squeegee, rake, or trowel.
- Complete edges and details within the working period.
- Use the designated air-release roller only when required.
- Connect batches within the manufacturer’s allowed interval.
- Protect the surface from traffic and contamination during cure.
Tools must be clean and serviceable.
Countertop and tabletop sequence
A flood coat moves toward low points and exposed edges. Before pouring, decide whether the design requires dams, deliberate edge coating, removable tape, or controlled runoff.
Protect adjacent surfaces and establish collection areas. Prepare enough material to maintain the approved coat rather than repeatedly pulling resin back from edges and starving the center. Correct an unlevel workpiece before pouring instead of attempting to manage continuous drift during cure.
Temperature and timing
Cold resin generally becomes more viscous and may hold tool marks longer. Warmer conditions may improve flow while reducing available working time. Check the product’s material, substrate, and ambient limits rather than relying on room temperature alone.
Do not assume a torch or heat gun is universally approved for bubbles. Use a surface-heat technique only if the selected product expressly permits it, and follow its application and safety instructions.
Do not transfer a mix ratio, maximum depth, pigment limit, primer, solvent, or bubble-removal method from another epoxy unless the selected manufacturer explicitly approves it.
Plan curing, topcoats, reopening, and safe handling
“Dry” is too vague for scheduling. Separate the timeline into:
- Working time: Time available to distribute and finish the mixture.
- Initial set: The point at which the resin no longer flows as intended.
- Recoat window: The interval for applying another compatible layer using the stated preparation.
-
Light foot traffic or light use: Limited access under specified conditions.
-
Full cure: The product’s defined final cure condition.
- Chemical service: Exposure to cleaners, process liquids, spills, or immersion where approved.
A universal claim that epoxy “dries in 24 hours” is unreliable. The cited floor products specify different light-traffic and full-cure periods. Fiberglass Warehouse gives a broad 24–48 hour full-cure description for tabletop epoxy, depending on conditions, but that estimate cannot replace the selected product’s schedule. See the vendor’s tabletop cure comparison.
Maintain the required conditions throughout cure and protect the surface from dust, water, disturbance, and premature loading. Reopening decisions should follow the selected product’s documented milestone for the intended service.
Topcoats are part of system design
A topcoat may be a designed system layer rather than an optional extra. Duraamen describes systems combining epoxy primers and body coats with epoxy, polyurethane, or polyaspartic finish layers.
Evaluate a topcoat according to documented needs:
- Wear
- UV exposure
- Chemical or cleaning exposure
- Gloss, color, or texture
- Recoatability
- Slip control
Compatibility, preparation, and recoat timing remain system-specific. Do not assume that a glossy floor is safe when wet; the available product evidence does not provide a universal quantified wet slip-resistance value.
Safe handling
Read the product’s safety data sheet and application instructions before work. Use them to determine ventilation, skin and eye protection, respiratory precautions where specified, first aid, fire precautions, spill response, cleanup, storage, and disposal.
Likewise, do not assume cured epoxy is universally food-safe, heat-proof, waterproof, UV-proof, or resistant to every chemical. Those properties require documentation for the selected formulation and intended exposure.
Troubleshoot common self-leveling epoxy defects
Most defects have several possible causes. Review substrate preparation, component measurements, mixing records, batch timing, conditions, and layer compatibility before selecting a repair.
| Visible defect | Likely causes | Prevention | Possible next step |
|---|---|---|---|
| Bubbles or pinholes | Porous-substrate air release; incomplete sealing; moisture; air introduced during mixing; unsuitable conditions | Follow moisture and primer requirements; use the specified mixer and speed; respect application limits | Allow the coat to reach the required condition, investigate the cause, and use the manufacturer’s repair procedure |
| Waves or tool marks | Uneven base; too little material at the specified rate; cold resin; delayed spreading; worn tools | Prepare the base; calculate material at approved thickness; stage labor; maintain tools | Measure the defect and follow the approved preparation and recoat method |
| Sticky or soft spots | Wrong ratio; incomplete mixing; unmixed vessel residue; contamination; unsuitable cure conditions | Measure accurately; mix for the specified time; scrape only as directed; keep tools dry | Isolate the area and obtain the manufacturer’s removal or repair instructions |
| Cloudy or uneven cure | Ratio error; moisture; incompatible additive; poor mixing; conditions outside limits | Use approved additives and exact proportions; keep tools and substrate dry | Determine whether the issue is surface haze or uncured material before overcoating |
| Dust or debris inclusions | Dirty room, clothing, tools, footwear, or cure area | Vacuum thoroughly; use clean equipment; restrict access | After cure, use the product-approved finishing or recoat process |
| Edge runoff on tables | Poor containment; unlevel workpiece; unplanned flow over edges | Level the work; mask or dam openings; protect below; plan drips | Let the resin reach the required condition, then follow approved correction and recoat instructions |
| Thin or bare areas | Overstretched coverage; substrate absorption; tool losses; excessive runoff; poor batch planning | Estimate at target thickness; seal when specified; include realistic loss | Follow the product’s recoat procedure |
| Delamination or blisters | Inadequate preparation; contamination; moisture; air release; incompatible layer | Verify profile, cleanliness, moisture requirements, primer, and compatibility | Remove unsound material as directed and investigate the cause rather than hiding it |
| Visible batch lines | Lost wet edge; inconsistent batches; changing conditions; delayed placement | Standardize batch quantities and coordinate the crew | Use the system’s repair guidance; local correction may remain visible |
| Recurring cracks or displacement | An unresolved substrate condition | Obtain the specified detail or qualified assessment before coating | Stop cosmetic recoating and investigate the substrate |
Cured epoxy is a thermoset and cannot simply be melted and flowed again. Carved’s troubleshooting guide discusses mechanical correction of cured resin.
If the normal recoat interval has passed, obtain the selected manufacturer’s instructions. Do not assume one sanding grit, surface profile, or cleaning procedure applies to every epoxy.
Will self-leveling epoxy fix an uneven or sloped concrete floor?
Usually not by itself. A thin self-leveling coat can reduce minor texture and application marks, but it generally follows the existing substrate. Broad depressions, waviness, or unwanted slope require assessment and an appropriate leveling approach before the finish coat.
Do not compensate by pouring an unspecified extra depth. That increases consumption and may exceed the coating’s approved application range.
Do I need primer under self-leveling epoxy?
It depends on the system and substrate. QuestMark specifies compatible primers for CM8120SL, while One Stop Epoxy says suitably prepared concrete may accept direct application but some slabs require primer or a moisture-vapor barrier.
Follow the selected product’s preparation and moisture requirements. Do not treat primer and moisture-vapor control as interchangeable.
How thick can self-leveling epoxy resin be poured?
There is no universal thickness. POUR-N-WALK lists an application range of 62–125 mils, while One Stop Epoxy lists theoretical builds of approximately 10.7–16 mils for its thinner floor coating. See the POUR-N-WALK thickness specification and One Stop Epoxy’s stated film builds.
These figures describe different systems, not interchangeable choices. Tabletop and deep-pour limits must also come from the selected product’s instructions.
How long does self-leveling epoxy take to cure?
It depends on the formulation, thickness, conditions, and intended use. Working time, recoat time, light use, heavy traffic, full cure, and chemical service are different milestones.
POUR-N-WALK lists approximately 10–18 hours to light foot traffic at 70°F. QuestMark CM8120SL lists 14–24 hours to light foot traffic and 2–7 days to full cure for heavy traffic. See the POUR-N-WALK traffic time and QuestMark’s CM8120SL cure schedule.
Use the selected product’s schedule to determine reopening and loading.
Can tabletop epoxy be used for a deep pour?
Not unless the manufacturer explicitly approves the intended depth and volume. Tabletop epoxy is generally designed as a relatively thin flood coat over a broad horizontal surface. Deep-pour epoxy is intended for thick, contained castings such as river-table channels.
Use a dedicated casting product with approved depth, volume, mold, and cure instructions rather than assuming fluid resins are interchangeable.
Choose self-leveling epoxy by the job and complete system—not by the label alone. Separate floor coatings from tabletop and casting resins, then verify preparation, primer requirements, thickness, coverage, working time, cure stages, topcoat compatibility, and handling instructions. If the base is substantially uneven, wet, moving, or extensively damaged, resolve that condition before treating epoxy as the finish.