
26 min read ·
Should You Use Contact Cement on Your Veneer Project?
Use backed veneer only when its supplier permits contact cement, on a flat, rigid panel with a compatible adhesive. Raw veneer is generally excluded.
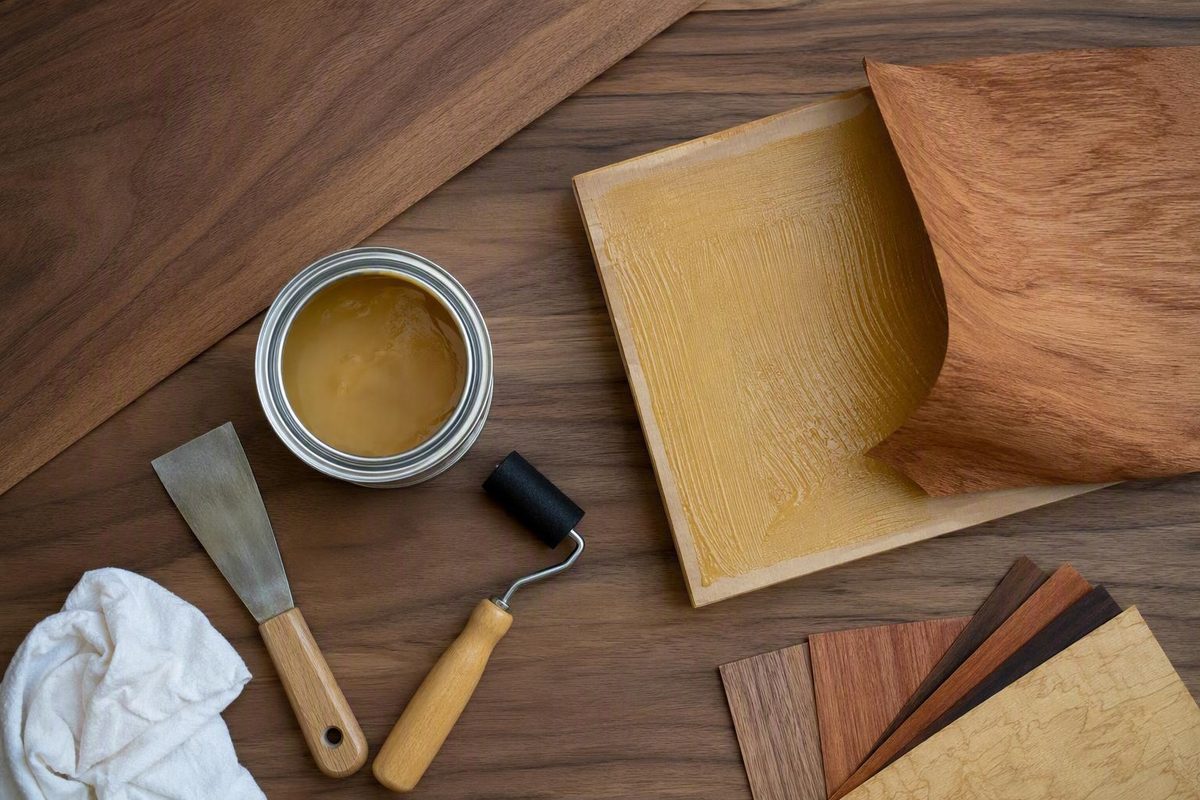
Contact cement can simplify veneer installation when a press is unavailable, but it is not a universal veneer glue. Its strongest use case is compatible backed veneer on a flat, rigid panel, with the veneer supplier and adhesive instructions both approving the complete assembly.
That approval should account for the veneer construction, substrate, adhesive formulation, panel geometry, service environment, and finish. If any part of the system is uncertain, use an approved rigid-setting veneer adhesive under suitable pressure instead.
The short answer: use contact cement only for the right veneer system
Contact cement can be used for some wood-veneer projects. The best-supported candidate is paper-backed, wood-backed, or phenolic-backed veneer whose supplier expressly permits contact cement, bonded to a flat, stable substrate such as MDF with an adhesive approved for both materials.
Even in that situation, specialist suppliers often present contact cement as a fallback. Oakwood Veneer prefers white or yellow glue in a vacuum, cold, or hot press and describes contact cement as an alternative when a press is unavailable—not its recommended method. See Oakwood Veneer’s guidance on contact-cement application.
WiseWood likewise describes contact cement as acceptable when other methods are unavailable or impractical. Its instructions cover paper-backed, wood-backed, and phenolic-backed veneer but expressly exclude raw or unbacked veneer. Review WiseWood’s approved veneer types and installation conditions.
Those distinctions matter because “wood veneer” can describe materially different products:
- Raw or unbacked veneer is a thin sheet of wood without a stabilizing backing.
- Paper-backed veneer has paper bonded to its reverse.
- Wood-backed or two-ply veneer uses a second wood layer, often oriented to help stabilize the face.
- Phenolic-backed veneer uses a resin-based backing.
Approval for one construction does not automatically cover another. Specialist guidance in the evidence available here generally discourages contact cement for raw veneer, particularly when the sheet is highly figured, brittle, unusually thin, large, or arranged in prominent matched seams.
Contact cement is attractive because the prepared faces bond rapidly when brought together, eliminating prolonged clamping in some approved systems. That same immediate grab is its principal handling disadvantage: there may be little or no opportunity to slide the veneer, reopen a seam, or correct a skewed sheet.
A practical decision tree
Answer these questions before choosing contact cement:
-
What is the veneer construction? If it is raw or unbacked, favor a veneer adhesive designed to cure under pressure. If it is backed, obtain the supplier’s current instructions for that exact product.
-
Does the veneer supplier approve contact cement? Look for approval naming the backing or product line, not a generic statement that contact cement works with “wood veneer.”
-
Does the adhesive documentation cover the assembly? Confirm the backing, substrate, application method, service environment, and any finish restrictions.
-
Is the substrate flat, rigid, dry, sound, and bondable? Do not assume compatibility with flexible, hollow, coated, sealed, contaminated, or nonporous panels.
-
Is the panel large, curved, seamed, or difficult to replace? These conditions make immediate grab, alignment errors, and local weak spots more consequential.
-
Will the assembly encounter exterior exposure, significant moisture, or an aggressive finishing schedule? Ordinary interior instructions cannot be extrapolated to those conditions.
-
Has the complete system passed a representative test? Test the actual veneer, substrate, adhesive, application tool, stain, sealer, and topcoat.
If any answer remains uncertain, obtain written confirmation from the veneer supplier and adhesive manufacturer or choose an approved rigid-setting adhesive and pressing method.
Large sheets, expensive or irreplaceable veneer, prominent seams, tight curves, flexible panels, exterior installations, and assemblies that would be difficult to strip all favor a more controllable pressing process. Anecdotal shop reports include both failures and long-lived installations, but they do not establish an expected service life or failure rate.
Compatibility matrix: veneer, substrate, and project conditions
This matrix is a screening tool, not a universal compatibility chart. “Documented” refers to combinations or exclusions addressed directly by supplier guidance in the evidence available here. “Precautionary” means that the condition increases uncertainty and requires explicit product approval.
| Material or condition | General suitability | Reason | Required verification |
|---|---|---|---|
| Paper-backed veneer on flat MDF | Best-supported conditional combination | Documented by specialist guidance as a common contact-cement application; backing adds stability and MDF offers a relatively uniform surface | Confirm approval for the exact veneer, adhesive, substrate, environment, and finish |
| Wood-backed veneer on flat MDF | Conditional | One specialist supplier permits wood-backed veneer, but constructions vary | Confirm that the exact wood-backed or two-ply product is approved |
| Phenolic-backed veneer on flat MDF | Conditional | One specialist supplier permits phenolic-backed veneer; selected systems may favor this backing | Verify adhesion to the phenolic surface and approval for the service environment |
| Raw or unbacked veneer | Generally unsuitable under the supplied guidance | Specialist instructions exclude it from their contact-cement procedures | Use only with explicit written approval for the exact veneer and assembly |
| Highly figured raw veneer | Poor candidate | Precautionary: figure and thinness can make handling and uniform bonding more demanding | Prefer an approved rigid-setting adhesive and pressing process |
| MDF | Generally favored, not guaranteed | Supplier guidance ranks it as a comparatively stable substrate | Confirm that the panel is flat, dry, sound, uncoated, sufficiently rigid, and adhesive-compatible |
| Industrial particleboard | Conditional | A rigid, porous board may be suitable, but surface quality and integrity vary | Check porosity, surface strength, coatings, and adhesive approval |
| Veneer-core plywood | Conditional | Supplier guidance accepts it conditionally, but the face may absorb adhesive unevenly | Add another coat only if the selected adhesive instructions require it |
| Solid wood | Higher risk | Precautionary: the substrate and veneer may respond differently to environmental change | Obtain explicit approval or use a system designed for the assembly |
| Flexible plywood | Do not assume compatibility | Some product guidance excludes flexible substrates because movement can compromise the bond | Require approval for the panel support and intended shape |
| Hollow-core panel | Do not assume compatibility | Some product guidance excludes hollow-core substrates; the face may also deflect during application | Verify panel stiffness and adhesive approval |
| Coated, sealed, painted, or laminated substrate | Often unsuitable without specified preparation | A coating can block adhesion or become a weak intermediate layer | Follow written preparation and compatibility instructions |
| Two-sided melamine | Generally unsuitable under the supplied supplier guidance | Its nonporous faces do not provide the intended bonding surface in the cited procedure | Use only with an adhesive expressly approved for that surface |
| Tight curve | Higher risk | Precautionary: alignment, full contact, spring-back, and uniform pressure are harder to control | Use a system approved for the radius and support conditions |
| Exterior exposure | Not covered by ordinary interior instructions | Environmental exposure changes the demands on every component | Select an exterior-approved veneer, adhesive, substrate, and finish system |
| Large sheet or multiple seams | Higher risk | Immediate grab magnifies alignment errors and makes defects harder to correct | Prefer pressing or conduct a complete dry run with a controlled placement sequence |
MDF receives the strongest conditional support because it is generally flat and rigid. Oakwood ranks MDF ahead of industrial particleboard, veneer-core plywood, and hardwood for substrate stability. It also specifies epoxy rather than contact cement for exterior use of paper-backed veneer.
MDF is not a guarantee against failure. A damp or dusty board, a sealed face, a bowed panel, or a thin skin over flexible framing may still be unsuitable. The material name matters less than the condition and construction of the actual panel.
Plywood and particleboard require more qualification. A porous face may absorb the first application and leave an incomplete adhesive film. Some supplier instructions call for another coat in that situation, but this is not a universal two-coat rule. Follow the selected adhesive’s instructions rather than transferring a coat count from another product.
Solid wood is more demanding because its movement may differ from that of the veneer. A backing can moderate handling and movement concerns, but it does not make every solid-wood panel suitable for contact cement.
Broad retailer language such as “recommended for bonding wood veneers” is less useful than approval naming the veneer construction and substrate. For example, one water-based product page limits its stated veneer use to paper-backed and selected two-ply products on rigid, porous substrates while excluding raw veneer and several flexible, coated, or unsupported assemblies. See the Titan DX product page for its stated compatibility limits.
Why contact cement is not the default veneer adhesive
Contact cement and conventional veneer glues create different working processes.
With contact cement, adhesive is normally applied to both faces and allowed to reach a product-specific setup state. The faces then form a pressure-sensitive bond when joined. Substantial pressure is still required across the full surface, but repositioning after contact is usually limited.
Depending on the system, that pressure may come from a vacuum bag, mechanical press, clamps and cauls, or a traditional hammer-veneering process.
Supplier guidance and trade discussions associate contact-cement veneer work with possible bubbling, edge lifting, checking, moving seams, and delamination. Contributors sometimes propose the comparatively flexible glue line as one reason the veneer and substrate can move differently. These are plausible concerns and reported failure modes, not quantified predictions.
The experience reports are conflicting. Some woodworkers describe peeling, bubbling, cracking, and moving joints; others report installations that remained intact for years. Because those reports rarely control the veneer species, backing, adhesive formulation, coat thickness, pressure, environment, or finish, they cannot establish comparative durability. A LumberJocks discussion illustrates the range of reported outcomes.
Comparing common veneer adhesives
| Adhesive family | Typical fit supported by the available evidence | Positioning and assembly | Pressure method | Raw versus backed veneer |
|---|---|---|---|---|
| Contact cement | Approved backed veneer on a flat, rigid panel when pressing is impractical | Rapid grab with little repositioning after contact | Full-area hand pressure using the approved tool | Most defensible for expressly approved backed veneer; generally discouraged for raw veneer |
| PVA veneer glue | Interior veneer work where a compatible product and pressing method are available | Veneer is positioned before the adhesive sets | Vacuum bag, press, or suitable cauls and clamps | Suggested as an alternative for raw or backed veneer when approved |
| Urea-resin or plastic-resin adhesive | Larger or demanding panels where a pressed rigid-setting system is preferred | Allows deliberate assembly before pressing | Press, vacuum bag, or properly designed cauls | Frequently suggested by trade contributors for raw veneer and demanding layouts |
| Epoxy | Selected difficult or exterior-approved assemblies | Working and mixing requirements depend on the product | Controlled contact pressure as specified | May suit raw or backed veneer when the complete assembly is approved |
| Hide glue | Traditional veneering and restoration methods | Technique-sensitive assembly, including hammer veneering | Pressing, cauls, or a veneer-hammer method | Established as an alternative for suitable raw-veneer work |
No adhesive family is universally best. Selection still depends on the veneer construction, substrate, panel geometry, available assembly time, pressure equipment, environment, and product approval.
For raw veneer, large matched layouts, highly figured faces, prominent seams, and other demanding work, an approved rigid-setting adhesive under pressure is usually the more defensible choice. A vacuum bag is convenient but not mandatory for every project; some flat panels can be pressed between stiff cauls with an appropriate clamp pattern if the arrangement follows the adhesive instructions and supplies even pressure.
Water-based or solvent-based contact cement?
The available evidence does not establish a universal winner.
WiseWood prefers solvent-based contact adhesive for its own backed veneer products and suggests considering phenolic-backed veneer when water-based adhesive is necessary. Conversely, Titan DX is a water-based contact cement sold specifically for paper-backed and selected two-ply veneers. Those positions concern different products and are not necessarily contradictory.
Start with the veneer supplier’s approved adhesive list. Then confirm that the adhesive’s current label and technical instructions cover the exact backing, substrate, application method, environment, and finish schedule. If the instructions conflict, obtain written compatibility confirmation rather than choosing whichever direction is more convenient.
Water-based and solvent-based contact cements are not interchangeable. They may differ in:
- Acceptable application tools and film thickness
- Readiness indicators
- Setup time
- Available bonding window
- Application and curing conditions
- Porous and nonporous substrate restrictions
- Cleanup procedures
- Ventilation and personal-protection requirements
- Flammability and ignition controls
- Storage and disposal requirements
- Compatibility with stains, sealers, and topcoats
Three stages are especially easy to confuse:
- Flash or setup time: the period after coating and before the faces are ready to join.
- Bonding window: the period during which the prepared faces can still be assembled.
- Final cure: the period after assembly during which the bond continues to develop.
Immediate grab does not mean final cure is complete.
Do not use a generic finger-tack test. Some instructions require complete drying or a non-tacky surface, while a retailer page for another water-based product says the adhesive should remain tacky and glossy at assembly. That disagreement shows why the current instructions for the selected formulation must control. The DAP Weldwood retailer listing illustrates its product-specific readiness language.
As a retailer-listed example—not a transferable schedule—the Titan DX page specifies a typical setup period of 25–40 minutes, bonding within 90 minutes after setup, and a 24-hour cure with the panel maintained at a minimum of 68°F. Conditions and film thickness can affect setup, and these figures should not be applied to another adhesive. Verify the Titan DX figures on the current product page.
Before opening the adhesive, obtain and review its current:
- Container label
- Technical data sheet
- Safety data sheet
- Veneer supplier’s installation instructions
Use those documents for the exact application conditions, ventilation, protective equipment, storage, cleanup, and disposal requirements. Generic workshop advice cannot replace the selected product’s current safety documentation.
Preflight preparation before any adhesive is opened
A disciplined preflight reduces compatibility, placement, and finishing risk.
Make a complete sample panel
A glue-only test is not enough. Build a representative sample using:
- The actual veneer and backing
- The same substrate and surface condition
- The selected adhesive
- The intended roller, brush, spray equipment, or other applicator
- The planned separator and pressure tools
- The proposed stain, dye, sealer, and topcoat
- The same sanding and cure schedule
Make the sample large enough to expose application variation. Include an edge or seam if the project has one, and observe the sample through both adhesive cure and finish cure. A small coupon prepared under ideal conditions may not reveal the placement and pressure problems of a full sheet.
Acclimate veneer and substrate together
Lay the veneer and substrate flat under the same shop conditions. WiseWood recommends acclimating both for at least 48 hours and up to four days, while keeping them flat and exposed to the same environment. See WiseWood’s acclimation procedure.
Those periods are supplier guidance, not a universal schedule. Follow the current requirements for the actual veneer and adhesive.
Qualify the substrate
The substrate should be:
- Flat
- Rigid enough for application and service
- Dry
- Structurally sound
- Free of loose fibers or weak surface layers
- Uncoated unless the adhesive expressly accepts the coating
- Compatible with the veneer and adhesive
Inspect the faces and edges for damage, oily residue, sanding dust, sealers, paint, laminate, or old adhesive.
Clean both bonding faces using a method approved by the relevant manufacturers. Remove dust, dirt, grease, oil, wax, and debris without introducing an unapproved cleaner or residue.
Scuff only when the applicable instructions call for it. Different supplier and product pages prescribe different surface-preparation methods, so one sanding specification should not be imposed on every system.
Plan the layout and placement
Before coating either face:
- Establish the grain direction.
- Arrange any book match, slip match, or sequence match.
- Mark the veneer and panel centerlines.
- Plan seams and select the reference edge.
- Allow sufficient overhang for trimming.
- Position defects and sapwood intentionally.
- Decide where separators will enter and exit.
- Confirm that every separator can be removed without disturbing alignment.
Conduct a complete dry run. Place the uncoated veneer on the substrate, install all separators, rehearse the alignment sequence, and assign each person’s role. For a large panel, determine how the sheet will be supported while the first contact is established.
Confirm that enough adhesive is available to coat both surfaces continuously. The workspace must also maintain the product’s required conditions throughout application and cure.
Stop/go checklist
Proceed only when every item is “yes”:
- [ ] The veneer construction and backing are identified.
- [ ] The veneer supplier approves the selected adhesive family.
- [ ] The adhesive instructions cover the backing and substrate.
- [ ] The intended service environment is covered.
- [ ] Veneer and substrate are flat and acclimated.
- [ ] The substrate is rigid, dry, sound, and bondable.
- [ ] A representative complete-system sample has succeeded.
- [ ] Grain direction, seams, overhang, and trimming are planned.
- [ ] The placement sequence has been rehearsed.
- [ ] Separators and approved pressure tools are ready.
- [ ] There is enough adhesive for uninterrupted coverage.
- [ ] The current label, technical instructions, and safety data have been reviewed.
A “no” is a stop signal. Extra adhesive does not compensate for uncertain compatibility, inadequate preparation, or a flexible substrate.
Step-by-step application for approved backed veneer
This procedure applies only to a flat, rigid assembly using backed veneer and contact cement explicitly approved for each other. It is not a raw-veneer method. Where the selected product’s instructions differ from the workflow below, those instructions control.
1. Stabilize the workspace and materials
Bring the adhesive, veneer, and substrate to the application conditions required by their documentation. Measure the relevant conditions rather than assuming that a comfortable room is adequate.
Support the substrate continuously on a flat work surface. Avoid allowing the panel to bow while the veneer is positioned or pressed.
2. Mix only as directed
Stir or mix the adhesive if the label requires it so that settled material is redistributed. Work along the bottom and sides of the container without unnecessarily whipping air into the product.
Do not add water, solvent, thinner, retarder, or another adhesive unless the manufacturer expressly permits that modification.
3. Coat both bonding faces
Apply a thin, even, continuous coat to:
- The veneer backing
- The substrate
Use the application method specified for the adhesive. A tool that works with one formulation may leave another too thick, ridged, aerated, or patchy.
Coat to the edges. Avoid repeatedly working a film that has already begun to set.
4. Inspect coverage under angled light
Look across each coated surface in raking light. Correct visible defects before assembly:
- Holidays: bare or undercoated areas
- Dry edges: inadequate perimeter coverage
- Ridges: heavy applicator lines
- Puddles: localized excess
- Debris: fibers, dust, roller fragments, or dried particles
- Uneven appearance: possible variation in coverage or readiness
More adhesive is not automatically safer. Product guidance warns that an excessively thick film may skin over while remaining wet underneath, delaying cure or weakening the assembly.
5. Address porous absorption only as instructed
Plywood and other porous faces may absorb the first application unevenly. If the selected product requires another coat, allow the first to reach the prescribed state and then apply the additional film as directed.
Do not automatically repeat the coat on the veneer or copy a fixed coat count from another adhesive. The objective is a continuous, correctly prepared film—not maximum thickness.
6. Wait for the correct readiness state
Allow both faces to reach the formulation-specific setup condition. Use the indicator named by the current instructions, which may involve elapsed time, color change, loss of gloss, dryness, non-tackiness, tackiness, or another product-specific test.
Assemble within the stated bonding window. Joining too early may trap wet adhesive; waiting too long may prevent proper bond formation. Temperature, humidity, airflow, and coat thickness can alter actual drying behavior, so a timer alone may not be enough.
7. Install separator strips or dowels
Place clean, smooth separators across the substrate closely enough to prevent the coated surfaces from touching or sagging together. WiseWood recommends separator strips approximately 1–2 inches apart in its procedure.
The separators should not shed debris, imprint the adhesive, or stick to it. Extend them past the panel edges so they can be removed without reaching under the veneer.
8. Align the entire sheet
Lower the veneer onto the separators without allowing the adhesive-coated faces to meet. Check:
- Grain direction
- Centerlines
- Reference edge
- Seams or matches
- Overhang on all sides
- Far corners as well as the starting edge
Once the first area touches, correcting a skewed sheet may be impossible without damaging the veneer or contaminating the adhesive film.
9. Establish contact progressively
Begin at the planned reference area, often near the center. Remove one separator or a small group while keeping the rest of the veneer supported. Lower the sheet without sliding it.
Continue removing separators and establishing contact from the center toward the edges. Keep the contact line controlled so that the sheet does not bridge over a pocket of air.
For a large panel, one person may manage the veneer and separators while another applies pressure. Follow the rehearsed sequence rather than improvising.
10. Apply pressure over every square inch
Contact cement still requires pressure after placement. Use the tool approved by the veneer and adhesive instructions—often a veneer scraper—and work:
- In the grain direction
- From the center outward
- In overlapping passes
- Across the entire field
- Along every edge and corner
Apply controlled force without crushing the face, bruising soft grain, splitting an edge, or damaging the backing.
Several specialist veneer suppliers caution against relying on a J-roller or handheld roller alone because they consider the resulting pressure insufficient for flexible wood veneer. This does not prove that every roller-based system is unsuitable; it means the selected system’s approved pressure method must control.
11. Inspect before cure
Use raking light to check for:
- Raised areas
- Ripples
- Edge lift
- Trapped debris
- Unbonded corners
- Opening or shifting seams
- Areas that feel or sound different
Do not continue pressing blindly if the veneer begins to crease or a seam moves. Document the defect and obtain product-specific guidance before introducing heat, cuts, solvents, or injected adhesive.
12. Protect the assembly through cure
Keep the panel flat and protect it from flexing, dust, unsuitable conditions, premature machining, and early finishing.
Oakwood instructs users to wait 24 hours after applying veneer before finishing, but that period is supplier-specific rather than universal. Follow the cure schedule for the selected adhesive and veneer. Consult Oakwood’s procedure for its stated finishing wait.
Do not equate immediate grab with full strength. Avoid aggressive trimming that pries at an uncured edge, and do not introduce finishing liquids merely because the veneer no longer moves by hand.
Finishing is part of the adhesive decision
The veneer, backing, adhesive, stain, sealer, and topcoat form one interacting system. Finish selection should therefore occur before bonding rather than after the panel has already been veneered.
Wait until the adhesive has completed its specified cure before sanding or finishing. Supplier guides commonly mention a wait of about a day, but the current adhesive and veneer instructions control.
Sand lightly using a sequence appropriate to the veneer and its face thickness. Thin veneer offers little margin for correcting scratches or unevenness. Pay particular attention to edges, corners, and high spots where sanding through is most likely.
Why bubbles sometimes appear during finishing
Forum users have reported bubbles after backed veneer was dampened in preparation for water-based stain and during application of a solvent-containing topcoat. In one reported case, many bubbles appeared after dampening and later subsided; contributors disagreed about both the cause and the appropriate repair. Read the original report and conflicting responses.
Possible contributors include:
- Wood swelling after absorbing moisture
- Product-specific interaction with solvent vapor
- A marginal glue line exposed by finishing
- Excessive adhesive thickness
- Inadequate setup time
- Incomplete pressure
- Local contamination or patchy coverage
- Movement between the veneer and substrate
- Finishing before the adhesive completed its cure
A bubble cannot be diagnosed from appearance alone. The available reports are uncontrolled, and contributors disagree about whether moisture, solvent vapor, coating behavior, heat, movement, or earlier application defects dominate in a particular failure.
Finish recommendations also conflict. Some veneer suppliers prefer oil- or solvent-based finishing systems and caution against water-based products unless a suitable sealer is used. Some forum contributors instead suggest a water-based finish when they are concerned about solvent interaction with an existing bond. Neither position should be generalized across all adhesives and veneers.
A WOODWEB discussion about bubbles appearing during application of a pre-catalyzed topcoat includes the opinion that vapor from some solvents can contribute to adhesion loss, while also stating that not every solvent affects every contact cement. Other contributors attribute failures to excessive adhesive, inadequate flash time, insufficient pressure, or movement. The discussion illustrates why finish-stage bubbling requires product-specific diagnosis.
Test the whole finishing schedule
Apply the proposed stain, sealer, and topcoat to a representative veneered sample using the intended:
- Surface preparation
- Application tool
- Wet-film amount
- Recoat schedule
- Drying conditions
- Number of coats
- Final cure period
Where the finish manufacturer permits it, multiple light coats and avoidance of unnecessary saturation may reduce abrupt moisture or solvent loading. Do not modify a finish schedule simply to protect an adhesive that was never approved for the system.
If bubbles appear, stop adding finish. Record which product and coat triggered the change, then consult the veneer, adhesive, and finish manufacturers before using heat, solvent, injected adhesive, razor cuts, or another sealer.
Troubleshooting bubbles, lifting, weak edges, and moving seams
Begin by documenting the complete process:
- Veneer species, thickness, and backing
- Veneer supplier and product
- Adhesive product, formulation, and batch
- Substrate type, thickness, coating, and support
- Surface preparation
- Applicator and coating method
- Number of coats on each face
- Setup conditions and readiness indicator
- Time between coating and assembly
- Temperature, humidity, and airflow
- Separator and placement method
- Pressure tool and sequence
- Cure time before trimming or finishing
- Stain, sealer, and topcoat schedule
- The exact stage at which the symptom appeared
Without that information, a bubble or loose edge is only a symptom.
| Symptom | Possible contributors | First response |
|---|---|---|
| Bubbles immediately after placement | Trapped air, incomplete pressure, debris, patchy coverage, bridging between separators, or premature contact | Stop and inspect in raking light; do not puncture or heat the veneer until an approved repair method is known |
| Bubbles during adhesive cure | Excessive film thickness, trapped wet adhesive, assembly outside the bonding window, unsuitable conditions, or panel movement | Stabilize the panel under the specified conditions and consult the adhesive supplier |
| Delayed weak or hollow areas | Adhesive absorption, incomplete coverage, inadequate pressure, late assembly, or substrate flexibility | Map the affected area and determine whether the defect is local or widespread |
| Bubbles after water exposure | Moisture-related wood expansion, an exposed weak glue line, inadequate cure, or use outside the approved environment | Remove the moisture source and seek system-specific guidance |
| Bubbles during staining or topcoating | Moisture expansion, product-specific solvent interaction, premature finishing, heavy saturation, trapped adhesive, or inadequate original pressure | Stop finishing and record the exact product and coat involved |
| Loose edges | Dry edge, adhesive starvation, contamination, insufficient pressure, trimming damage, or panel movement | Protect the edge and obtain an approved rebonding procedure |
| Moving seams | Placement error, differential movement, insufficient pressure near the seam, flexible glue-line concerns, or unsuitable panel design | Measure and monitor the movement; assess the bond on both sheets |
| Checking or face cracking | Differential movement, brittle or figured veneer, substrate movement, or an unsuitable adhesive system | Determine whether the crack is in the wood, backing, finish, or bond |
| Broad delamination | System incompatibility, widespread coating or setup error, substrate flex, finish interaction, moisture exposure, or inadequate pressure | Consider removal and re-veneering rather than repeated local repairs |
Trade contributors raise differential movement and a comparatively flexible glue line as concerns in checking and seam movement. Those observations do not establish a quantified mechanism or predict failure in every assembly. Likewise, finish-stage bubbling does not prove that the finish dissolved the adhesive; it may have exposed a bond that was already marginal.
Decide whether the failure is local or systemic
A small edge defect associated with visible contamination is different from bubbles recurring across the entire panel. Ask:
- Is the defect confined to one location?
- Do new bubbles appear as conditions change?
- Does finish application trigger defects in several areas?
- Is the substrate flexing?
- Are seams moving as well as lifting?
- Can the failed area be reached without cutting visible veneer?
- Would a local repair remain compatible with the finish?
Broad, recurring, or finish-sensitive failure may justify removing the veneer and rebuilding with a different adhesive system.
Do not assume heat or injection is safe
Forum and supplier discussions conflict over whether contact cement can be reactivated successfully with heat. Some contributors suggest warmth and pressure; others report that reactivation is unreliable or inappropriate. The available evidence does not establish a universal temperature, dwell time, barrier material, or compatibility limit.
Do not treat a heat gun, household iron, solvent injection, cyanoacrylate, or injected contact cement as a standard repair. Heat or chemicals may damage the veneer, backing, or finish, and the selected adhesive’s safety requirements still apply.
Obtain repair instructions from the veneer and adhesive manufacturers before applying heat or chemicals. If the panel has already been finished, consult the finish manufacturer as well.
Frequently asked questions
Can I use contact cement on raw or unbacked wood veneer?
Generally, the specialist guidance available here says no. Contact-cement instructions from veneer suppliers are directed toward compatible paper-backed, wood-backed, or phenolic-backed products and expressly exclude raw veneer.
Anecdotal reports include successful raw-veneer installations, but they also include bubbling, checking, peeling, and seam movement. Those reports cannot establish dependable durability or override supplier restrictions.
For raw veneer—especially large, thin, figured, expensive, or matched sheets—use an approved veneer adhesive with a suitable press, vacuum bag, cauls and clamps, or traditional veneering method. Any exception should require explicit approval for the exact veneer, substrate, and adhesive.
Is MDF or plywood the better substrate for contact-cemented veneer?
Flat, sufficiently rigid MDF is the better-supported conditional choice in the specialist guidance. It still must be dry, sound, clean, uncoated, and compatible with the selected adhesive.
Plywood can work when approved, but a porous face may absorb adhesive unevenly. Apply another coat only when the selected product’s instructions require it.
Panel construction matters as much as the material name. Bowed MDF, flexible plywood, sealed faces, thin skins over hollow framing, and poorly supported panels should not be treated as ordinary rigid substrates.
How dry should contact cement be before I place the veneer?
Exactly as dry—or as tacky—as the current instructions for that formulation require.
Some supplier instructions call for complete drying before assembly. Some water-based systems use a color change or non-tacky feel as the readiness indicator. Other product language describes assembly while the cement remains tacky and glossy.
Confirm the indicator for both coated faces, distinguish setup time from the later bonding window, and maintain the specified conditions through final cure. Never transfer the timing or touch test from one adhesive to another.
Can I use a J-roller instead of a veneer scraper?
Only if the veneer and adhesive instructions approve it as the complete pressure method.
Several specialist veneer suppliers recommend a veneer scraper and warn against relying on a J-roller or handheld roller alone. Their stated concern is that flexible backed veneer may need more concentrated pressure than those tools provide.
That does not make every roller universally prohibited. Follow the approved procedure for the exact system and ensure that the entire field, edges, corners, and seams receive the required pressure.
Can bubbles under contact-cemented veneer be repaired with heat or injected glue?
A manufacturer may approve a localized repair, but heat or injected adhesive is not a universal remedy.
First determine whether the defect is local or evidence of widespread incompatibility, incomplete coverage, trapped adhesive, substrate flex, moisture exposure, or finish interaction. Record the materials and process, then consult the veneer, adhesive, and finish manufacturers.
Do not automatically use an iron, heat gun, solvent, cyanoacrylate, or injected contact cement. Published shop discussions disagree about heat reactivation and do not establish safe operating limits. Where bubbles recur, spread during finishing, or affect a broad area, removal and re-veneering with an approved system may be more prudent than repeated spot repairs.
The practical rule is straightforward: choose contact cement only after confirming that the specific backed veneer, adhesive, rigid substrate, service conditions, and finish are compatible. For raw veneer, large or complex panels, exterior exposure, movement-prone substrates, or work where failure would be costly, favor an approved rigid-setting adhesive and pressing method. Whatever system you choose, validate the complete veneer-to-finish assembly on a representative sample before committing the finished project.