
17 min read ·
When You Can Touch, Recoat, and Use an Epoxy Countertop
A sticky surface after 24 hours is not automatically a failed cure. Start by checking the product's stated tack-free time.
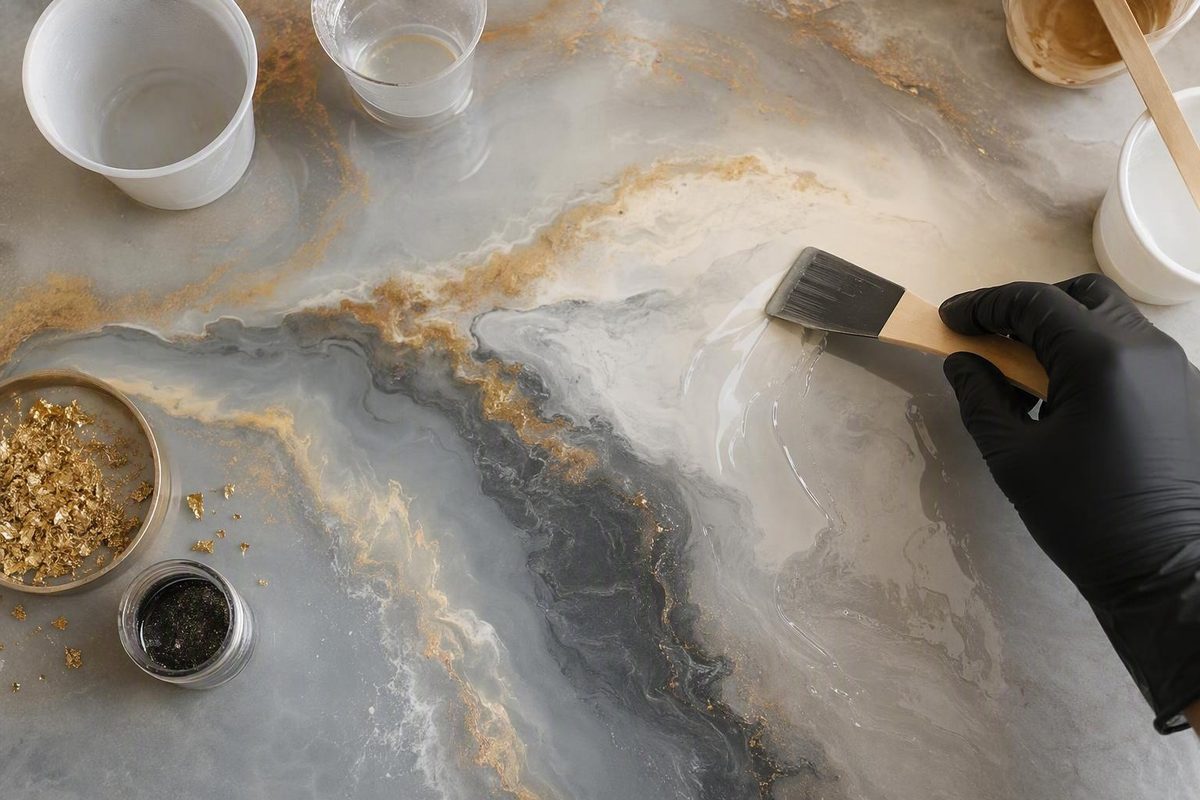
The short answer: allow about a day before touching and three days before light use
For planning purposes, many tabletop and countertop coatings follow this approximate sequence:
- About 12–24 hours: some products become tack-free.
- About 72 hours: cautious light or ordinary use may be permitted.
- About 7–30 days: the coating may reach maximum hardness, durability, and resistance.
These are conditional estimates, not a universal cure schedule. Craft Resin, for example, reports a 12–24-hour tack-free time, 72 hours before light normal handling, and 21 days to maximum hardness for its Table Top Epoxy under the specified conditions (Craft Resin cure guide). Premium FX Poxy’s seller reports usable hardness in 12–24 hours but allows 30 days for full durability (Premium FX Poxy cure guidance).
The answer to “how long for epoxy resin for countertop to dry?” therefore depends on what you intend to do next. Touching an edge, applying another coat, sanding, polishing, cleaning, replacing an appliance, and exposing the surface to heat are separate tasks with potentially different wait times.
UltraClear’s published schedule provides another product-specific example: its final tabletop flood coat requires approximately 72 hours before typical use at 75–80°F and continues curing for two weeks before reaching full strength and durability (UltraClear drying-time schedule). That schedule applies to the described product and conditions, not automatically to another countertop resin.
A surface that feels hard after a day has not necessarily developed its maximum scratch, load, heat, or chemical resistance. The early cure may be sufficient for limited handling while still leaving the coating more vulnerable than it will be after its maximum-property cure.
Use the schedule on the selected product’s label or technical data sheet whenever it differs from a general estimate. Look for separate entries covering:
- Pot life or working time
- Tack-free time
- Recoat window
- Sanding or polishing time
- Handling or light-service cure
- Full cure or maximum hardness
- Required temperature and humidity
- Maximum coat depth
They are not independent comparisons conducted under a single standardized definition of “dry” or “fully cured.” The figures are useful for planning, but the instructions for the exact resin being installed remain decisive.
Dry, tack-free, usable, and fully cured are not the same milestone
Two-part epoxy hardens through a reaction between resin and hardener. People commonly call this process “drying,” but the more accurate term is curing. As the reaction progresses, the mixture thickens, gels, becomes tack-free, develops handling strength, and eventually approaches its intended maximum properties.
Pot life is the limited working period after the components are combined. It indicates how long the mixed epoxy can be spread, colored, and manipulated before it becomes too thick to apply as directed. Pot life is not the time required for the coating to become touch-dry on the countertop.
The principal milestones are:
- Pot life: The usable working period after mixing.
- Tack-free time: The stage at which the surface no longer feels sticky under the product’s permitted test method.
- Recoat window: The period during which another layer may be applied using the specified preparation.
- Handling or light-use cure: The point at which limited contact or cautious service is allowed.
- Full cure or maximum-property cure: The stage at which the coating develops its stated maximum hardness, durability, and resistance.
Ordinary-use readiness can arrive well before maximum hardness. A surface may look glossy and feel solid while remaining easier to scratch, dent, or mark than it will be later.
The following table is a conditional planning framework, not a replacement for the product label:
| Task or milestone | Conditional planning range | What it means |
|---|---|---|
| Mixing and application | Usually measured in minutes | Work only within the stated pot life. Do not continue using material after it has thickened beyond the product’s working instructions. |
| Cautious touch | Commonly around 12–24 hours for cited tabletop products | The surface may be tack-free, but that does not establish readiness for normal service. |
| Recoating | May begin within hours or extend into the next day | Timing depends on the formulation and whether the layer is a seal coat, flood coat, or deep pour. |
| Sanding or polishing | Product-specific; one general tabletop guide estimates about 72 hours | The coating should be hard enough not to smear, deform, or clog the abrasive. Follow the specified preparation and grit (Flowyline task-time guide). |
| Light use | Frequently about 72 hours in the cited product guidance | Limited or ordinary use may be allowed if the required curing conditions have been maintained. |
| Heavy loading | No universal wait time | Use the product’s heavy-service or maximum-hardness instructions before restoring concentrated loads. |
| Maximum cure | Approximately 7–30 days across the cited guidance | Formulations and definitions differ; use the selected coating’s stated maximum-property schedule. |
Do not infer one milestone from another. Tack-free epoxy is not automatically ready for sanding, and sandable epoxy is not necessarily ready for concentrated weight, hot cookware, or a cleaner not approved for the coating.
If the label does not address the intended task, ask the manufacturer rather than treating the word “dry” as permission for unrestricted use.
A practical schedule for the first 72 hours and the weeks after
A task-based schedule is more useful than relying on one cure-time number.
During the first 12–24 hours, leave the surface untouched unless the product instructions require another operation. Protect the coating from dust, insects, dripping water, tools, cords, and accidental contact. Maintain the specified environmental conditions continuously rather than warming the room only during application.
At approximately 12–24 hours, some products become tack-free or develop early usable hardness. This is an initial milestone, not proof that the coating is ready for ordinary countertop service.
Premium FX Poxy illustrates that distinction. Its seller reports usable hardness in 12–24 hours but directs users to maintain 70–75°F during the initial cure and to treat the surface gently while it develops full durability over 30 days. The guidance specifically cautions against hot, heavy, footed, or potentially scratching objects during that early period.
At approximately 72 hours, light or ordinary use is a common product-specific milestone when the required temperature has been maintained. Interpret “light use” according to the manufacturer’s definition. Brief contact with lightweight objects is not necessarily equivalent to restoring every countertop activity.
During the remaining full-cure period, take conservative precautions until the selected resin has developed sufficient hardness:
- Keep hot cookware and heat-producing appliances off the finish unless the product documentation permits them.
- Delay replacing heavy or footed appliances until the applicable service-cure instructions allow it.
- Do not drag dishes, cutting boards, tools, or appliances across the coating.
- Avoid abrasive pads, powdered cleansers, solvents, and other cleaners unless approved for the product.
- Prevent concentrated loads from narrow feet or sharp edges.
- Follow the manufacturer’s instructions for water and cleaning exposure.
- Do not cut directly on the coating.
Named product schedules show how much the maximum-cure period can vary. Premium FX Poxy’s seller reports full durability after 30 days. Craft Resin reports maximum hardness after 21 days for its Table Top Epoxy, together with instructions to avoid heavy objects, heat, and strong cleaning products before that point. UltraClear reports that its tabletop coating continues curing for two weeks after its ordinary-use milestone.
These schedules are not interchangeable. There is no evidence-based universal day for replacing appliances, exposing a coating to hot cookware, or using a particular cleaning chemical. Check the exact product’s service-cure, heat-resistance, chemical-resistance, and maximum-hardness instructions before resuming a high-consequence task.
Why the product type changes the cure schedule
“Countertop epoxy” can describe products intended for substantially different jobs:
- Thin tabletop or countertop flood coats, which form a final clear or decorative surface.
- Deep-pour epoxies, which are formulated for thicker castings, voids, or embedded features.
- Fast repair, seam, filling, or seal-coat products, which are used for localized work or surface preparation.
Their published cure schedules cannot safely be transferred from one category to another.
Stone Coat Epoxy Quick Coat, for example, is reported to dry in 3–4 hours and cure in 12–24 hours. It has about 15 minutes of working time and is intended for seams, crack and knot filling, inlays, and seal coats—not as a representative final countertop flood coat (Stone Coat Quick Coat product page).
That product’s 3–4-hour dry time therefore should not be presented as the normal schedule for a final flood coat. A repair or seal-coat resin can have a shorter working period, a different application depth, and a different preparation procedure from the coating used for the final surface.
Final tabletop flood coats can require considerably longer before use. UltraClear’s product guidance, for example, gives approximately 72 hours before typical use at 75–80°F for its final tabletop flood coat. Its recoat schedules also differ among seal coats, nonfinal flood coats, and deep-pour layers.
Deep-pour formulations behave differently because their permitted depth, application volume, and heat development differ from those of thin coatings. A resin intended for a shallow countertop layer should not be poured more deeply than its instructions permit. Conversely, the timing for a deep-pour casting does not establish when a thin decorative finish can be sanded or returned to service.
Before mixing, confirm that:
- The resin is intended for the planned countertop or tabletop application.
- The proposed coat thickness is within its permitted range.
- The instructions cover any vertical edges or backsplash sections.
- The resin is compatible with the substrate, primer, pigments, and previous layers.
- Its recoat and service-cure schedules apply to the layer being installed.
A project involving seam filling, a seal coat, decorative layers, and a final flood coat may involve several separate cure clocks.
Temperature, humidity, and pour depth can extend the wait
Several commercial guides recommend curing tabletop or countertop epoxy somewhere near 70–80°F, but the exact range specified for the selected resin controls. Similar-looking products can have different limits.
Premium FX Poxy specifies 70–75°F and tells users to acclimate the room, resin, and countertop before pouring, then maintain that range during the initial cure. UltraClear’s approximately 72-hour typical-use schedule assumes 75–80°F. These are product-specific conditions rather than competing universal rules.
Conditioning only the surrounding air may not be sufficient. The substrate and stored components can differ in temperature from the room. As directed by the manufacturer, check:
- Room temperature
- Resin and hardener temperature
- Countertop substrate temperature
- Nearby surfaces that may affect the work area
Cold conditions can slow curing and, according to some product guidance, may leave a coating soft or stalled. Excessive warmth can shorten pot life and reduce the available mixing and application time.
Humidity limits also vary. UltraClear’s general FAQ recommends approximately 70–80°F for tabletop epoxy, relative humidity below 60%, and cautions that temperatures around 85°F or higher can shorten working time and contribute to visual imperfections (UltraClear curing FAQ). Craft Resin supplies a different preferred humidity range for its own Table Top Epoxy and warns that humidity above its stated limit may contribute to cloudiness or adhesion problems. Follow the limit for the selected product rather than adopting one number for every resin.
Coat depth and batch volume matter because epoxy produces heat while reacting. Material retained in a mixing container can behave differently from a thin layer spread across a countertop. Product formulation, batch size, pigments, allowable depth, substrate temperature, and changing room conditions can all affect working time and surface quality.
Stable conditions during the initial cure are particularly important. Do not schedule the pour if the room cannot remain within the specified range after application.
Pre-pour checklist
- [ ] Is the room within the product’s required temperature range?
- [ ] Have the resin and hardener reached the required temperature?
- [ ] Is the countertop substrate properly conditioned?
- [ ] Is relative humidity within the stated limit?
- [ ] Is the planned coat depth permitted?
- [ ] Can the required conditions be maintained during the initial cure?
- [ ] Is the material divided into approved batch sizes?
- [ ] Are dust, condensation, direct sun, drafts, and overnight cooling controlled?
- [ ] Are the label and technical instructions available during the job?
Do not compensate for unsuitable conditions by adding extra hardener. Correct the room, material, and substrate conditions before mixing.
Mixing accuracy can decide whether the countertop cures at all
The resin-to-hardener ratio is formulation-specific. A 1:1 ratio printed for one countertop product does not mean every epoxy uses equal parts. Some products specify measurement by volume, while others may require weight; those measurements are not automatically interchangeable.
Accurate measurement is essential because the components must be combined in the intended proportions. Too much or too little of either component can leave the countertop soft, flexible, tacky, or wet. Adding extra hardener is not a dependable cure accelerator and can prevent the coating from developing correctly.
Follow the product instructions for:
- Measurement by volume or weight
- Mixing duration
- Container shape and maximum batch size
- Scraping the sides and bottom
- Transfer to a second container, if required
- Approved pigments or additives
- Time allowed before pouring
Unmixed material can remain on the sides or bottom of the mixing container. If it reaches the countertop, it may form isolated sticky streaks or soft spots even when the remainder of the surface cures.
Commercial troubleshooting guidance identifies inaccurate proportions, incomplete mixing, moisture, unsuitable temperature, mixed brands, and unapproved additions as potential causes of a failed cure. Epoxy Countertop DIY specifically cautions against adding extra hardener or water and advises following the selected product’s measurement and mixing instructions (sticky-resin troubleshooting guide).
Excessive coat depth is another product-specific failure risk. Craft Resin, for example, lists a maximum depth of 3 mm, or 1/8 inch, for its Table Top Epoxy. Applying a tabletop coating beyond its permitted depth can change heat development and cure behavior.
For each pour, record:
- Product and formulation
- Resin and hardener batch or lot numbers
- Required and measured ratio
- Whether measurement was by weight or volume
- Mixing start and finish times
- Pour time
- Approximate coat depth
- Room, material, and substrate temperatures
- Relative humidity
- Pigments or additives used
This record can help the manufacturer distinguish unsuitable conditions from an incorrect ratio, incompatible additive, or mixing problem.
Recoat and sanding times follow a different clock
A recoat window can be much shorter than the wait for ordinary use or maximum cure. Its purpose is to identify when the next layer can be applied using the bonding and preparation procedure specified for that system.
UltraClear’s product guidance gives the following conditional examples:
- About 4 hours before recoating a seal coat
- About 4–10 hours for a nonfinal tabletop flood coat
- About 12–24 hours for a nonfinal deep-pour coat
The same guidance recommends light sanding with 220–320 grit if more than 10 hours pass before another tabletop flood coat. These times apply to the products and coat types in UltraClear’s schedule—not to every epoxy.
Some products allow another layer while the first remains slightly tacky. Others require the first layer to cure and then be sanded and cleaned. Applying a coat outside the specified window without the required preparation can affect bonding or appearance.
Stone Coat gives a different procedure for its cured Quick Coat: sand with 220-grit abrasive and clean as directed before adding another layer. That instruction belongs to its fast seam, filling, inlay, and seal-coat product and should not be transferred unchanged to another finish resin.
For sanding or polishing a standard tabletop coating, one general commercial guide estimates approximately 72 hours under suitable conditions. Because that estimate is not a specification for every countertop product, use it only for preliminary scheduling.
Before recoating, sanding, or polishing, identify:
- The exact recoat window for the product and coat type.
- Whether the next coat is applied while tacky or after cure.
- Whether washing, cleaning, or degreasing is required.
- The permitted abrasive grit.
- How sanding dust must be removed.
- Whether the proposed cleaning solvent is allowed.
- The minimum time before machine polishing.
- The temperature, humidity, and depth assumptions behind the schedule.
If the recoat window has closed, follow the manufacturer’s late-recoat procedure rather than applying another layer without preparation.
What to do when the epoxy is still sticky after 24–72 hours
A sticky surface after 24 hours is not automatically a failed cure. Start by checking the product’s stated tack-free time. Some formulations or colder conditions require longer, and a “24-hour cure” may refer only to early handling rather than maximum hardness.
Use this diagnostic sequence:
- Check current and overnight temperatures. Determine whether the room, substrate, resin, or hardener fell outside the approved range.
- Check humidity. Compare the recorded conditions with the product’s limit.
- Verify coat depth. Compare the actual layer with the maximum permitted thickness.
- Review the measured ratio. Confirm both the required ratio and whether measurement should have been by weight or volume.
- Review the mixing method. Check the mixing time, side and bottom scraping, transfer procedure, and batch size.
- List every additive. Include pigments, powders, solvents, water, and materials used to change flow or release bubbles.
- Check for moisture. Consider the substrate, tools, cleaning process, and condensation.
- Confirm compatibility. Identify primers, sealers, previous coatings, and any components from different brands.
If the temperature is below the specified range but the ratio and mixing were correct, stable whole-room conditioning within the manufacturer’s approved range may allow a slow reaction to continue. This is different from directing concentrated heat at one part of the coating.
Avoid uncontrolled use of a hairdryer, heat gun, or concentrated heater. Commercial cure guidance warns that moving air and localized heating may contribute to bubbles, ripples, cloudy areas, cracking, discoloration, or uneven curing; excessive heat can also shorten working time (general epoxy curing guide).
Epoxy that remains wet, runny, or persistently tacky for several days may reflect an incorrect ratio or incomplete mixing rather than a slow cure. Baltic Day’s product-specific troubleshooting guidance identifies inaccurate measurement, inadequate mixing, and low temperature as common causes and recommends removing runny uncured material before applying a correctly prepared coat (Baltic Day sticky-epoxy guide).
Do not assume that fresh epoxy can simply be poured over liquid uncured material. Available repair guidance commonly calls for removing wet resin and then preparing and recoating the sound surface as directed. A partly cured tacky film may require a different procedure from fully liquid resin, so use the countertop resin manufacturer’s repair instructions.
There is no universal deadline at which every sticky coating must be declared irreparable. Waiting indefinitely, however, will not correct every ratio, mixing, or compatibility error. If the surface remains soft beyond its stated schedule, document the materials and conditions and contact the manufacturer before attempting a repair.
Frequently asked questions
Can I use an epoxy countertop after 24 hours?
Usually, 24 hours should be treated as an early cure milestone rather than permission for normal service. Some cited products may be tack-free or have usable hardness within 12–24 hours, while light or ordinary use is commonly placed at approximately 72 hours under the required conditions.
Follow the exact service-cure instructions. Do not infer permission for appliances, heat, cleaning chemicals, or other demanding use solely because the surface feels dry.
When can I put appliances or other heavy objects on epoxy?
There is no universal waiting period. Heavy or footed appliances can create concentrated loads, and early hardness does not establish that the coating has reached its maximum load resistance.
Use the product’s heavy-service or maximum-hardness schedule. The cited guidance ranges from approximately 7 days in general planning estimates to 21 days for Craft Resin Table Top Epoxy and 30 days for Premium FX Poxy. Those figures apply to different products and definitions, so the selected resin’s instructions control.
Can I make countertop epoxy cure faster with a heater or hairdryer?
You may condition the whole room within the manufacturer’s specified temperature range, preferably before mixing and throughout the initial cure. Do not add extra hardener.
Avoid aiming a hairdryer, heat gun, or concentrated heater at the coating. Localized heat and moving air can contribute to uneven curing and surface defects, while excessive warmth can shorten working time and push the resin beyond its approved conditions.
Why is my epoxy countertop still tacky after three days?
First compare three days with the product’s stated tack-free and full-cure schedule. If the surface should already be tack-free, check temperature, humidity, coat depth, resin-to-hardener ratio, measurement method, mixing quality, moisture, additives, and compatibility with previous materials.
A cold but correctly mixed coating may need stable conditioning within the approved range. A wet or runny coating caused by an incorrect ratio or incomplete mixing may not cure normally and may need removal and repair according to the manufacturer’s instructions.
Does fully cured epoxy automatically make a countertop food-safe?
No. Cure time alone does not establish that a coating is suitable for direct food contact. “Fully cured” describes a cure stage or the development of stated properties; it is not, by itself, product-specific evidence of food-contact suitability.
Confirm the intended use in the documentation for the exact cured formulation, including any restrictions involving direct food contact, cutting, temperature, cleaning, and required cure conditions. General claims about epoxy as a category should not override product-specific documentation.
For planning, remember the qualified rule: roughly 12–24 hours to become tack-free, about 72 hours before cautious light use, and 7–30 days for maximum properties—but the selected product’s schedule controls. Protect the coating from premature weight, heat, scratching, water, and unapproved chemicals. If tackiness persists, investigate temperature, humidity, ratio, mixing, additives, and coat depth rather than assuming that more time will always solve the problem.