
22 min read ·
When Expanding Glue Helps—and When It Weakens the Joint
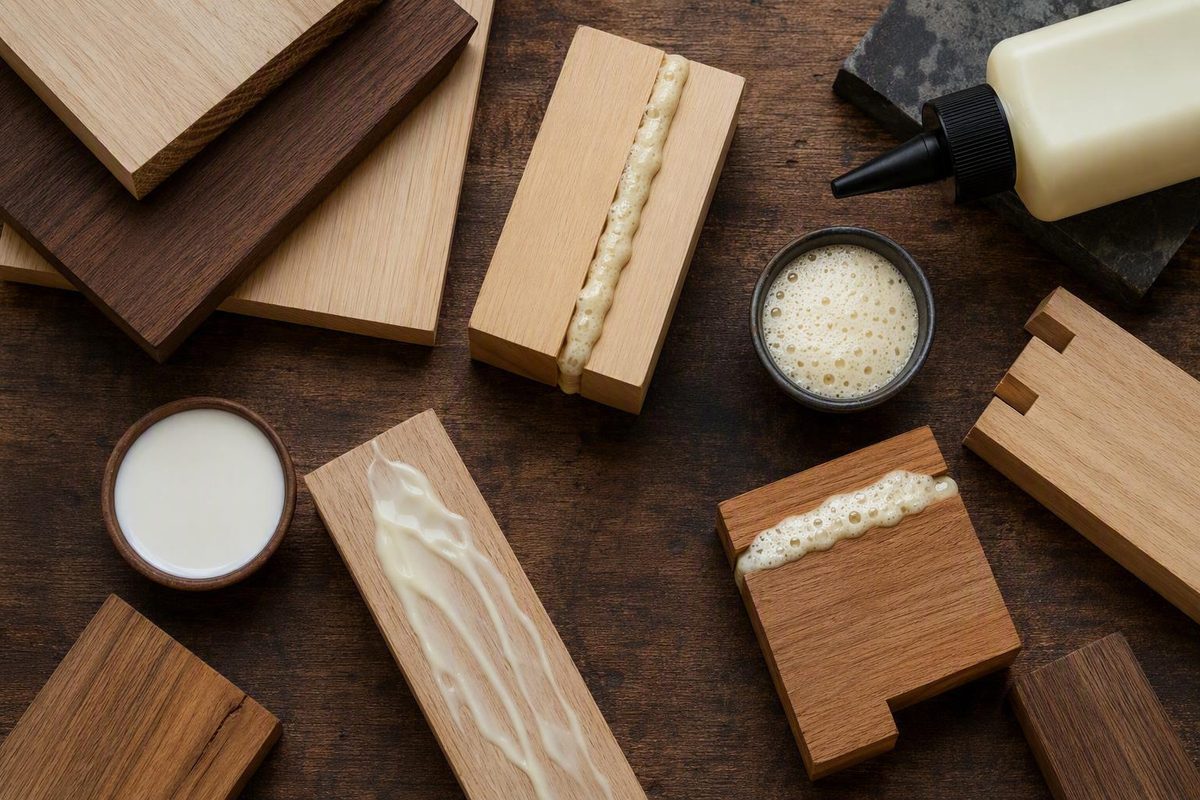
Polyurethane wood glue is generally a one-part adhesive that cures with moisture and expands or foams as it cures. That behavior can be useful, but it also creates the product’s most persistent misconception: visible foam is not evidence of a strong, gap-filling bond. Manufacturer guidance describes polyurethane as moisture-activated and expanding, while still emphasizing preparation, clamping, and product-specific use (Gorilla Glue’s wood-adhesive guide).
The best adhesive choice begins with the joint. Routine, well-fitted raw-wood joinery usually points toward a suitable PVA. Polyurethane becomes worth investigating when documented moisture resistance, compatible mixed-material bonding, veneer behavior, or a difficult assembly offers a specific advantage. If a joint has a meaningful load-bearing gap, repair the fit or consider an epoxy expressly documented for the substrates, gap, load, and exposure rather than expecting polyurethane foam to replace missing wood.
This guide provides a fit-first decision framework based on the supplied manufacturer pages, retailer guidance, and practitioner accounts. Those sources do not include current safety data sheets, complete technical data sheets, traceable standards reports, or controlled comparative strength testing. Product-performance claims therefore remain product-specific, and detailed application and safety requirements must come from the current label, technical data sheet, and safety data sheet for the exact adhesive being used.
Related: Epoxy vs Polyurethane: Choosing a Stone Adhesive.
The short answer: when polyurethane glue is the right choice
Use polyurethane wood glue when its particular behavior solves a defined problem. It may suit an approved wood-to-metal or wood-to-stone assembly, selected damp or exterior work, veneer that reacts badly to water-based glue, or tight joinery that benefits from a slippery uncured adhesive. The exact product must approve the materials, preparation method, joint design, and intended exposure.
For ordinary furniture joinery between clean, closely fitted pieces of raw wood, PVA is normally the simpler starting point. It is familiar, non-foaming, straightforward to spread, and available in formulations intended for different moisture conditions. This practical preference does not establish that every PVA is stronger than every polyurethane formula. Strength depends on the products, wood, geometry, preparation, application, cure, exposure, and test method. Family Handyman similarly presents regular PVA as the general choice for raw wood-to-wood work while noting that waterproof wood glues are sold in both PVA and polyurethane chemistries (Family Handyman’s wood-glue guide).
| Decision factor | Polyurethane wood glue | PVA wood glue | Product-specific epoxy |
|---|---|---|---|
| Typical substrate pairing | Wood-to-wood or approved mixed materials | Primarily porous wood-to-wood assemblies | Wood-to-wood and various mixed materials, depending on formula |
| Required joint fit | Close contact remains important despite expansion | Best with close-fitting mating surfaces | Some formulas permit thicker bond lines or gaps; documentation must confirm this |
| Moisture exposure | Consider when the exact product documents the required resistance | Select a PVA grade approved for the exposure | Product-dependent; verify water and service limitations |
| Working behavior | Moisture-curing, slippery in some assemblies, and prone to foaming | Usually non-foaming and straightforward to spread | Mixing and proportioning requirements depend on the delivery system |
| Clamping or restraint | Required to maintain contact and prevent expansion from moving parts | Required to maintain alignment and a close glue line | Product- and joint-dependent |
| Cleanup | Product- and surface-specific; cured foam can be troublesome | Many products permit water cleanup while uncured | Product-specific and usually more difficult after cure |
| Meaningful structural gaps | Do not infer tolerance from the foam | Generally unsuitable for loose joints | Investigate only a formula documented for the gap, load, substrates, and exposure |
| Best reason to consider it | Approved mixed materials, selected damp or exterior work, or useful assembly behavior | Routine close-fitting raw-wood joinery | Missing material or a substantial void after proper repair evaluation |
Polyurethane is therefore a candidate, not an automatic upgrade. Suppliers often position it for dissimilar materials—including combinations involving wood, metal, glass, or stone—but broad category descriptions cannot replace the exact product’s compatibility instructions (Redwood UK’s comparison of polyurethane and PVA adhesives).
The central rule is simple: foam may occupy empty space, but it does not demonstrate structural gap-filling strength. If load-bearing surfaces do not meet closely and remain stable during a dry fit, correct the geometry before glue-up.
How moisture curing and expansion change the way the glue behaves
“Polyurethane wood glue” describes an adhesive family, not one identical formula. As one representative example, Kraken Bond identifies its bottled product as a single-component polyurethane-prepolymer adhesive with a moisture-curing mechanism. Its directions call for a thin layer, prompt assembly, clamping, and light moistening, but those instructions apply to that formula rather than every polyurethane adhesive.
In practical terms, the process is:
- Moisture in the air, substrate, or deliberately dampened surface participates in cure.
- The adhesive begins reacting and expanding.
- A controlled quantity remains between closely fitted mating surfaces.
- Surplus adhesive can foam outside the joint or into unoccupied spaces.
- If the components are not immobilized, the expanding adhesive can disturb their position.
Clamps, cauls, pins, stops, jigs, or other restraints must establish and preserve contact. This is especially important with miters, veneers, smooth faces, light components, and parts that can slide under clamp pressure.
There is no supported universal rule specifying a fixed number of sprays or requiring both surfaces to be dampened in every assembly. Published instructions differ. Follow the current label and technical data sheet on whether moisture should be added, where it should be placed, and how much to use. “Lightly damp” should not be converted into “soaked,” and departing from the documented moisture procedure creates an uncertain result rather than a predictably better cure.
Package format and consistency also matter:
- Liquid polyurethane wood glue spreads readily and may run or migrate on vertical work.
- Semi-gel or quick-setting polyurethane adhesive may offer more placement control but can provide a different assembly window.
- Heavy-bodied cartridge adhesive is applied as a bead and may be intended for construction or installation rather than thin furniture glue lines.
One manufacturer describes separate liquid woodworking, quick-setting semi-gel, and heavy-bodied cartridge products, with the latter two marketed for materials including wood, stone, tile, metal, and glass (Grizzly Glue’s product range). These are manufacturer descriptions, not evidence that the formulas are interchangeable or suitable for every listed substrate.
Do not substitute a polyurethane construction adhesive for bottled polyurethane wood glue merely because both use polyurethane chemistry. Choose the product class documented for the joint.
Where polyurethane glue fits—and where PVA usually fits better
Polyurethane earns its place when it provides something the ordinary wood-glue routine does not. The following matrix is a screening tool; the exact label and technical documentation still control the application.
| Use case | Starting recommendation | Why | Main qualification |
|---|---|---|---|
| Close-fitting furniture joinery | Usually PVA | Straightforward spreading, alignment, and cleanup | Consider polyurethane only when a documented property solves a particular problem |
| Edge and face laminations | Usually PVA | Well suited to broad, close-fitting raw-wood surfaces | Expansion does not excuse uneven machining |
| End-grain joint | Improve joint design first | Adhesive cannot compensate for weak geometry or poor fit | Polyurethane is a craft preference for some users, not a universal recommendation |
| Veneer | Product and process dependent | Water-free polyurethane may reduce moisture-related veneer curl | Requires even coverage, close contact, and a suitable pressing method |
| Bent laminations | Process dependent | Some furniture makers value a rigid polyurethane glue line | Pressure, cure, springback, and lamination design still require control |
| Damp timber | Consider an approved polyurethane | Moisture-curing behavior may be useful if the product permits damp substrates | Damp does not mean saturated, decayed, dirty, or covered in standing water |
| Outdoor work | Choose by documented exposure rating | Suitable polyurethane and PVA products are both marketed for moisture exposure | Occasional wetting, repeated weather, and immersion are different conditions |
| Wood to another material | Consider polyurethane or a documented epoxy | Some formulas approve dissimilar substrates | Verify both substrates, coatings, preparation, and service conditions |
| Loose load-bearing joint | Repair the fit or evaluate a documented epoxy system | Missing material requires more than visible foam | Confirm permitted bond-line thickness, load, cure, and exposure |
For cabinet frames, drawers, chairs, panels, and similar raw-wood assemblies, PVA is usually the practical default when the pieces fit closely and the selected product suits the expected moisture exposure. That is a workflow recommendation, not a universal laboratory ranking.
Mixed-material bonding is a central reason to investigate polyurethane. Manufacturer and supplier literature lists possible combinations such as:
- wood to metal;
- wood to stone or masonry;
- wood to concrete;
- wood to glass;
- wood to ceramic;
- wood to compatible rigid foam.
“Possible” is the important word. A label that lists metal does not necessarily approve every alloy, plated fitting, oily surface, or powder-coated part. A product that lists foam may work with one foam chemistry but not another. For projects specifically involving masonry or natural stone, the separate guide to choosing adhesive for granite, marble, and masonry explains why the stone, support conditions, and application method matter.
Specialized woodworking preferences deserve the same qualification. Furniture maker Craig Thibodeau reports favoring water-free polyurethane glue for veneer because it does not introduce the water that can curl thin sheets. He also values its slipperiness in tight assemblies and its rigid glue line in bent laminations. At the same time, he emphasizes close-fitting joinery and sufficient clamping (Fine Woodworking’s practitioner account).
Those observations provide valid reasons to test the chemistry, but they do not make polyurethane the automatic veneer or lamination adhesive. Tight joinery that benefits from slippery glue still has to be dry-fitted and restrained without distortion.
End-grain recommendations are particularly variable. Some craftspeople prefer polyurethane, while others use PVA or redesign the joint to provide more long-grain contact. Adhesive choice remains secondary to joint geometry.
Before using polyurethane on an unfamiliar material, determine:
- whether coatings must be removed;
- whether abrasion is required or permitted;
- which cleaner is compatible with both adhesive and substrate;
- whether the surface must be dry or may be damp;
- whether the wood species is approved;
- whether the plastic or foam is chemically compatible;
- whether the formula permits bonding two nonporous surfaces;
- whether a primer is required;
- whether the cured adhesive will remain visible under the finish.
A representative scrap joint is particularly useful with pale veneer, finished wood, porous stone, plastics, foam, and visible seams. It can reveal staining, foaming, adhesion, and cleanup problems before the actual assembly is committed.
The gap-filling myth: foam is not a repaired joint
“Gap filling” can describe two different results:
- The adhesive expands and visibly occupies a hollow or surface irregularity.
- The cured material reliably transfers the intended load across a significant gap.
Expansion establishes the first behavior. It does not establish the second.
A slightly irregular surface may still provide close contact over most of the joint. In that case, cured adhesive may occupy isolated low spots while the sound mating areas form the principal bond. A loose mortise, missing corner, hollow repair, or broad offset is different because the joint asks foam to replace wood and carry load across empty space.
Thibodeau reported observing lightweight foam in gaps of approximately 0.005 to 0.010 inch or larger and concluded from his woodworking experience that polyurethane offered no useful gap-filling ability in poorly fitted joinery (Fine Woodworking). That measurement is an experience-based observation, not a universal engineering threshold or pass/fail specification for every formula.
Clamping still matters because the joint needs close mating-surface contact, stable alignment, appropriate adhesive coverage, and timely assembly. Expansion can work against those conditions by raising veneer, opening a miter, sliding a component, or leaving a thick foamed line where a close bond line was required. The clamps maintain contact; the foam does not.
Consider two examples.
Slightly uneven outdoor repair: A weathered wooden component has shallow texture and small localized irregularities, but it dry-fits firmly with broad contact. A polyurethane product documented for the wood and expected exposure may be a candidate. Prepare the surfaces as directed, confirm that restraint closes the joint, test the foaming behavior if appearance matters, and reject the repair if deterioration prevents bonding to sound material.
Loose mortise or missing wood: A tenon rattles in its mortise, or damage has removed a meaningful portion of the bearing surface. Foaming polyurethane is not a fit correction. Replace or splice in sound wood, remake the component, or use another suitable mechanical repair. An epoxy should be considered only if its documentation expressly permits the substrates, bond-line thickness, load, exposure, and cure conditions involved. For consequential load-bearing work, seek appropriately qualified advice rather than improvising from a chemistry-wide claim.
Retailers sometimes describe polyurethane as useful on uneven surfaces, while experienced woodworkers warn that foam in gaps is lightweight. These positions can be reconciled by distinguishing minor surface texture from a genuine structural void. The dry fit is the decisive inspection: if the components cannot meet and remain stable before adhesive is applied, visible expansion is not a sound repair strategy.
How to apply polyurethane wood glue step by step
A reliable glue-up begins before the bottle opens. Because polyurethane can expand and some products have short assembly windows, planning and restraint matter.
1. Complete a full dry fit
Assemble every component without adhesive. Confirm that joints seat fully, reference faces align, clamps can reach their intended positions, and the assembly can be brought square without excessive force.
Rehearse the sequence when several joints must close at once. Place clamps, cauls, pads, stops, squares, and cleanup materials within reach. Discovering that a dowel is too long or a clamp blocks the next component is much easier before the working window starts.
2. Inspect the fit
Look for rocking, visible light through a supposedly closed seam, loose tenons, crushed fibers, veneer bridges, or missing material. Correct those defects mechanically rather than budgeting for expansion to conceal them.
For repair work, confirm that the surrounding material is sound enough to accept a bond.
3. Confirm compatibility and exposure
Read the current label and technical data sheet where available. Verify:
- both substrates;
- permitted surface condition;
- preparation requirements;
- application-temperature limits;
- moisture instructions;
- assembly and clamping times;
- cure requirements;
- exposure restrictions.
Do not improvise an abrasion or cleaning process for metal, glass, stone, plastic, foam, coated parts, or oily wood. A method suitable for one substrate may damage another.
4. Prepare the mating surfaces
Remove dust, loose fibers, grease, wax, and incompatible residue using a method approved for the adhesive and both substrates. Freshly fitted raw wood may need little beyond dust removal, but nonwood surfaces may require additional preparation.
When documentation is unclear, test the complete preparation and bonding process on scrap or a concealed area.
5. Add only the specified moisture
If the product instructs you to dampen a surface, follow its stated method. Do not soak the material or copy another brand’s misting routine. Instructions differ on whether moisture must be added and where it belongs.
Departure from the label creates uncertainty. It should not be assumed that more water means more complete or faster curing.
6. Apply a thin, controlled layer
Spread enough adhesive to cover the intended bond area without creating reservoirs.
Coverage still needs to be continuous where the design requires it. Do not compensate for a missed area by overloading another part of the joint.
7. Assemble promptly
Bring the parts together within the product’s stated assembly window. Seat the joint fully rather than expecting clamps to force badly fitted components into place.
Check reference faces and witness marks as the assembly closes. Product terminology varies, so do not assume a listed open time means final assembly can be delayed until the end of that period.
8. Immobilize and clamp
Clamp or restrain the assembly so that the mating surfaces remain in contact and cannot move as the adhesive expands. Use pads or cauls where necessary to distribute force and protect the work. Add lateral stops when parts may skate sideways.
There is no supported universal clamping-pressure value for every species, joint, veneer, foam, or mixed-material assembly. Follow the product instructions and apply enough restraint to close and stabilize the joint without damaging the workpiece.
9. Recheck alignment
Clamp tightening and expansion can change registration after the first inspection. Confirm square, flushness, and component position again before leaving the assembly. Watch particularly for lifted veneer edges, opened miters, and narrow parts creeping sideways.
10. Respect each cure milestone
Maintain restraint for the documented minimum clamp period. Do not assume that clamp removal means the assembly is ready for machining, transport, weather, or loading.
Full cure is the manufacturer’s stated completion of the curing period. Any separate instructions for handling, machining, loading, or water exposure must also be observed.
11. Manage squeeze-out using the approved method
Protect adjacent surfaces before glue-up when practical. Whether squeeze-out should be removed while uncured, at an intermediate stage, or after cure depends on the formula, surface, and finish schedule.
Do not transfer cleanup instructions between products without verification. A method that works on unfinished hardwood may damage plastic, foam, stone, veneer, or a finished surface.
12. Test uncertain assemblies
Make a representative trial joint when using an unfamiliar adhesive, pale wood, clear finish, porous material, foam, nonporous substrate, or visible seam. Duplicate the actual preparation, moisture procedure, adhesive quantity, restraint, temperature, and cure period as closely as possible.
Open time, assembly time, clamp time, and full cure are not the same
Several different clocks may apply during a glue-up:
- Open time generally describes the period during which exposed adhesive remains usable after application.
- Assembly time is the available period for bringing the prepared parts together and completing the joint.
- Clamp time is the minimum period for which the assembly must remain restrained.
- Handling time is the documented point at which limited movement or another specified operation may be permitted.
- Full cure is the manufacturer’s stated completion of the cure period.
These values are not interchangeable. Reaching minimum clamp time does not establish full cure, approval for loading, or readiness for water exposure. Likewise, a stated open time may not permit final assembly to be delayed for that entire interval.
Kraken Bond’s manufacturer product page illustrates both product specificity and the risk of relying on a single headline figure. It lists a 5–15-minute open time, directs users to assemble the parts within two minutes, specifies at least 15–20 minutes of clamping, and gives an application range of 41°F to 95°F (Kraken Bond’s product page). The two-minute assembly instruction appears difficult to reconcile with the longer open-time range, so the prudent response is to obtain current technical guidance rather than invent an explanation.
Other published guidance reports different schedules. Family Handyman says one named Titebond polyurethane glue should remain clamped for at least 45 minutes and describes polyurethane curing as taking up to five hours. These figures illustrate product variation; they are not a universal schedule for polyurethane adhesives.
The available retailer evidence also gives an approximate 24-hour general full-cure estimate for polyurethane formulas, but it does not provide the technical documentation needed to turn that estimate into application guidance. Use the exact product’s current instructions instead of planning around a category-level number.
Before glue-up, identify:
- the permitted application-temperature range;
- any conditioning requirements for the adhesive or substrates;
- moisture instructions;
- open and assembly windows;
- minimum clamp time;
- handling or machining time;
- full-cure period;
- delay before weather or water exposure;
- delay before loading.
If the container, retailer listing, and manufacturer page disagree, pause and seek current technical guidance. In a consequential assembly, unresolved timing ambiguity is a reason not to proceed.
Waterproof and D4 claims: what they do not automatically prove
Polyurethane wood glues are often marketed as waterproof, weather-resistant, marine-oriented, suitable for outdoor work, or D4-rated. These descriptions can help create a shortlist, but they remain product-specific manufacturer or retailer claims unless supported by identifiable standards documentation and applicable test information.
For example, Kraken Bond markets one product as D4 water-resistant, while retailers group several polyurethane formulas under waterproof or marine-oriented descriptions. The supplied sales material does not include independent water-exposure testing or enough traceable standards information to treat those terms as universal proof.
A water-resistance claim does not answer every service question. Distinguish among:
- occasional wetting, such as spills or brief dampness;
- sheltered exterior exposure, with limited direct rain but changing humidity;
- repeated weather exposure, including wet–dry cycles;
- prolonged or continuous immersion;
- marine construction, where structural duty, design, regulation, and repairability may matter.
An adhesive marketed for intermittent wetting is not automatically suitable underwater. A product name containing “marine” does not by itself approve structural boatbuilding. A D4 statement should not be extended to every outdoor assembly, substrate, or exposure condition without supporting documentation.
Outdoor durability also depends on the project. The bonded materials must also tolerate the service environment.
Use this buying checklist:
- Identify the exact product and rating. Do not rely on a chemistry-wide statement.
- Find current technical documentation. Look for the applicable classification, test method, limitations, and document date where supplied.
- Confirm both substrates. Check species, porosity, coatings, metals, plastics, foams, stone, or masonry as applicable.
- Match the exposure. Determine whether approval covers interior dampness, occasional wetting, repeated exterior weather, or immersion.
- Verify joint requirements. Check fit, permitted bond-line thickness, restraint, and any requirement for mechanical support.
- Check application conditions. Temperature, moisture, and preparation may be conditions of the claimed performance.
- Observe cure requirements. Do not expose or load the joint earlier than the documentation permits.
- Consider the entire assembly. The substrate and joint design may need protection even when the cured adhesive resists water.
Polyurethane is not the only chemistry sold for moisture-resistant woodworking. Suitable PVA and epoxy products are available for particular applications. Compare documented product performance rather than selecting solely by adhesive family.
Troubleshooting foam, movement, cleanup, safety, and storage
Polyurethane glue problems are easier to diagnose when the visible symptom is separated from the probable process failure.
Excessive foam
Common process issues to investigate include too much adhesive, departure from the label’s moisture procedure, and inadequate planning for squeeze-out. The appearance alone cannot identify the cause with certainty.
For the next attempt, make a scrap sample, apply a thinner controlled layer, and follow the exact moisture instructions. Protect surrounding surfaces only in ways that will not interfere with bonding or finishing.
Shifted or opened parts
The components may not have been restrained before expansion began. Delayed assembly, slippery parts without lateral stops, uneven clamping, or a joint that never seated during the dry fit may also contribute.
Do not assume that simply increasing clamp force will solve the problem. Improve the fit and assembly sequence, add registration blocks or cauls, and immobilize the components promptly.
Weak or hollow-looking gaps
A bubbly or lightweight-looking line suggests that foam rather than a close adhesive line may occupy the void. Check joint fit, substrate compatibility, preparation, contamination, timing, and whether the mating surfaces were held together throughout cure.
A visibly filled gap should not be accepted on appearance alone. Remake an inadequate joint where practicable. Repair missing material or investigate an epoxy documented for the specific gap, load, substrates, and service conditions.
When evaluating such an epoxy, check:
- approved substrates;
- permitted bond-line thickness;
- load or structural designation, if relevant;
- preparation and mixing instructions;
- cure conditions;
- moisture and exposure limits;
- whether the repair also requires mechanical reinforcement or professional assessment.
Incomplete or inconsistent cure
Check whether the adhesive was used within its documented application conditions, whether the specified moisture procedure was followed, whether the substrates were compatible and clean, and whether the assembly remained undisturbed.
Do not improvise corrective treatment for a critical partially cured joint. If cure remains uncertain, keep the assembly unloaded and seek guidance from the manufacturer for that exact product.
Visible glue line or staining
Excess application, uncontrolled expansion, residue in pores, or adhesive left beneath a finish can create a cosmetic defect. Pale woods, stone, veneer, and clear finishes deserve a representative trial.
Do not assume sanding will remove all contamination. Plan surface protection and cleanup before applying glue.
Difficult squeeze-out
Sources disagree about cleanup. One experienced furniture maker describes cured squeeze-out as manageable when allowed to harden, while Rockler warns that cured polyurethane foam can require scraping, sanding, or cutting (Rockler’s guide to wood-glue types). Different formulas, surfaces, cure stages, and cosmetic standards may explain the conflicting accounts.
Follow the exact adhesive manufacturer’s instructions for uncured and cured removal. Do not assume acetone, paint thinner, or another solvent is universally suitable. Without current product and substrate documentation, this guide cannot verify solvent compatibility or prescribe the necessary hazard controls.
Bottle has thickened or become unusable
Moisture-curing adhesive can have a limited life after opening, but the supplied evidence does not establish one universal duration or storage method. A bottle should not be assumed usable merely because some liquid remains.
Follow the manufacturer’s resealing and storage instructions. If the adhesive has thickened, skinned, separated, clogged repeatedly, or changed application behavior, do not use it for an important joint. Do not dilute it unless the manufacturer expressly permits that procedure.
Safety limitations
Safety requirements are formulation-specific. The available Kraken Bond page directs users to provide ventilation, use personal protective equipment, and consult the product’s safety information, but the supplied evidence does not include the complete current safety data sheet needed to prescribe detailed controls, first aid, disposal, or solvent handling (Kraken Bond’s product information).
Before use, review the exact product’s current label and safety data sheet. Follow their requirements for personal protective equipment, ventilation, first aid, storage, cleanup, fire precautions, and disposal. Generic workshop advice is not a substitute for formulation-specific safety documentation.
The final diagnosis is often fit rather than chemistry.
Is polyurethane wood glue stronger than PVA?
Not universally. The supplied evidence contains no controlled comparison proving that every polyurethane formula is stronger or weaker than every PVA.
For routine, close-fitting raw-wood joinery, PVA is usually the simpler default. Polyurethane may be preferable when documented moisture performance, mixed-material compatibility, veneer behavior, or assembly characteristics solve a specific problem.
Do I need to wet the wood before applying polyurethane glue?
Only if the current instructions for the exact product require it. Published guidance differs on whether moisture should be added and whether it belongs on one or both surfaces.
Do not soak the wood or adopt a universal spray quantity. Follow the label and technical data sheet, then make a scrap joint if foaming or appearance is uncertain.
Can polyurethane glue fill a gap in a wood joint?
It can expand into a visible gap, but the resulting foam is not proof of a strong load-bearing repair. Polyurethane works best when the mating surfaces already fit closely and restraint maintains contact.
Minor localized irregularity may be acceptable when most of the joint has sound contact. A loose mortise, missing wood, or substantial void should be repaired or evaluated using a product specifically documented for that gap and service condition.
How long should polyurethane wood glue remain clamped?
For the period specified by the exact product. Clamp time, handling time, and full cure are different milestones, and published schedules vary substantially between formulas.
Check the current label or technical data sheet for the assembly window, minimum restraint period, full cure, and any separate delay before machining, loading, or moisture exposure.
Can polyurethane wood glue bond wood to metal, stone, concrete, glass, or foam?
Some polyurethane adhesives are marketed for those combinations, but compatibility is formulation- and substrate-specific. Confirm that the exact product approves both materials and the intended exposure.
Coatings, contamination, polished surfaces, plastics, and foams require particular scrutiny. Bottled woodworking glue, semi-gel adhesive, and cartridge construction adhesive should not be treated as interchangeable.
The reliable conclusion is a fit-first rule: use a suitable PVA for most well-fitted raw-wood joints; consider polyurethane when its documented moisture resistance, assembly behavior, or mixed-material compatibility solves a defined problem; and repair the joint or investigate a suitably documented epoxy when a meaningful load-bearing gap remains. Let the current label, technical data sheet, and safety data sheet—not the amount of foam—determine preparation, timing, exposure limits, cleanup, and safe use.