
24 min read ·
How to Evaluate a Bubbled Aquarium Seam Without Guessing
Isolated marks show lower apparent concern only without leaks, peeling, growth or clear glass-to-glass involvement. Connected or advancing voids are more concerning.
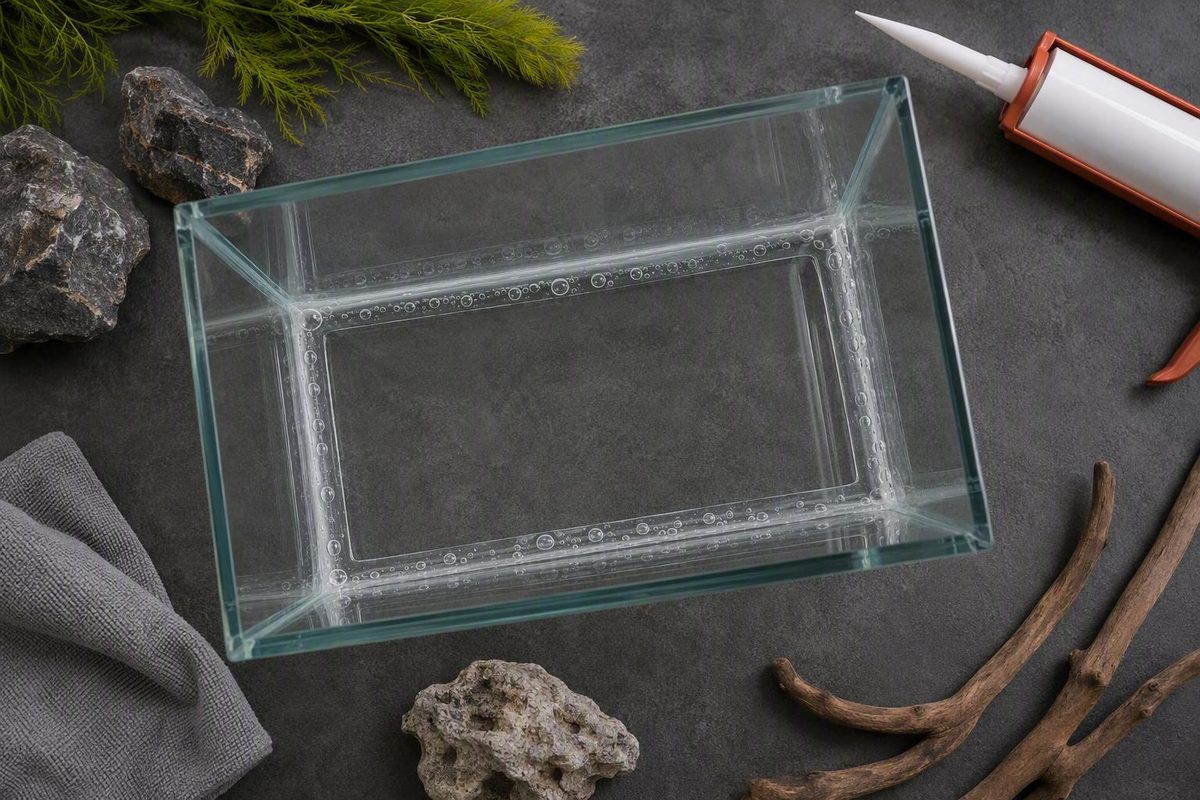
The short answer: a bubble is a reason to inspect, not a safety verdict
Air bubbles in aquarium silicone do not automatically mean that the tank is about to leak or separate. They also do not prove that the seam is sound.
Some aquarium owners report tanks remaining leak-free for years despite visible inclusions. Others describe pockets that appeared to enlarge, merge, accompany peeling, or spread across a joint and therefore chose replacement. A discussion involving a used tank with an uncertain history contained both kinds of reports, illustrating why anecdotes cannot establish whether another aquarium is safe in this conflicting hobbyist discussion of bubbled seams.
The supplied evidence does not establish any universal rule such as:
- Bubbles below a particular diameter are safe.
- A certain number of bubbles is acceptable.
- A specified percentage of visible contact is sufficient.
- A bubble-free interior bead proves that the joint between the panes is sound.
- A tank that passes a short leak test is certified for long-term use.
Bubble size is worth recording, but it is not a stand-alone verdict. More useful questions are:
- Where is the mark? Is it in the exposed interior bead or apparently between adjacent panes?
- How is it distributed? Is it isolated, clustered, connected, widespread, or apparently spanning the joint?
- Is it changing? Is it enlarging, merging, appearing in new places, or changing at the same fill level?
- What surrounds it? Are there lifted edges, cuts, peeling, moisture, leakage, or visible displacement?
- What is the tank’s history? Is it new and returnable, used with reliable records, or used with no baseline?
- What would failure mean? Could water affect livestock, flooring, occupied rooms, or electrical equipment?
Tank volume does not diagnose a seam. A questionable mark on a large aquarium is not inherently more defective than a similar mark on a small aquarium. The consequences of being wrong, however, may be much greater when more water, heavier components, difficult livestock relocation, and a complicated move are involved.
Scope and evidence limit: This article cannot certify an aquarium from a description or photograph. It provides a conservative triage framework for documenting the condition and choosing among monitoring, written manufacturer review, return, replacement, interior resealing, or professional structural rebuilding. Most available examples are forum reports and practical repair articles—not controlled structural tests, engineering calculations, or published acceptance criteria.
That limitation is important. In one reported case involving a 180-gallon aquarium, participants strongly disagreed about a heavily voided glass-to-glass seam, and the discussion ended without a confirmed repair or long-term outcome in the MonsterFishKeepers case.
Locate the bubbles: interior bead versus glass-to-glass bond
Before deciding what a bubble might mean, identify which silicone region appears to contain it. Aquarium owners often call both regions “the seal,” but practical repair literature treats them as different parts of the job.
The following diagram is a simplified explanatory cross-section, not an engineering drawing. Construction details vary among rimmed, rimless, braced, and custom tanks.
Simplified top view of an aquarium corner

                       INSIDE THE TANK
                             ↓

                Glass pane B
                     │
                     │  B. Thin inter-panel silicone line
                     │     between adjacent glass surfaces
                     │
Glass pane A ────────┘
                   ╲
                    ╲  A. Exposed interior fillet
                     ╲    visible inside the corner


A. INTERIOR FILLET
   The exposed triangular or curved bead visible inside the tank.

B. GLASS-TO-GLASS BOND
   The thin silicone line between the adjoining glass surfaces.
A self-published aquarium repair article distinguishes resealing, where the exposed interior bead is replaced without separating the panes, from rebuilding, where the aquarium is disassembled and the glass-to-glass joints are prepared and bonded again in its discussion of resealing versus rebuilding.
Use these terms consistently:
- Interior reseal: Removal and replacement of the exposed corner bead without separating the panes.
- Structural rebuild: Separation of the panels, preparation of the intended bond surfaces, alignment, and rebonding.
These definitions identify the scope of the work. They do not establish whether a particular aquarium requires repair.
Bubbles limited to the interior fillet
A mark may be enclosed within the thick, visible bead inside a corner. It may also appear beneath an edge that has begun to lift.
This condition can still matter. The exposed bead may be cut, peeling, worn, or associated with a leak. But a mark confined to that bead is not, by appearance alone, proof that adhesion between the panes has been lost.
The practical next question is therefore not merely “Is there a bubble?” It is “Can the mark be located confidently, and what condition is the surrounding silicone in?”
Bubbles in the glass-to-glass line
A pocket that appears directly between adjacent panes warrants more conservative treatment because it may interrupt apparent contact in the inter-panel joint. Forum discussions and practical repair articles generally treat broad voids, connected channels, or apparent separation there as more concerning than marks confined to the exposed bead.
That is a practical distinction, not a quantified engineering threshold. A photograph cannot establish:
- The pocket’s depth
- The strength of the surrounding adhesion
- The hidden condition of the rest of the joint
- The amount of bonded area required by that aquarium’s design
- Whether the visible mark is trapped air, contamination, moisture, or separation
A forum participant discussing damaged aquarium seams also cautioned that photographs were insufficient for a firm assessment in this Reef2Reef discussion.
Marks that cannot be located confidently
A tight close-up may also hide the pane geometry needed to interpret the image.
If the location is ambiguous:
- Photograph the corner from inside and outside.
- Include a wider image showing the full pane intersection.
- Use front lighting and side lighting.
- Keep the camera perpendicular to the seam where possible.
- Record whether the tank is empty, partly filled, or full.
- Ask the manufacturer to identify the seam region before discussing repair.
- If the manufacturer cannot assist, seek a builder with documented experience in comparable aquarium construction.
Do not assume that every clear or cloudy area is trapped air.
Do not press the glass, pry at an edge, cut the silicone, or insert a blade or probe into a questionable joint. One reported case involved bubble-like areas that became visible when a new aquarium was full and faded after it was partly drained, but the discussion did not establish the mechanism in the 40-breeder forum report. Record naturally occurring changes rather than deliberately loading the panes.
Classify what you can actually observe
A useful inspection separates observation from diagnosis.
“There is a translucent area approximately 12 mm long at the outer edge of the right-front vertical joint” is an observation.
“The structural silicone is failing” is a diagnosis that may not be supportable from the same image.
Organize the inspection around four attributes: location, distribution, progression, and accompanying damage.
1. Location
Record the exact seam and the apparent silicone region:
- Interior fillet
- Glass-to-glass line
- Exposed edge of the joint
- Top or bottom of a vertical seam
- Bottom seam
- Intersection of several seams
- Unknown or ambiguous location
Use consistent labels so that later photographs can be compared. For example:
- LFV: left-front vertical
- RFV: right-front vertical
- LRV: left-rear vertical
- RRV: right-rear vertical
- FB: front-bottom
These labels do not indicate severity. They simply prevent observations from being mixed up.
2. Distribution
Describe the visible pattern without turning it into a safety category:
- Isolated inclusion: One pocket separated from others by apparently continuous silicone.
- Cluster: Several pockets in a limited area.
- Connected channel: Pockets that appear to touch or form a route along the seam.
- Broad poor apparent contact: A larger cloudy or irregular area rather than a distinct bubble.
- Edge-originating mark: A line or pocket beginning at an exposed joint edge.
- Joint-spanning void: An apparent gap extending across the visible width of the joint.
- Widespread pattern: Similar marks along multiple seams.
Measure visible dimensions when possible and place a scale beside the seam without touching it. Do not use diameter alone to decide whether the tank is safe.
3. Progression
Dated, comparable observations are more informative than memory, although they still cannot measure bond strength.
Look for:
- Enlargement
- Merging of previously separate pockets
- New pockets
- A channel extending farther along the joint
- Increased visibility at the same fill level
- Apparent separation advancing from an exposed edge
- A changed relationship between silicone and glass
Keep the conditions consistent.
A defect that becomes visible only when the tank is full is worth recording and escalating, especially when it appears to be within the glass-to-glass line. It is not, by itself, proof of delamination or imminent failure.
4. Accompanying damage
Inspect the surrounding tank for observable conditions such as:
- Lifted silicone edges
- Peeling or loose sections
- Deep cuts or gouges
- Worn or missing interior silicone
- Moisture emerging from the seam
- Residue associated with suspected leakage
- An active drip or damp line
- Visible pane-to-pane separation
- Glass displacement or loss of alignment
- Visible damage to the rim or bracing
- Obvious gaps, damage, or instability at the support
Do not infer the cause from appearance alone. A photograph generally cannot prove that transport, cleaning, support, age, or repair preparation caused the condition.
In one forum case, the owner of a six-year-old 20-gallon aquarium reported drop-shaped pockets, slightly lifted silicone edges, and green growth beneath an edge. The contents and structural significance of the pockets were not established, and the owner chose replacement rather than an uncertain repair in the FishLore discussion.
Growth, merging, broad poor apparent contact, edge lifting, leakage, and an apparent joint-spanning void were repeatedly treated as reasons for greater caution in the forum evidence. They are conservative escalation triggers, not validated engineering thresholds.
Printable aquarium seam inspection checklist
AQUARIUM IDENTIFICATION

Brand: ______________________________________________
Model: ______________________________________________
Nominal volume: _____________________________________
Length × width × height: _____________________________
Approximate age/build date: __________________________
Rim or bracing type: _________________________________
Serial or production code: ___________________________

PURCHASE AND HISTORY

[ ] New and returnable
[ ] New; return status uncertain
[ ] Used with documented history
[ ] Used with unknown history

Purchase date: ______________________________________
Receipt available?  [ ] Yes  [ ] No
Applicable return/warranty documents checked? [ ] Yes [ ] No
Previous leak-free service documented? [ ] Yes [ ] No
Previous interior reseal? [ ] Yes [ ] No [ ] Unknown
Previous structural rebuild? [ ] Yes [ ] No [ ] Unknown
Recently moved? [ ] Yes [ ] No
Recently cleaned? [ ] Yes [ ] No
Recently repaired? [ ] Yes [ ] No

INSTALLATION

Stand/support type: __________________________________
Visible support gaps, twist, or damage: ______________
Floor/location: _____________________________________
Tank currently: [ ] Empty [ ] Partly filled [ ] Full
Recorded fill level: _________________________________

SEAM OBSERVATION

Seam label/location: _________________________________

Apparent region:
[ ] Interior fillet
[ ] Glass-to-glass line
[ ] Exposed joint edge
[ ] Corner intersection
[ ] Unclear

Pattern:
[ ] Isolated
[ ] Clustered
[ ] Connected
[ ] Broad poor apparent contact
[ ] Appears to span the joint
[ ] Widespread across several seams

Dimensions with scale: _______________________________
Lifted edge or peeling? [ ] Yes [ ] No
Cuts or worn silicone? [ ] Yes [ ] No
Visible glass displacement? [ ] Yes [ ] No
Moisture present? [ ] Yes [ ] No
Active leak? [ ] Yes [ ] No

MONITORING

Baseline photograph date: ____________________________
Camera position recorded? [ ] Yes [ ] No
Lighting recorded? [ ] Yes [ ] No
Scale reference included? [ ] Yes [ ] No
Wide view included? [ ] Yes [ ] No
Close-up from inside? [ ] Yes [ ] No
Close-up from outside? [ ] Yes [ ] No
Appearance changes with fill level? [ ] Yes [ ] No
Enlargement, merging, or new marks observed? _________
Dates and conditions of changes: _____________________

CONTACT AND DECISION

Seller contacted: ___________________________________
Manufacturer contacted: _____________________________
Written response received? [ ] Yes [ ] No
Builder or repair provider contacted: ________________

Current decision:
[ ] Document and monitor
[ ] Do not fill pending review
[ ] Discontinue use
[ ] Return or exchange
[ ] Replace
[ ] Interior reseal under an applicable procedure
[ ] Structural rebuild by an experienced provider
Warning signs and the conservative action matrix
The following matrix is a triage tool based largely on recurring patterns in hobbyist reports. It does not certify a seam or predict whether a tank will separate.
Other observations—such as clustered pockets or fill-dependent visibility—justify escalation because uncertainty remains, not because they prove structural failure.
| Level | Observable condition | Conservative next step |
|---|---|---|
| 1: Lower apparent concern, not certified safe | Isolated marks; no known change; no leak; no peeling; and no visible evidence that the mark crosses the inter-panel joint | Establish a dated baseline, inspect the surrounding silicone and support, and check return or warranty documents |
| 2: Unresolved concern | Clustered or connected pockets; broad poor apparent contact; unknown history; fill-dependent change; ambiguous depth; or a defect apparently in the glass-to-glass line | Avoid casual reassurance and deliberate pressure testing; contact the seller or manufacturer in writing; seek review from a builder experienced with comparable construction |
| 3: Stop-use condition | Active leakage; moisture emerging from a seam; visible glass displacement; or apparent separation that is progressing | Keep people away from unstable glass, discontinue normal use, protect livestock without handling shifting panes, and obtain qualified assistance |
Level two does not mean that the aquarium will burst. Level three does not reveal exactly how or when a failure might progress. The matrix manages consequences under uncertainty rather than forecasting an outcome.
Large tanks: probability versus consequence
A questionable seam on a large aquarium is not automatically more defective. The possible consequences are nevertheless greater because more water may be released, livestock may be harder to relocate, and the tank may be too heavy or awkward to handle without planning.
A discussion involving a used 125-gallon aquarium illustrates this distinction. Participants disagreed about the bubbles, while the owner reported receiving advice not to fill the tank and chose a cautious path. The alleged manufacturer advice was relayed secondhand and should not be treated as official or universal policy in the Aquarium Advice forum case.
Lower tolerance for unresolved uncertainty is reasonable when:
- The aquarium is in an occupied room.
- Water could reach electrical equipment.
- Flooring or rooms below are vulnerable.
- Livestock cannot be relocated promptly.
- The aquarium cannot be drained or moved safely without help.
- The glass-to-glass joint remains uncertain after documentation and review.
If leakage or visible separation is occurring
Keep the response at the level of hazard control rather than attempting an improvised structural intervention:
- Keep people away from visibly shifting or displaced glass.
- Do not enter standing water or touch equipment if water may have reached energized electrical components; contact emergency or licensed electrical help as appropriate.
- Arrange suitable temporary accommodation for livestock if this can be done without approaching unstable glass.
- Obtain qualified help with controlled water removal and handling of a large or visibly damaged aquarium.
- Do not attempt to hold a moving pane in place by hand.
- Photograph the condition only after immediate hazards are controlled.
Do not impulsively drag, lift, cut apart, or dismantle a large aquarium. A planned response should account for livestock, water, electrical equipment, lifting assistance, sharp glass, and the route through which the aquarium or its contents would be moved.
Choose the next step based on the tank’s history
The same visible mark may lead to a different practical decision depending on whether the aquarium is new, used with a credible history, or used without a reliable baseline.
New and returnable aquarium
For a new aquarium with a questionable glass-to-glass seam, return or exchange is usually the lowest-uncertainty option. That decision manages risk; it does not prove that the aquarium would otherwise fail.
In one reported case, a new 75-gallon aquarium had a long pocket where the panes met. The owner said its appearance changed when pressure was applied. Although the aquarium held water for more than two days, it was returned successfully rather than treating the test as a long-term guarantee in the Aquarium Co-Op forum case.
Before altering a new tank:
- Photograph the mark from both sides.
- Preserve the receipt, model information, packaging details, and production code.
- Ask the seller whether return or exchange is available.
- Contact the manufacturer with clear photographs and a factual description.
- Request written guidance.
- Read the applicable return and warranty documents before removing, cutting, injecting, or covering silicone.
Do not rely on forum summaries of another buyer’s warranty. Policies and documents may differ by seller, product, date, and transaction.
Used aquarium with documented history
A credible record of leak-free service is useful context, but it is not structural certification.
Record:
- How long and how recently the aquarium was in service
- Whether it was kept continuously full
- Whether leakage occurred
- Whether the seams were previously repaired
- Whether panels were ever separated
- How the aquarium was drained, transported, and stored
- Whether older photographs show the same marks
- Whether the current interior bead is cut, peeling, or worn
- Whether the rim, bracing, and support appear damaged
An isolated, unchanged, dry mark that is not clearly within the glass-to-glass line may be suitable for documented monitoring while the owner seeks tank-specific guidance. Prior service should not be used to dismiss connected voids, broad poor apparent contact, edge lifting, leakage, or visible displacement.
Used aquarium with unknown history
Uncertainty is higher when the owner cannot establish:
- The aquarium’s age
- Whether the mark is new
- Whether it has enlarged
- Whether the tank previously leaked
- Whether someone performed a partial repair
- How it was stored or transported
- Whether the glass, rim, or bracing was damaged
A seller’s statement that the aquarium was previously leak-free does not create a photographic baseline for every seam.
Where connected voids, broad poor apparent contact, deep cuts, lifted edges, leakage, or questionable glass alignment are present, the defensible options narrow toward manufacturer-assisted assessment, review by an experienced builder, or replacement. Replacement can be rational when the consequences of failure and the uncertainty of a technically demanding rebuild exceed the aquarium’s value.
Recently moved, cleaned, or repaired aquarium
Record what happened without assuming causation:
- Date and method of transport
- Whether the tank was carried empty
- How it was supported during storage
- Whether the rim, bracing, or glass was struck
- Cleaning tools used and areas cleaned
- Date and stated scope of any repair
- Whether the panes were separated
- Product used
- Preparation and cure records
- First fill date
These details may help a manufacturer or builder review the aquarium. They do not prove that movement, cleaning, uneven support, contamination, or premature filling caused a particular mark.
How to seek a useful assessment
There is no universal aquarium-builder credential established by the supplied evidence. Start by asking the tank manufacturer for a referral or authorized procedure.
If using an independent builder or repair provider, look for someone who:
- Has documented experience with the same general construction type and scale
- Will inspect more than a single close-up photograph
- Distinguishes an interior reseal from panel rebonding
- Will provide the proposed scope in writing
- Identifies the product and preparation procedure
- Uses product-specific cure requirements
- States what testing will and will not establish
- Provides written warranty terms, if any
- Does not promise safety from bubble size alone
Manufacturer-contact checklist
Provide:
- Brand, model, dimensions, and nominal volume
- Serial number, date code, or production label
- Purchase date and receipt
- New, transferred, or used status
- Rimmed, rimless, or braced construction
- Exact seam location
- Overview photographs of the entire aquarium
- Close-ups from inside and outside
- A scale reference placed beside—not pressed into—the seam
- Recorded fill level
- Whether appearance changes with fill level
- Whether moisture or leakage is present
- Whether the interior bead is cut or peeling
- Whether any repair has already been attempted
- A direct request for written use, return, inspection, or repair guidance
What leak testing and photo monitoring can—and cannot—tell you
A controlled fill can reveal that an aquarium leaks during the test. It cannot certify long-term structural integrity.
A test answers a limited question:
Did water visibly escape under these conditions during this period?
It does not directly answer:
- How strong is the remaining glass-to-glass adhesion?
- Is the visible pocket deep or superficial?
- Is the surrounding joint uniformly adhered?
- Will a connected mark progress?
- How will the joint behave during long-term service?
- Is the aquarium suitable for another installation?
Reported cases demonstrate the limitation. The questionable 75-gallon aquarium described earlier held water for more than two days before being returned. A separate new 40-breeder reportedly remained leak-free for approximately one week despite unresolved, fill-dependent marks in the glass-to-glass seams. Neither observation established a long-term structural verdict.
There is no universal leak-test duration
Do not turn a forum suggestion of several days, a week, or any other generic period into a safety standard. If the aquarium has been repaired, the selected silicone must first meet its current documented cure conditions.
If a manufacturer or experienced builder recommends a controlled fill:
- Use a location where leakage will not damage occupied rooms or valuable property.
- Keep electrical equipment away from possible water paths.
- Do not introduce livestock during an investigative test.
- Watch for moisture rather than relying only on water-level change.
- Stop the test if leakage, glass movement, or apparent advancing separation is observed.
- Do not press the panes or seams.
It does not prove that indefinite indoor use is safe.
A consistent photographic monitoring protocol
- Map the seam. Mark every observed pocket on a simple sketch.
- Fix the camera position. Record distance, height, orientation, and viewing side.
- Use consistent lighting. Repeat the same front and side lighting.
- Keep magnification consistent. Do not compare a macro image with a wide phone photograph.
- Include a scale. Place it near the seam without pressing against the glass or silicone.
- Record the fill level. Use a repeatable description such as empty, one-quarter, one-half, three-quarters, or full.
- Take a wide view. Show where the mark sits in the aquarium.
- Take close-ups from both sides. This may help distinguish the visible silicone regions.
- Label every image. Include the date, time, fill condition, and whether the tank was undisturbed.
- Preserve the original files. Cropping and enhancement can remove scale or exaggerate contrast.
A seam map helps prevent an old but previously overlooked pocket from being mistaken for a new one. Consistent images can document visible change, but they cannot measure bond strength, reveal all hidden adhesion, or identify the material inside a translucent pocket.
Repair boundaries: resealing is not the same as rebuilding
The first repair question is not “How can I remove the bubble?” It is “Which part of the seam would need to be restored?”
Interior reseal
An interior reseal replaces the exposed triangular or curved bead inside the aquarium without separating the panes.
It may be considered when:
- The exposed bead is peeling, cut, or worn.
- The problem has been identified as limited to the interior fillet.
- The glass-to-glass joint is not suspected of separation.
- A manufacturer or experienced provider supplies an applicable procedure.
An interior reseal should not be represented as recreating an inter-panel joint. If adhesion between the panes is uncertain, replacing only the exposed bead does not resolve that uncertainty.
Structural rebuild
A structural rebuild involves disassembling the aquarium, removing old material from the intended bond surfaces, preparing those surfaces, aligning the panes, rebonding the tank, curing the selected product, and testing before use.
This is substantially more demanding than replacing an exposed bead. It can involve:
- Heavy or unstable glass
- Sharp edges
- Exact alignment
- Surface contamination control
- Ventilation requirements
- Product-specific application conditions
- Incomplete curing
- A poorly formed replacement joint
The self-published Aquarium Science article states that new silicone should not be relied on to bond to old silicone within a structural joint and calls for removal of old material from the intended bond surfaces during rebuilding. That is practical hobbyist guidance rather than a published engineering standard, but it supports treating panel rebonding as a different scope from replacing an interior bead.
Unsupported shortcuts
The supplied evidence does not validate the following as reliable structural repairs:
- Injecting silicone into a cured void
- Smearing new silicone over old cured silicone
- Cutting into a loaded structural seam
- Removing only the visible center of an inter-panel void
- Covering a questionable joint with another bead
- Adding improvised glass strips or braces
- Assuming that a watertight surface patch restored inter-panel adhesion
There is conflicting practical advice. One sealant manufacturer’s article suggests removing and replacing a cured affected section, but it does not clearly separate defects in the exposed fillet from those inside the glass-to-glass line in its bubble-removal guidance. That local-repair suggestion should not be treated as universal permission to cut out any visible pocket.
For structural work—especially on a large, rimless, unusually braced, or custom aquarium—seek a written manufacturer procedure or a provider with documented experience in comparable construction. If no defensible repair scope can be established, replacement may involve less uncertainty than an improvised rebuild.
Preventing trapped air during aquarium silicone application
Application guidance explains how practical sources attempt to reduce defects during construction or a properly defined repair. It does not prove that an existing bubbled seam is safe.
Prepare the intended bond surfaces
For surfaces intended to form a new bond:
- Follow the selected procedure for removing cured silicone and residue.
- Keep the glass clean and dry.
- Prevent dust, oils, fingerprints, lint, and loose debris from entering the joint.
- Dry-fit the assembly and plan support before applying silicone.
- Prepare tools and temporary supports before beginning.
Removing an exposed interior fillet is not the same as preparing the surfaces between two panes. If the panels remain assembled, the inter-panel surfaces have not been prepared as they would be during a complete rebuild.
Choose silicone from current documentation
Do not assume that every cartridge labeled “100% silicone” is suitable for aquarium fabrication.
Use current manufacturer documentation to determine whether a product supports the intended role, such as aquarium fabrication or continuous water immersion. A product intended for a nonstructural household seal should not be assumed to serve as an inter-panel aquarium adhesive.
Packaging, formulations, and online recommendations can change. Use the current technical data and application instructions for the exact product rather than an old forum post or an unidentified leftover cartridge.
Apply a continuous bead
Recurring practical guidance includes:
- Apply a continuous bead where the procedure requires continuity.
- Maintain steady dispensing pressure.
- Keep the nozzle close to the joint.
- Avoid unnecessary stops and starts.
- Use enough material to fill the intended joint.
- Plan transitions and corners before starting.
A practical aquarium-repair guide similarly recommends clean, dry preparation, removal of old residue, a continuous bead, and keeping the nozzle close to the seam to reduce trapped air in the Select Aquatics application guide. Its repair methods and waiting periods are experience-based rather than universal product requirements.
Tool without overworking
When a defined procedure calls for forming an interior fillet:
- Form a fully filled, continuous bead.
- Use a consistent direction and pressure.
- Avoid repeatedly leaving and re-entering the wet silicone.
- Keep contamination out of the bead.
- Inspect corners and transitions before the surface skins.
The objective is a continuous, filled fillet rather than a surface that merely looks smooth.
One commercial article says colder silicone is thicker and more prone to trapping air. Treat that as manufacturer-authored application guidance without cited testing, not as a universal temperature rule. The selected product’s documented application range should control.
Address wet defects under the applicable procedure
If a void or discontinuity is noticed while the silicone is still wet, follow the product instructions and the applicable build procedure. Correcting a wet application before cure is different from allowing an uncertain structural joint to harden and then attempting to inject or cover it.
Make curing product-specific
Cure conditions may depend on:
- Silicone formulation
- Joint and bead dimensions
- Temperature
- Humidity
- Air exposure
- Substrate condition
- Manufacturer-defined cure depth
- The aquarium design and application
Generic 24-, 48-, or 72-hour recommendations are not universal. Follow the current technical documentation for the exact product and application.
Leak testing should begin only after the documented cure conditions have been met. Livestock should not be introduced merely because the surface feels dry or because a generic waiting period has elapsed.
Frequently asked questions
Are a few tiny air bubbles in aquarium silicone safe?
A few isolated marks with no leakage, peeling, known growth, or clear involvement of the glass-to-glass line present lower apparent concern than connected or advancing voids. They still cannot be certified safe by size alone.
Record the location, determine which silicone region appears to contain them, and check whether the aquarium is new and returnable. Escalate if the marks are in the inter-panel line, widespread, changing, or accompanied by damage.
Why do bubble-like marks sometimes appear when the aquarium is full and disappear after draining?
Fill-dependent visibility has been reported, but its cause is not established by the supplied evidence. It may involve an optical change or another change at the interface, but photographs cannot reliably identify the mechanism.
Document the condition from the same position at recorded fill levels. Do not press the panes to reproduce it. Ask the manufacturer or an experienced builder to review the pattern.
Can a two-day or one-week leak test prove that the aquarium will remain safe?
No. It can show that no visible leak occurred during that period under those conditions. It cannot measure remaining adhesion or certify long-term seam integrity.
A controlled fill may be one observation after all applicable cure requirements have been met and qualified guidance supports testing. Passing it does not verify an otherwise questionable glass-to-glass joint.
Can I patch a bubble by applying new silicone over the existing seam?
Do not treat that as a validated structural repair. Covering a visible mark may not restore uncertain adhesion between the panes.
First determine whether the problem is in the exposed interior fillet or the glass-to-glass joint. An interior reseal and a structural rebuild are different jobs. If inter-panel adhesion is in question, use a manufacturer-approved procedure or an experienced provider rather than injecting, smearing, or locally cutting the seam.
Should I return a new aquarium if bubbles are in the glass-to-glass seam?
Return or exchange is often the lowest-uncertainty choice when a new tank has a questionable glass-to-glass seam and remains eligible for return. That decision does not prove that the aquarium would fail.
Document the seam, preserve the receipt and identifying labels, and request written instructions from the seller or manufacturer before altering the silicone.
The conservative decision rule
Do not judge air bubbles in aquarium silicone by bubble size alone. Locate the mark, document its distribution and progression, and discontinue normal use if the tank is leaking or visibly separating.
When the glass-to-glass joint remains uncertain, prefer written manufacturer guidance, a documented assessment from someone experienced with comparable construction, return, or replacement over an improvised spot repair.
A monitored fill may reveal a present leak. An interior reseal may replace an exposed bead. Neither should be presented as proof—or repair—of uncertain adhesion between the glass panels.