
4 min read ·
Clean Rusty Painted Metal: Remove Loose Rust, Then Restore the Finish
Distinguish rust stains from failing paint, remove loose corrosion, and choose a compatible coating system before repainting—or prepare separately for bonding.
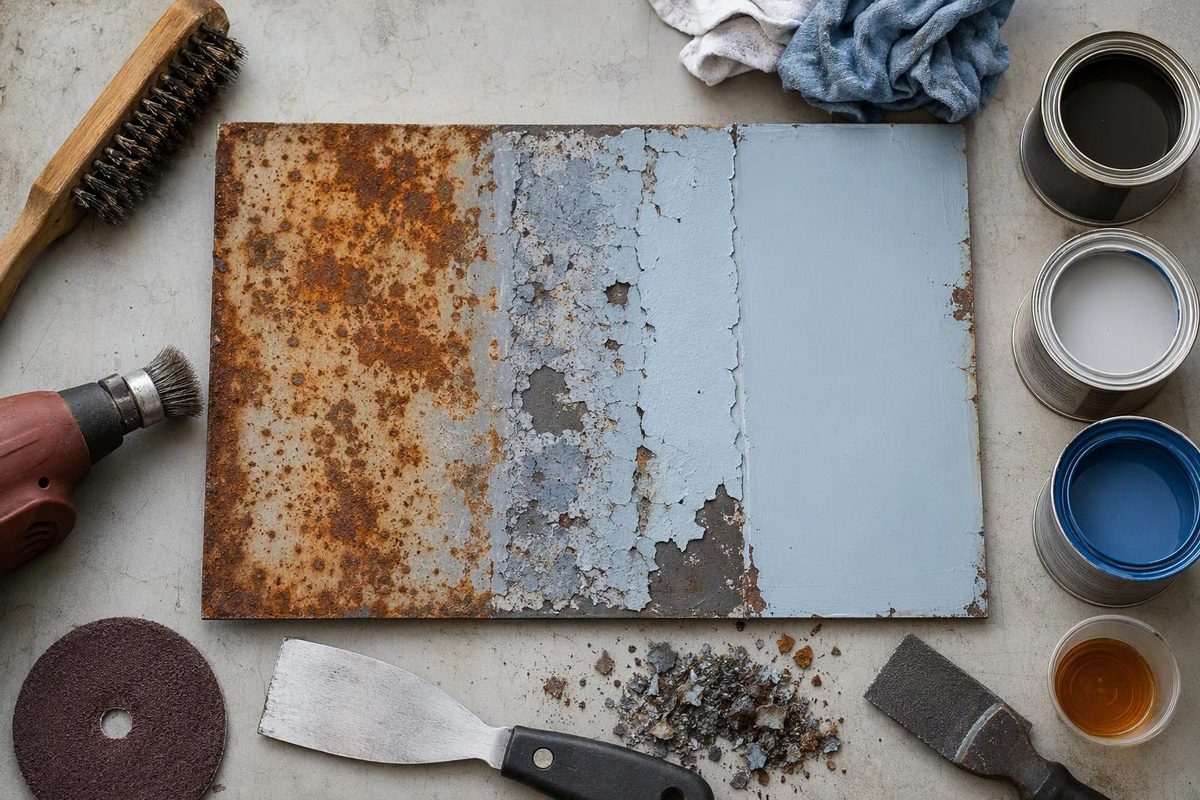
If rust is exposed through chipped or peeling paint, washing alone is not the repair. Clean off contamination, remove loose rust and failed paint, then protect the prepared area with a compatible coating system. You can preserve sound paint around a small repair, but not paint that is already lifting from the metal. Rust-Oleum’s rusty-metal primer instructions require removal of loose rust, scale and deteriorated coatings; remaining paint must be sound.
This sequence is for local surface repairs on painted iron or ordinary steel. Do not automatically apply it to galvanized steel, aluminum or specialist finishes.
Decide whether it is a stain or a coating repair
Inspect the area after gentle washing, rather than judging by its orange-brown color alone.
| What you find | Next action |
|---|---|
| Discoloration over smooth, firmly attached paint, without an exposed rusty spot | Start with finish-safe cleaning. Inspect nearby fasteners and surfaces for the source of the stain before sanding. |
| A rusty chip, rough exposed metal, or paint that flakes at its edge | Treat it as a local coating repair: remove loose material, prepare the remaining surface and recoat. |
| Widespread blistering, extensive scaling, deep pits, holes or a weakened joint | Stop treating it as a cleaning job. Have the part assessed for repair or replacement, especially if it carries a load. |
For the first case, use the paint-preserving cleaning method. Do not turn a stain into a bare-metal patch by scrubbing aggressively before you know what is underneath.
Before scraping or sanding
Check the old paint for lead risk. Scraping and sanding old coatings can release hazardous dust. In the United States, EPA recommends hiring a certified lead inspector or risk assessor to test affected surfaces, and a lead-safe certified contractor for renovation work in pre-1978 homes. Where lead is possible, resolve that risk before using the ordinary preparation steps below; a dust mask alone is not a lead-safe work plan. See EPA’s DIY lead-safe guidance.
Use eye protection and suitable gloves, collect debris, and follow the cleaner or coating’s safety data sheet for ventilation and respiratory protection.
Choose the intended coating system before final preparation so you know how much rust it requires you to remove. If the patch will be bonded rather than repainted, follow the adhesive’s preparation requirements instead; see the bonding section below.
Clean and prepare the damaged patch
- Wash first. Remove dirt, salt, grease and other contamination with a detergent suitable for the existing finish. Rinse thoroughly with fresh water and let the area dry completely. If grease remains, use a cleaner approved by the coating manufacturer rather than choosing a strong solvent by default.
- Remove loose corrosion and failed paint. On the damaged patch, use a scraper, wire brush or sandpaper as appropriate. Remove flaking rust, scale and paint that no longer holds firmly. Do not stop simply because the orange color has disappeared beneath loose paint.
- Prepare the surrounding sound paint. Smooth the transition around the patch. If the replacement coating requires it, lightly sand hard or glossy paint to provide a surface profile. Remove preparation dust and leave the surface clean and dry.
These steps follow the cleaning, steel preparation and previously coated surface requirements in Rust-Oleum’s primer guidance. The endpoint depends on the coating you choose: some systems accept firmly attached residual rust; others require more thorough removal.
Choose a treatment—not just a stronger cleaner
Primer route: Select a primer documented for the actual metal and its prepared condition, then apply a compatible finish coat. Test compatibility with remaining paint. For example, Stops Rust Rusty Metal Primer accepts sound rusted steel after loose material is removed, but is not intended for galvanized steel. Follow your product’s application conditions and recoat window—not another primer’s timing.
Converter route: A rust converter creates a paintable coating over suitable remaining rust; it does not wash the rust away or restore the original paint. Loose scale and failed paint still need removal. Rust-Oleum’s Rust Reformer instructions specify rusted surfaces, exclude galvanized steel and say not to use it on non-rusted surfaces. Do not spread a converter over intact paint or newly cleaned bare metal unless that particular product permits it.
Dissolver route: Do not assume a chemical rust remover is safe for neighboring paint. Henkel’s 2018 Naval Jelly technical sheet, for example, explicitly says it removes paint and should not be used on painted surfaces. Check the current product instructions for substrate compatibility, dwell time, rinsing and subsequent coating requirements.
If the next step is gluing
Do not treat a newly primed or converted patch as automatically ready for adhesive. A paint-repair coating is not necessarily an approved adhesive pretreatment.
3M’s structural-adhesive preparation bulletin calls for removal of grease and surface deposits such as rust, and warns that bonding over paint can leave joint strength limited by the paint’s adhesion to the metal. Prepare the bond area to the adhesive manufacturer’s requirements; where paint remains, its attachment and adhesive compatibility both matter. For adhesive selection after preparation, see the metal epoxy guide.