
22 min read ·
Choose the Right Epoxy for the Metal Joint—and Make the Bond Work
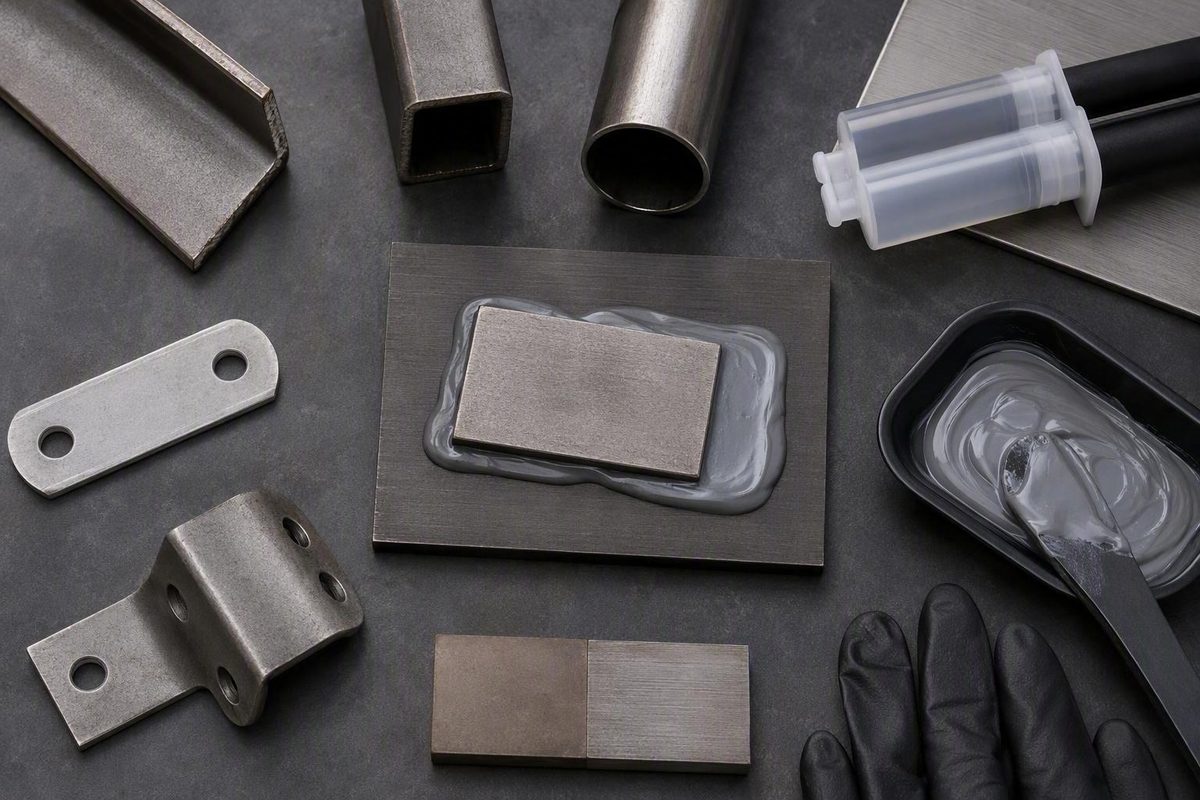
Searching for an epoxy adhesive for metal produces plenty of products described as “maximum strength,” “waterproof,” or simply “metal epoxy.” Those labels do not establish whether an adhesive will work in a particular joint.
A reliable bond depends on the complete assembly: both substrates, every coating or oxide layer, bonding area, load direction, gap, orientation, vibration, exposure, service temperature, assembly time, and cure conditions. Application technique then determines whether the selected formulation can deliver its stated performance.
This guide explains how to choose, prepare, mix, apply, cure, and troubleshoot a metal-bonding epoxy. It is not a universal product ranking, and no single strength figure proves suitability for every repair.
Is epoxy the right adhesive for this metal joint?
Two-part epoxy contains separate resin and hardener components. Mixing them starts the curing reaction. Most two-part products described for repair and general assembly cure at room temperature, although permitted heat may accelerate some formulations.
One-part epoxy is supplied premixed. Most products in that category require heat to cure and are commonly associated with controlled production processes rather than ordinary field repairs. The substrate’s heat tolerance, available equipment, open time, and production method all affect the choice between one- and two-part systems. Permabond explains these practical distinctions between one- and two-part epoxies.
Epoxy is worth considering when a joint has:
- A reasonably broad bonding area
- A gap within the formulation’s qualified range
- Dissimilar substrates, such as metal to wood, ceramic, composite, or a compatible plastic
- Several parts that require positioning time
- Loads that can be spread across an overlap
- A need for non-sag, toughened, flexible, gap-filling, or machinable material
That does not mean every epoxy provides all these characteristics. Epoxy is a chemistry family, not a standardized performance class.
Epoxy versus super glue
Cyanoacrylate, commonly called super glue, can suit a small, flat, close-fitting, light-duty repair where rapid handling is important. It requires no resin-to-hardener mixing and usually offers little positioning time.
Epoxy is commonly recommended for larger bonding areas, imperfect fits within a qualified gap, and more highly stressed joints because formulations are available with different viscosities, cure speeds, working times, and toughness. Loctite’s consumer guidance, for example, suggests super glue for small, flat metal repairs and epoxy for larger or heavier surfaces. That is product-oriented application guidance, not an independent head-to-head test. See Loctite’s comparison and metal-bonding procedure.
Epoxy versus MMA
Not every two-component structural adhesive displayed beside epoxy is an epoxy. Methyl methacrylate adhesive, or MMA, is an acrylic resin-and-hardener system with its own preparation, odor, working-time, gap, and performance characteristics.
Retail catalogs may place the two chemistries in one category. One catalog, for example, includes epoxy and MMA products together while also listing epoxy formulations with different ratios, work lives, and toughness descriptions. The mixed epoxy-and-MMA catalog illustrates why chemistry and technical data must be checked product by product.
Epoxy versus welding, brazing, bolts, or rivets
No method is automatically superior. The consequences of failure and the available evidence should decide.
Do not treat a general-purpose epoxy repair as an automatic substitute for engineered joining in:
- Pressure-containing equipment
- Suspended or overhead components
- Vehicle steering, braking, restraint, or suspension parts
- Load-bearing building elements
- Heavily loaded machinery
- High-temperature assemblies
- Continuously immersed joints
- Repairs whose failure could cause injury, leakage, major damage, or loss of structural support
These applications require validated data for the actual substrates, preparation, geometry, loads, environment, and cure process. Obtain professional or engineering review, and use welding, brazing, mechanical fastening, or a combined joint when the evidence for adhesive-only construction is insufficient.
Choose by joint requirements, not a “best metal epoxy” label
Start with the application rather than the package claim. Before comparing products, document the joint requirements.
Application-first selection checklist
-
What are both substrates? Record the alloy if known—not merely “metal.” The joint might be steel-to-steel, aluminum-to-stainless, brass-to-ceramic, or metal-to-plastic.
-
What is on each substrate? Identify paint, powder coating, plating, galvanizing, anodizing, conversion coatings, oil, scale, rust, tarnish, or old adhesive.
-
What is the joint geometry and area? Note whether it is an overlap, butt joint, flange, insert, inside corner, patch, or irregular break. Measure the available bonding area.
-
How will the load act? Distinguish tension, compression, shear, peel, cleavage, bending, and combinations. Include static, impact, and cyclic loads where relevant.
-
How large is the gap? Separate a close-fitting joint from an irregular repair. Check the product’s qualified gap rather than assuming every thick epoxy is suitable for gap filling.
-
What is the assembly orientation? A fluid adhesive may drain from a vertical or overhead bond line before it sets.
-
Will the joint experience movement? Record expected impact, vibration, shock, or differential movement between dissimilar materials.
-
What will reach the bond? Consider humidity, rain, immersion, salt, cleaning agents, oils, fuels, solvents, and process chemicals. Concentration, temperature, and exposure duration can matter.
-
What temperatures will occur? Include application temperature, normal service temperature, brief peaks, thermal cycling, and the heat tolerance of both substrates.
-
How much assembly and cure time is available? Allow for dispensing, mixing, spreading, positioning, fastening, inspection, fixture time, and full cure—not only the advertised set time.
Match formulation features to the problem
- Non-sag or thixotropic epoxy: A candidate for vertical placement and joints where a fluid adhesive would drain from the gap. Non-sag behavior during assembly does not prove that a cured overhead joint is safe.
- Gap-filling epoxy: Intended to bridge imperfect fits within a stated range. Verify the qualified maximum gap and test conditions.
- Toughened or flexible epoxy: Worth evaluating for vibration, shock, impact, or dissimilar materials that move differently. Greater flexibility is not automatically beneficial for every joint.
- Metal-filled compound: Useful for rebuilding, patching, shaping, or machining certain damaged components. Metal filler does not establish structural capacity.
- Long-work-life epoxy: Helpful for large areas, complicated alignment, hand mixing, or multiple fasteners. The trade-off is a longer wait before handling or loading.
- Fast-curing epoxy: Useful when throughput matters, provided there is still enough time to mix, wet the surfaces, assemble, and restrain the joint correctly.
Published products illustrate how much formulations differ. Some use equal proportions by weight and volume, another specifies equal proportions by weight, and one retailer lists a toughened epoxy at 2:1. Their working and cure times also vary. The product-specific figures and citations appear in the comparison table below; none should be generalized to epoxy as a category.
Choose packaging that supports process control
Dual cartridges and syringes dispense both components in a fixed volume ratio. With the correct static nozzle, they can simplify repeated small assemblies. Trade-offs include nozzle waste, limited control over very small output, and the need to confirm that both chambers are dispensing.
Hand-mixed kits suit prototypes, repairs, and low-volume work. They permit flexible batch sizes but make the user responsible for accurate measurement and complete mixing.
Pouches can provide a premeasured batch, although the full contents may need to be mixed and used within the stated pot life.
Bulk and meter-mix systems suit production volumes but require compatible equipment, process checks, and maintenance.
Read the technical data sheet before buying
Look for:
- Named compatible substrates and excluded surfaces
- Required preparation and primer
- Mix ratio and whether it is by weight or by volume
- Pot life or working life at a stated temperature and batch size
- Open and assembly time
- Fixture, handling, or clamp time
- Full cure and any required post-cure
- Viscosity, non-sag behavior, and permitted orientation
- Qualified gap or bond-line thickness
- Service-temperature limits
- Test method, substrate, preparation, cure schedule, and test environment
- Relevant water, chemical, weathering, fatigue, immersion, or thermal-cycle data
- Storage conditions and shelf life
- Safety and disposal requirements in the safety data sheet
A 1:1 ratio is not universal. Even if a product uses 1:1 by volume, it cannot automatically be mixed 1:1 by weight because the resin and hardener may have different densities.
Treat words such as waterproof, weather-resistant, maximum strength, and high performance as manufacturer or seller descriptions unless disclosed tests resemble the proposed use. A label alone does not establish long-term performance in saltwater, fuel, outdoor weather, continuous immersion, or repeated temperature cycling.
Check the metal and every surface layer before bonding
If that layer is contaminated, incompatible, weak, or poorly attached, the complete joint may fail even if the epoxy adheres to it.
Use the following table as a practical starting point, then follow the selected product’s instructions.
| Substrate condition | What the epoxy initially meets | Practical approach |
|---|---|---|
| Bare steel | Steel, rapidly forming oxide, and possible shop contamination | Remove oil and contamination, abrade where permitted, clear the residue, clean again, dry, and bond promptly |
| Rusty steel | Rust, scale, residual coating, and possibly exposed steel | Remove loose and unsound corrosion; do not treat friable rust as a dependable bonding surface |
| Stainless steel | Passive oxide plus possible fabrication oils | Clean thoroughly, use the specified abrasion or pretreatment, avoid fingerprints, and bond promptly |
| Aluminum | Native oxide rather than pristine aluminum | Follow aluminum-specific preparation and primer guidance; test when the alloy or finish is uncertain |
| Anodized aluminum | An engineered anodic layer, possibly sealed or dyed | Confirm formulation-specific compatibility rather than treating it as bare aluminum |
| Galvanized steel | Zinc or a zinc-based surface layer | Confirm that the epoxy and preparation are suitable for galvanized material; inspect whether failure occurs at the coating interface |
| Copper or brass | Oxide, tarnish, oil, and the base alloy | Remove contamination and unsound tarnish by an approved method; confirm product compatibility |
| Painted or plated metal | Paint, powder coating, or plating | Determine whether the finish may remain and whether its adhesion is adequate; strip unsound layers and test uncertain systems |
A safe default preparation sequence
Unless the selected product specifies another validated process:
- Remove loose paint, rust, corrosion products, scale, dirt, old adhesive, grease, and oil.
- Abrade the bonding area where the adhesive and substrate instructions permit.
- Remove all abrasive dust and debris.
- Clean again using a method compatible with the adhesive, metal, coating, and workplace.
- Let both surfaces dry completely.
- Protect the prepared areas from dust, condensation, and handling.
- Bond promptly.
Clean gloves help prevent fingerprint oil from recontaminating prepared metal. Freshly prepared steel may also begin oxidizing quickly, so avoid unnecessary delay. Smooth-On’s preparation guide emphasizes degreasing, abrasion, re-cleaning, clean handling, and prompt bonding.
Do not adopt one universal sandpaper grit. Supplier recommendations vary because alloys, finishes, adhesives, and production processes differ. The selected adhesive’s current technical data and substrate instructions should control.
Special surfaces require product-specific confirmation
Anodized, galvanized, painted, powder-coated, and plated metals cannot be classified as universally bondable or unbondable. AeroMarine, for example, states that its 300/11 system does not work with anodized metal. That is a limitation of the named system, not evidence that every epoxy fails on every anodized surface. AeroMarine provides that product-specific limitation with its preparation and mixing instructions.
For an unknown alloy, coating, plating, or finish, prepare a representative test coupon using the proposed process. Cure and condition it as the real assembly would be conditioned, then inspect the apparent failure location:
- Separation at the adhesive-to-surface interface: investigate compatibility, contamination, and preparation.
- Coating attached to epoxy but detached from metal: the finish-to-metal interface may have limited the joint.
- Fracture through cured adhesive: investigate geometry, load, gap, cure, and formulation properties.
- Substrate damage: the substrate may be weaker than the bonded region in that specimen, but this does not qualify every joint configuration.
Visual inspection is useful for directing an investigation, but it may not conclusively identify the failure mechanism.
Industrial metal bonding sometimes uses specialized chemical or electrolytic pretreatments. Acid etches, dichromates, hydrofluoric acid, trichloroethylene, and similar materials require specialist process control, worker protection, ventilation, environmental controls, and compliant disposal. Do not improvise these processes from brief online instructions.
Design a joint that does not ask epoxy to resist peel
As a general design principle, joint performance depends on three elements working together:
- Appropriate properties in the cured adhesive
- Adhesion to both prepared surfaces
- Enough bonded area and suitable load transfer
A stronger adhesive cannot reliably compensate for unsuitable geometry.
Common joint shapes
Lap or overlap joint
Metal A  =====================
                 [ EPOXY ]
Metal B          =====================
An overlap spreads load across a bonded area. It is often more favorable than joining two thin edges directly, although offset loading can still bend the parts and concentrate stress near the ends.
Butt joint
Metal A =======| EPOXY |======= Metal B
A butt joint may provide little bonding area and may be sensitive to bending or edge opening. Where practical, an overlap plate, sleeve, scarf, or suitable mechanical reinforcement can provide a more favorable load path.
Inside corner with a fillet
Metal A  |
         |)
         |)  Epoxy fillet
=========|================ Metal B
When the formulation and joint design permit it, a smooth epoxy fillet can enlarge the bonded area and brace an inside corner.
Peel- or cleavage-prone loading
Force ↑
Metal A  =================
             [ EPOXY ]
Metal B  =================
                         ↓ Force
Where practical, arrange the joint so the load travels across a broad overlap instead of prying an edge open.
These are general design considerations, not numerical design rules. Consequential joints require application-specific analysis and validation. WEST SYSTEM’s bonding guidance discusses joint area, fillets, fit, clamping, and epoxy-starved joints.
Fit the pieces before mixing
Dry-fit the assembly and confirm that:
- The parts reach their final position without being forced
- Clamps can be installed without blocking alignment
- The intended gap is within the adhesive’s capability
- Squeeze-out has somewhere safe to go
- Assembly can be completed within the working time
- Fixtures will prevent sliding or rotation
Do not assume “thinner is always stronger,” and do not assume that a thick mass is automatically better. Some products are intended for controlled thin bond lines; others are qualified for larger gaps. Preserve enough adhesive to wet both surfaces and fill the intended space.
An epoxy-starved joint forms when too much adhesive is squeezed out or absorbed, leaving inadequate material at the interface. Excessive clamp pressure can contribute to this. Too little restraint creates a different problem: parts may shift, float, rotate, or open before fixture strength develops.
For porous dissimilar substrates, some epoxy systems recommend a two-step procedure: wet the porous surface with unthickened resin-hardener mixture, then add properly thickened epoxy before assembly. This is intended to improve penetration and reduce resin starvation. It is not a universal requirement for metal adhesives; use it only when the selected system supports the method.
Generic waterproof wording is not sufficient evidence for a durable dissimilar-metal joint.
Prepare, mix, apply, and clamp the epoxy
Good application is a controlled sequence, not a race that begins after the components have been dispensed.
Before opening the package
- Read the current technical data sheet and safety data sheet.
- Confirm that the product is intended for both substrates and the service environment.
- Check shelf life, storage history, and component condition.
- Verify the ratio and whether it is by weight or volume.
- Confirm workspace and component temperatures.
- Dry-fit and mark the final position.
- Prepare clamps, weights, fixtures, shims, mixing tools, timers, and cleanup materials.
- Protect nearby surfaces from drips and squeeze-out.
- Plan a batch size that can be applied within the stated working time.
Use suitable gloves and safety glasses when handling two-component epoxy. HumiSeal’s application guidance lists disposable gloves and safety glasses among the basic equipment.
Provide ventilation consistent with the product instructions and working conditions. Loctite’s metal-bonding procedure advises gloves and ventilation. The product safety data sheet controls any additional requirements, including respiratory protection, first aid, spill response, skin precautions, and disposal.
Step-by-step workflow
-
Prepare both surfaces. Remove unsound layers and contamination, abrade where permitted, clear the residue, clean again, and dry completely.
-
Protect the prepared areas. Wear clean gloves and do not touch the bonding faces.
-
Measure the exact ratio. Follow the specified basis. Use an appropriate scale for a weight ratio, suitable graduated measures for a volume ratio, or the designated cartridge system.
-
Mix thoroughly. Fold and stir while scraping the sides and bottom of the container. Avoid vigorous whipping, which can introduce unnecessary air. Never copy a mixing time from another epoxy.
-
Verify cartridge output. Confirm that both components dispense before relying on the static nozzle. Use the correct nozzle and discard initial output if the instructions require it.
-
Apply the specified bond line. Cover the intended area evenly. Work the adhesive onto the surfaces as directed and avoid trapping pockets of air.
-
Join within the working time. Bring the pieces together smoothly, move them into final alignment, and install the prepared restraint.
-
Clamp without starving the joint. Use enough force to maintain contact, gap, and alignment—not enough to empty the joint. Slight, reasonably uniform squeeze-out may indicate contact, but it is not a substitute for a controlled process.
-
Manage squeeze-out appropriately. Remove or shape uncured material only by a method compatible with the adhesive, metal, coating, nearby materials, and workplace controls.
-
Prevent movement. Keep the assembly fixed until the specified fixture or clamp stage has passed. Do not test the bond prematurely by twisting or flexing it.
Read cure times and temperature ratings correctly
Adhesive timing terms describe different milestones. Do not substitute one for another.
| Term | Practical meaning |
|---|---|
| Pot life | Time a stated quantity of mixed adhesive remains usable in its container under stated conditions |
| Open or working time | Time available to spread, join, and adjust the parts; supplier definitions may differ |
| Set or fixture time | Point at which the assembly can remain positioned under stated conditions without the original fixture |
| Handling strength | Enough strength for limited handling, not necessarily the design load |
| Clamp time | Minimum period the specified restraint must remain |
| Full cure | Manufacturer’s stated cure endpoint under the specified schedule |
| Post-cure | Additional controlled heat or time required or recommended to develop stated properties |
Keep the assembly unloaded through the required schedule, especially when it will experience peel, sustained stress, vibration, chemicals, or temperature extremes.
Published schedules vary substantially. SilverTip MetlWeld lists a three-hour working time and three-day full cure at 70°F. System Three reports those temperature-specific figures for MetlWeld.
Metal-Bond 24 lists a 60-minute pot life and cure schedules of 24 hours at 25°C or 4–6 hours at 65°C. Atom Adhesives reports those product-specific conditions.
AeroMarine advises waiting at least 24 hours before using its 300/11 system and seven days for its stated high-stress, full-strength condition. AeroMarine supplies that schedule for the named system.
Temperature changes the process
Colder conditions generally slow epoxy curing.
Reaction behavior can also differ between a mixing cup and a thin bond line. A larger mixed mass may retain more reaction heat and advance faster, while a thin spread may cure more slowly under otherwise similar conditions. Pot-life data therefore need a stated temperature and batch condition; they are not a universal countdown for every joint.
Service temperature is not retained strength
Ask:
- Which substrate and preparation were tested?
- Was exposure continuous or brief?
- Was the joint loaded while hot or cold?
- How much strength remained?
- Was thermal cycling included?
- Did the two substrates expand at different rates?
Likewise, waterproof or chemical resistant does not establish long-term durability in outdoor weather, continuous immersion, saltwater, fuel, solvents, or repeated hot-cold cycles. Seek test conditions that resemble the intended service.
For consequential or repeatable work, record the product lot, ambient and component temperatures, batch size, mix time, assembly time, clamp time, cure conditions, and earliest permitted loading time. Such records make process control and troubleshooting more reliable than memory.
Compare published product data without overreading it
The following is a manufacturer- or seller-reported comparison, not an independent ranking. The data are not normalized by test method, preparation, package volume, or price.
| Product | Reported proportioning and cure data | Reported characteristics | Important limitation |
|---|---|---|---|
| SilverTip MetlWeld | 1:1 by weight and volume; three-hour working time at 70°F; three-day full cure at 70°F | Non-sag, gap filling, waterproof, interior/exterior use, and machinable after full cure | The cited product page supplies no numerical strength or temperature result |
| Metal-Bond 24 | 100:100 by weight; 60-minute pot life; 24-hour cure at 25°C or 4–6 hours at 65°C | Reported operating range of -60°C to 163°C; reported aluminum-to-aluminum lap shear of 2,900 psi | The source does not identify the test standard, specimen preparation, environment, or uncertainty for the lap-shear result |
| AeroMarine 300/11 | Equal volumes; mix for 3–5 minutes, transfer to a clean cup, then mix for another 2–3 minutes; at least 24 hours before use; seven days for the stated high-stress full-strength condition | Seller presents it for metal bonding and specifies a multi-stage mixing method | Seller states that this system does not work with anodized metal |
| MetalFix P | One-hour pot life; the cited page does not state the temperature or batch conditions and does not supply a mix ratio or cure schedule | Aluminum-filled compound marketed as paintable and capable of drilling, tapping, sanding, and machining after cure | Post-cure workability does not establish load-bearing suitability |
The first three rows are supported by the product-specific citations in the preceding cure section. The MetalFix P seller describes the product as aluminum-filled and machinable after cure, but provides no bond-strength value, load rating, or stated conditions for its one-hour pot life. See the MetalFix P product page.
The reported Metal-Bond 24 value requires particular caution. The seller reports 2,900 psi aluminum-to-aluminum lap shear, but the page does not identify the test standard, specimen geometry, surface preparation, bond-line thickness, cure history, environmental conditioning, test temperature, sample variation, or uncertainty. It cannot be generalized to another alloy, finish, preparation, gap, joint shape, temperature, or service environment.
Do not make price the deciding specification. Package size, usable volume, nozzle waste, required dispensing equipment, shelf life after opening, batch waste, cure delay, availability, and rework risk all affect actual job cost. Prices and formulations can also change.
A more useful comparison asks: Does this product publish relevant evidence for my substrates, preparation, geometry, gap, load, environment, and cure process?
Diagnose a weak, soft, brittle, or failed metal bond
Inspect the failure before removing everything. The apparent location and condition of the failed material can help direct the investigation, although visual inspection alone may not prove the underlying mechanism.
| Symptom | Questions to investigate | Corrective direction |
|---|---|---|
| Soft or tacky adhesive | Was the ratio correct and on the right basis? Were both components dispensed? Were the cup walls and bottom scraped? Was the product properly stored and within shelf life? Was it too cold? Has the full-cure period elapsed? | Remove uncured material safely, verify product condition and ratio, improve mixing control, and cure within the specified range |
| Clean separation from metal | Was there oil, fingerprint contamination, oxide, rust, moisture, dust, or an incompatible finish? Was abrasion omitted? Was bonding delayed after preparation? | Renew the complete preparation and verify compatibility with a representative coupon |
| Fracture within hard epoxy | Was the joint loaded in peel or cleavage? Is the overlap inadequate? Was the gap outside the qualified range? Did impact, vibration, or thermal movement exceed the formulation’s capability? | Reassess geometry, bonded area, load path, and whether relevant data support a toughened formulation |
| Movement or misalignment | Was the fixture installed late, too loosely, or removed before fixture time? Did the pieces float on the adhesive? | Improve dry fitting, stops, fixtures, and clamp duration |
| Sagging from a vertical joint | Was viscosity too low? Was the gap too large? Did warm conditions reduce viscosity or working time? | Use a qualified non-sag or thixotropic product and support the bond line |
| Voids or bubbles | Was the mixture whipped? Was it applied unevenly? Did assembly trap air? | Mix gently, cover the intended area, and close the joint in a way that lets air escape |
| Excessive squeeze-out or dry interface | Was clamp pressure excessive? Was too little adhesive applied? Were the pieces forced below the intended gap? | Reduce pressure and control the bond line within the product’s qualified range |
| Failure within paint, plating, or galvanizing | Is the detached layer still attached to the epoxy? Was the finish itself poorly bonded to the base metal? | Qualify the finish as part of the joint, remove unsound layers where permitted, or use an approved preparation and primer |
Soft or tacky material
Check the ratio basis first. A 1:1-by-volume product may not be 1:1 by weight. Then investigate measurement accuracy, incomplete mixing near the cup walls or bottom, blocked cartridge output, product condition, temperature, and elapsed cure time.
Clean metal after separation
An apparently clean surface can suggest adhesion failure, although closer examination may reveal oxide or finish still attached. Investigate oil, fingerprints, moisture, corrosion, sanding debris, delayed assembly, unsuitable preparation, and product incompatibility.
Brittle or impact-related failure
A hard fracture does not necessarily mean the adhesive was defective. A short overlap, rigid butt joint, edge opening, impact, vibration, or differential thermal movement may have concentrated the load. Reconsider the joint before selecting another product solely because it advertises a larger strength number.
Failure in paint or plating
If paint or plating remains attached to the cured epoxy but has separated from the base metal, the adhesive may have bonded to the finish while the finish-to-metal interface failed.
Before trying again
Remove failed, contaminated, or partly cured material completely using methods safe for the substrate and coating. Restore the intended geometry and repeat the full preparation process. Do not assume fresh epoxy will adhere adequately to unknown residue.
Repeated failure is a reason to stop trial-and-error repair. For a consequential joint, obtain validated testing or engineering review, redesign the joint, add mechanical retention, or choose another joining method.
Frequently asked questions
What is the strongest epoxy adhesive for metal?
There is no defensible universal answer. “Strongest” depends on the substrates, preparation, geometry, bonded area, load direction, gap, cure schedule, temperature, vibration, impact, and exposure.
Compare strength values only when their test methods and conditions are relevant. An aluminum lap-shear result does not establish peel strength, fatigue life, steel performance, coated-metal adhesion, or durability after immersion. Joint design may also matter more than a headline material value.
Do I need to sand metal before applying epoxy?
Often, permitted abrasion is useful after degreasing because it removes weak surface material and creates a prepared texture. Sanding is not universally required or sufficient.
The correct process depends on the alloy, finish, plating, adhesive, and approved pretreatment. Where abrasion is permitted, remove the debris, clean again by a compatible method, dry fully, avoid fingerprints, and bond promptly. Do not rely on one universal abrasive grit.
How long does metal epoxy take to cure?
It depends on the formulation, temperature, mixed mass, and bond-line conditions. Set time, fixture time, handling strength, clamp time, and full cure are not interchangeable.
Follow the technical data sheet for the exact product and cure conditions. Keep the assembly restrained for the required clamp period and unloaded through the stated full cure.
Can epoxy bond anodized, galvanized, painted, or plated metal?
Sometimes, but compatibility and preparation are formulation-specific. The epoxy initially bonds to the anodizing, zinc layer, paint, powder coating, or plating—not directly to the base metal.
Confirm whether the selected product supports that finish and whether it requires abrasion, stripping, primer, or another approved treatment. For an uncertain finish, prepare a representative coupon and inspect where failure occurs after cure and relevant conditioning.
Should I use epoxy or super glue for metal?
Consider super glue for a small, flat, close-fitting, light-duty repair when rapid bonding matters most. Consider epoxy for a larger area, a qualified gap, dissimilar materials, more alignment time, or a more highly stressed joint.
Neither chemistry is universally suitable. For structural or safety-critical work, do not decide from a generic category comparison; require validated joint data or use an appropriate engineered joining method.
Before bonding, make one final pass through the decision:
- Identify both metals and every coating or surface layer.
- Define the load, gap, orientation, environment, and service temperature.
- Improve the geometry to increase useful bonding area and reduce edge opening.
- Choose a formulation with relevant technical data, not merely a “metal epoxy” label.
- Prepare both surfaces and protect them from recontamination.
- Measure and mix exactly as specified.
- Apply and clamp without starving the bond.
- Wait through the stated full cure before loading.
Use a representative test coupon for uncertain finishes or material combinations. Whenever failure could cause injury, major damage, pressure loss, leakage, or loss of structural support, require validated engineering data—or use welding, brazing, bolts, rivets, or another joining method with an adequate verified load path.