
5 min read ·
Choose and Apply a CA Accelerator Without Weakening the Joint
Choose a compatible CA glue accelerator, compare pre- and post-application, and avoid weak joints, plastic damage, blooming, and unsafe handling.
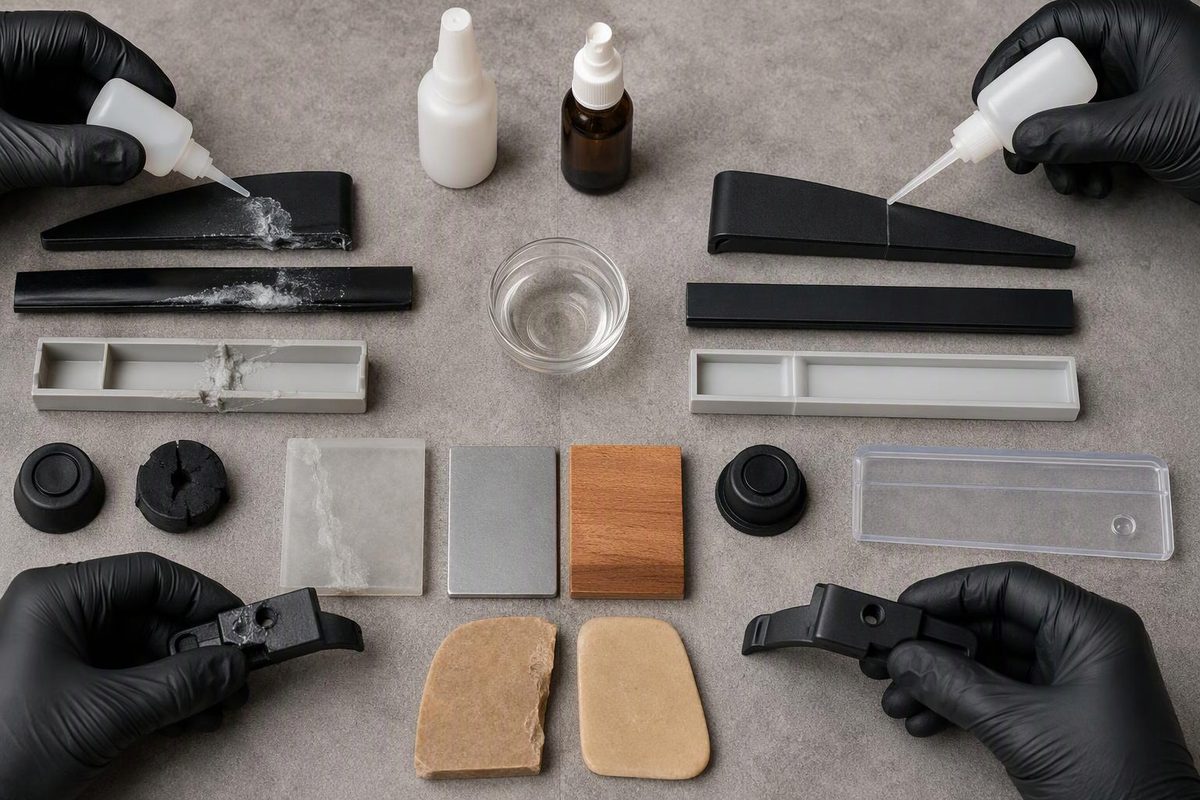
Use a purpose-made cyanoacrylate (CA) accelerator, also sold as an activator, kicker or setter. Apply it sparingly: either pre-apply it to one substrate and let the carrier evaporate, or assemble the joint and lightly post-apply it to exposed wet CA.
An accelerator helps when CA cures slowly on a porous or acidic surface, the air is dry, or exposed squeeze-out needs to set quickly. It does not make an incompatible material bondable, turn thin CA into a wide-gap adhesive or replace the manufacturer’s full-cure time.
Select the joint condition to see whether to use accelerator before or after assembly—or choose another bonding system.
CA Accelerator Decision Guide
Match the treatment to the joint rather than using accelerator automatically.
The default assumes compatible materials and a CA grade intended for them.
Showing: clean and close-fitting joint.
A close-fitting joint on compatible metal, rubber or plastic may not need help. Accelerator can remove nearly all alignment time.
Method: CA aloneCoat the specified mating surface lightly, allow the carrier to evaporate for the product’s stated time, apply CA as directed and assemble immediately.
Method: Before assemblyAssemble and hold the parts first, then use a light mist or controlled drop. Do not soak the joint or react a large pool.
Method: After assemblyUse minimal CA and consider a documented low-bloom system. Test the accelerator for haze, staining, whitening and solvent damage.
Method: Compatibility test firstPolyethylene, polypropylene and similar plastics may require a documented CA-and-primer system or a different adhesive. Accelerator is not an adhesion primer.
Method: Primer system or other adhesiveFaster curing does not make thin CA suitable for a wide gap, nor does it correct a joint that needs flexibility or impact resistance.
Method: Reassess the adhesiveSource basis: the manufacturer technical sheets and application guidance cited in the article. Product-specific drying and cure times are not interchangeable.
When a CA Accelerator Helps
CA is acid-stabilized in its container and cures in response to trace moisture and suitable surface chemistry. Low humidity and acidic materials such as wood and paper can slow that cure.
Uncured monomer vapor can also react with airborne moisture and settle near the joint as a white residue called blooming or frosting. Using the minimum necessary adhesive, curing it faster or choosing a low-bloom CA can reduce this cosmetic problem (Permabond explains CA cure and blooming).
| Joint Or Problem | Suitable Approach | Important Limit |
|---|---|---|
| Clean, close-fitting metal, rubber or compatible plastic | Try the specified CA alone first | Accelerator can leave almost no alignment time |
| Porous wood, ceramic or compatible foam | Pre-apply accelerator to one side and CA as directed | Confirm that both products list the substrate |
| Exposed squeeze-out, wire tack or small fillet | Assemble first, then lightly post-apply | Do not soak the joint or react a large CA pool |
| Clear or cosmetic part | Consider low-bloom CA and a compatible accelerator | Test for haze, staining and solvent attack |
| Polyethylene, polypropylene or another low-surface-energy plastic | Use a documented CA-and-primer system or another adhesive | Accelerator is not an adhesion primer; see adhesive selection for PP |
| Flexible, impact-loaded or wide-gap joint | Change the CA grade or adhesive chemistry | Faster curing does not correct unsuitable joint design |
Choose an Accelerator Approved for the Adhesive
Start with the CA adhesive’s current technical data sheet. Prefer an accelerator named or approved by that adhesive manufacturer. A general claim that a product “works with super glue” is less useful than documented compatibility with the exact adhesive and substrates.
Match the Applicator to the Joint
A pump spray is convenient for exposed beads and broad surfaces. A brush or controlled drop makes it easier to confine accelerator to one mating surface. Aerosols cover a wider area but can overspray nearby finishes and plastics.
The applicator does not determine whether the chemistry is safe for a material. Check the accelerator’s technical data sheet for permitted application methods and substrate restrictions.
Follow the Product’s Drying and Working Times
Carrier solvents and timing differ between accelerators. Henkel’s May 2025 technical sheet identifies acetone as the solvent in LOCTITE SF 7452 and gives a typical drying time of 30 seconds at 23°C (73°F) and an on-part life of 5 minutes. Those figures apply to SF 7452, not to CA accelerators generally (LOCTITE SF 7452 technical data sheet).
An accelerator that must dry before assembly should not be trapped wet inside the joint. Wait for the specified evaporation period, but do not exceed any stated on-part life before applying the adhesive and assembling the parts.
Test Plastics and Finished Surfaces
Solvent carriers can affect some plastics and coatings. Henkel says SF 7452 is not recommended on plastics prone to stress cracking and recommends testing a small area (Henkel’s SF 7452 product guidance).
Test an offcut or hidden area with the actual accelerator. Let its carrier evaporate, then inspect for softening, cracking, haze, staining or finish damage. A plastic that tolerates the CA adhesive may still react badly to the accelerator’s carrier.
Read the Exact Safety Classification
Do not assume all accelerators have the same hazard profile. LOCTITE SF 7452 must be handled as highly flammable, while Permabond describes CSA-NF as non-flammable (Permabond CSA-NF technical data sheet). These descriptions apply to those products, not to every accelerator sold under the same general name.
Read the label and safety data sheet for the product in hand. Use the specified ventilation, eye protection and gloves. Keep flammable formulations away from ignition sources, close the container promptly and follow the labeled storage-temperature range.
Pre-Apply Accelerator for Slow-Curing Mating Surfaces
Pre-application places accelerator on one substrate before the joint is assembled. It is useful for porous or acidic surfaces and other combinations for which the adhesive manufacturer specifies this method.
- Prepare the substrates. Remove dust, oil and loose material with a cleaner that will not attack either part. Let the surfaces dry.
- Apply a thin, even coat to the specified mating surface. Spraying, brushing, wiping or dipping may be permitted, depending on the product.
- Wait for the stated drying time. Let the carrier evaporate fully so that solvent is not trapped in the joint.
- Apply a small amount of CA as directed. Some systems specify CA on the untreated surface. Do not assume every accelerator-and-adhesive system works the same way.
- Mate and align immediately. Expect substantially less repositioning time than with CA alone.
- Keep the joint unloaded for the stated cure period. Fixture time indicates that the joint has reached a defined handling strength; it does not necessarily mean full strength.
Permabond’s CSA-NF instructions, for example, specify 24 hours at 23°C (73°F) for maximum bond strength (Permabond CSA-NF directions). Follow the cure schedule for the actual CA system rather than treating 24 hours as a universal requirement.
Post-Apply Accelerator Only to Exposed Wet CA
For post-application, assemble and hold the parts first. Then lightly mist or place a controlled drop of accelerator on the exposed wet adhesive. This method suits squeeze-out, small external beads, wire tacking and similar operations where the accelerator can reach the uncured CA.
Keep the quantity low. Too much accelerator can reduce tensile strength, while an overly concentrated spray can contribute to whitening (Aron Alpha application guidance). More accelerator is not a substitute for controlling the amount of CA in the joint.
Do not spray so broadly that the carrier reaches an untested plastic, coating or finished surface. On clear or cosmetic work, test the complete adhesive-and-accelerator combination before using it on the finished part.
Never Mix Liquid Accelerator and CA in a Container
Do not mix liquid accelerator and CA together in a cup, bottle or puddle. The reaction can become too rapid to control. Both Henkel and Permabond direct users not to mix the liquids, and Permabond warns against reacting large quantities of exposed CA.
Accelerator should contact a thin film or small exposed quantity in the manner specified by the manufacturer. If the joint contains a large pool because the gap is too wide or too much adhesive was dispensed, correct the joint design or choose a more suitable adhesive rather than trying to force the mass to cure with accelerator.