
19 min read ·
How to Plan a Direct-Bond Wood Floor Without Guessing at Moisture, Adhesive, or Cure Time
Follow a manufacturer-first sequence to test moisture, prepare the substrate, choose the approved adhesive and trowel, place planks, clean, and cure.
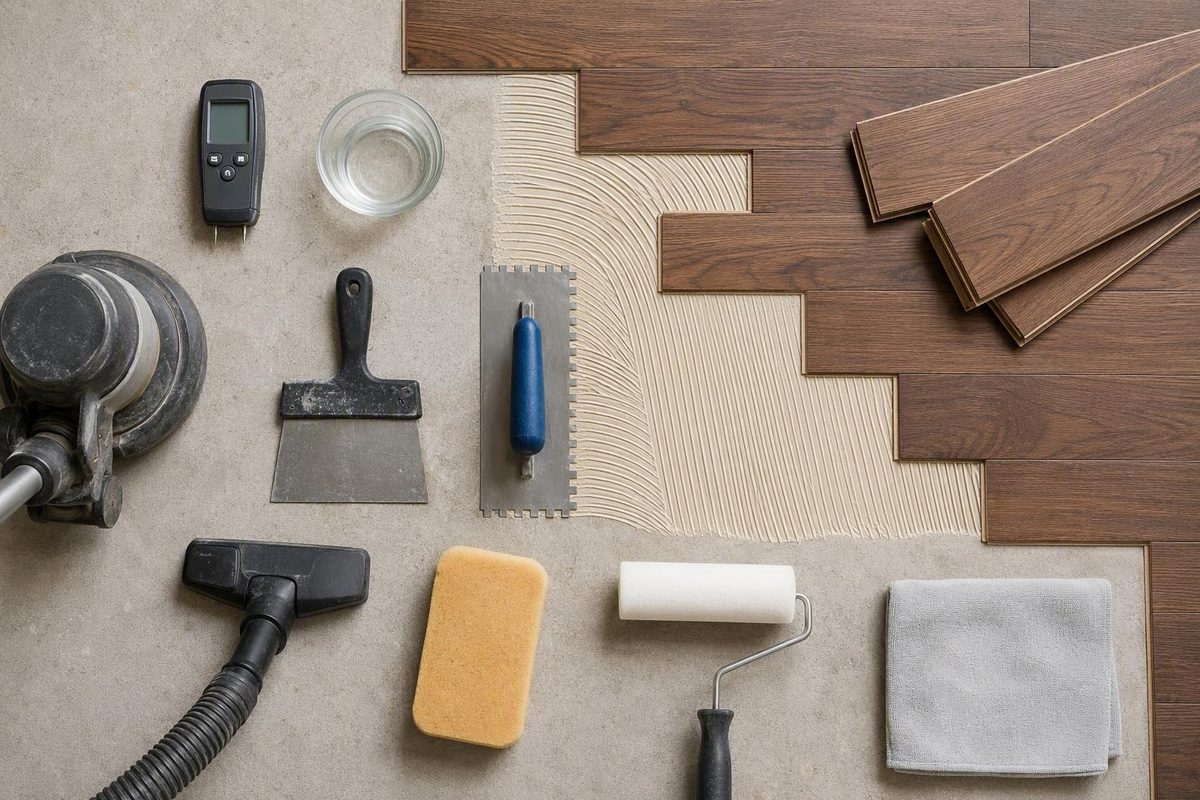
A successful glue-down engineered-hardwood installation does not depend on one universal moisture limit, trowel notch, expansion gap, or cure time. It depends on whether the flooring, substrate, adhesive, primer, patch or leveling material, moisture-control product, and jobsite conditions form one approved system.
The working sequence is straightforward: verify, test, prepare, lay out, spread adhesive, place planks, clean, and cure. The specifications are not interchangeable. Every critical number should come from the current documents for the exact products being installed.
Use this rule throughout the project:
If the flooring or adhesive manufacturer has not approved a material, substrate, condition, or procedure in writing, do not assume it is acceptable.
What glue-down engineered hardwood means—and when it makes sense
In a direct-bond installation, each approved engineered-hardwood plank is bonded to an approved substrate with flooring adhesive. Unlike a floating floor, the finished floor is attached to the substrate.
A conventional floating-floor underlay is generally not placed between the adhesive and the plank. The adhesive must contact the approved substrate or a specifically approved bonded component, such as a primer or moisture-control layer. That is different from adding loose foam or sheet underlay beneath a floating floor.
The three common installation methods work differently:
- Floating: Planks connect to one another rather than being fixed to the substrate. An approved underlay is commonly used. Installation is generally faster, and later removal or repair may be easier.
- Nail-down or staple-down: Mechanical fasteners secure approved flooring to a suitable wood fastening base. This is not ordinarily a direct-to-concrete method.
- Glue-down: Adhesive secures the underside of each plank to the prepared substrate.
Glue-down floors are commonly described as feeling firmer, moving less underfoot, and having less potential for a hollow sound than floating floors. These are practical tendencies, not guarantees of better acoustics, stability, or durability. Results depend on the plank construction, substrate, adhesive transfer, room assembly, and workmanship.
The trade-offs are significant. Direct bonding demands careful moisture testing, flattening, surface preparation, adhesive coverage, placement timing, and cleanup. It also adds material and labor costs, restricts access while the adhesive cures, and makes later removal or individual-board replacement more invasive.
Concrete slabs are a common reason to consider glue-down because they do not provide a direct fastening base. Concrete does not, however, make glue-down the only or automatically preferred choice. Some engineered floors can be floated over concrete, while others can be installed over an approved wood subfloor assembly.
Before comparing adhesives, answer this question:
Does the current installation manual for this exact flooring product permit full-spread glue-down over this substrate, at this grade level, in this room?
If the answer is missing, ambiguous, or conditional on products you are not using, stop before purchasing the installation system.
Verify the entire installation system before buying adhesive
Begin with the current installation instructions and warranty for the exact flooring SKU. A retailer’s glue-down filter, a carton symbol, or a general statement that engineered hardwood can be glued does not establish approval for a specific project.
Confirm:
- Permitted installation method
- Approved substrate type
- Above-, on-, or below-grade restrictions
- Permitted room types
- Plank-width or dimension restrictions
- Required moisture-test methods and limits
- Required jobsite conditions
- Expansion and movement-joint requirements
- Radiant-heat approval and temperature restrictions
- Adhesive, primer, and moisture-control requirements
- Installer responsibilities and warranty conditions
Cross-check those requirements against the adhesive technical data sheet. Verify that the adhesive approves the flooring construction, plank dimensions, substrate, and grade level. Identify its accepted moisture-test method and limit, primer or mitigation requirements, trowel specification, application rate, open and working time, transfer criteria, rolling or pressure instructions, cleanup procedure, and cure schedule.
Treat the installation as a layered system rather than a collection of unrelated purchases:
- Engineered-hardwood flooring
- Concrete, plywood, OSB, screed, or another approved substrate
- Surface-preparation method
- Patch or leveling compound
- Primer
- Moisture-control layer
- Flooring adhesive
- Cleaner compatible with the adhesive and factory finish
Some adhesives combine bonding with documented moisture-control or sound-control functions. Those functions are product-specific and may depend on the trowel, application rate, substrate preparation, full coverage, or accessory products. They cannot be assumed from the words “wood-flooring adhesive.”
Inspect the flooring under adequate light before installation. Check the finish, color range, milling, dimensions, tongues, grooves, and locking profiles. Set aside visibly unacceptable boards. National Flooring Products directs installers to inspect every plank and states that flooring installed with pre-existing defects cannot be claimed afterward in its engineered-hardwood installation guide.
Keep this preflight document set on site:
- Flooring installation manual
- Flooring warranty
- Adhesive technical data sheet
- Adhesive safety data sheet
- Primer and moisture-control instructions
- Patch or leveling-compound data sheets
- Substrate-preparation instructions
- Radiant-heating instructions, if applicable
- Written manufacturer clarifications
When documents conflict, do not select the easiest requirement. Ask the relevant flooring, adhesive, or preparation-product manufacturer for written clarification. Do not spread adhesive until the approved assembly is clear.
Evaluate concrete, plywood, OSB, and screed substrates separately
Every approved substrate shares a baseline: it must be clean, dry, structurally sound, flat within the flooring manufacturer’s tolerance, and free of anything that could interfere with adhesion. Preparation beyond that baseline depends on the material.
Concrete should be inspected for cracks, control and construction joints, patched areas, high and low spots, laitance, dust, weak surface material, oil, paint, wax, sealers, curing compounds, old adhesive, and unidentified residues. A slab that looks clean is not necessarily ready to bond.
Determine whether cracks are stable surface defects or evidence of continuing movement. Use only repair products approved for the substrate and adhesive system.
Plywood requires verification of panel type and grade, thickness, support arrangement, fastening, seams, structural stability, moisture condition, and adhesive approval. Do not assume that every panel described as plywood is a suitable bonding surface. BuildDirect identifies properly installed CDX plywood as one possible wood substrate and rejects particleboard and similar sheet goods in its general glue-down installation guidance. Those examples do not override the selected flooring system.
OSB requires explicit approval.
Anhydrite screed and gypcrete also require explicit approval. They may need substrate-specific curing, moisture testing, abrasion, dust extraction, priming, and repair materials. Do not automatically apply a concrete procedure to a gypsum-based substrate.
Barlinek, for example, describes a particular adhesive system as suitable over concrete, cement and anhydrite screeds, and ground OSB. That approval belongs only to the flooring and adhesive system covered by its manufacturer glue-down instructions.
Avoid importing detailed requirements from solid-hardwood, sleeper, or plywood-on-slab installations. Those assemblies may use vapor retarders, fasteners, or nailing bases that are irrelevant or incompatible with direct-bond engineered flooring.
Stop work if you find:
- A structural or moving crack that has not been evaluated
- Friable, powdery, delaminating, or otherwise weak material
- Oil, sealer, old adhesive, or contamination of unknown composition
- Flatness outside the flooring manufacturer’s tolerance
- Loose, flexing, inadequately fastened, or unsuitable sheet goods
- A substrate not approved by both flooring and adhesive documentation
- Repair or preparation products whose compatibility cannot be confirmed
Preparation is complete only when the repaired surface—not merely the original substrate—is approved for bonding.
Test moisture and stabilize the jobsite before installation
Moisture can affect both sides of the bond. Excess slab moisture may interfere with adhesive performance, while changing moisture conditions can contribute to wood movement, warping, finish deterioration, or microbial growth.
For concrete, in-situ relative-humidity testing under ASTM F2170 is one cited method. Wagner Meters recommends that method in its engineered-flooring installation guide, while also directing installers to the flooring and adhesive requirements. The selected system determines the accepted test method, number and placement of tests, recording procedure, and passing result.
A reading shown in a video, article, or unrelated installation manual is not a universal threshold. The test method, slab construction, drying direction, instrument, site conditions, and product limits all matter.
For wood substrates, measure the flooring and subfloor as required by the flooring instructions. Use the specified meter settings and sampling method, then compare the material readings as directed. Room relative humidity is important for conditioning, but it does not replace measurements of the flooring and subfloor.
Published environmental ranges demonstrate why generic numbers are unsafe. Barlinek specifies 45%–60% relative humidity and 64.4°F–75.2°F for its system, while BuildDirect’s general guide suggests 35%–55% relative humidity and 65°F–75°F. These are different source-specific ranges, not limits to transfer to another floor.
Acclimation guidance varies as well. Barlinek calls for unopened packages to remain horizontally in the installation room for at least 48 hours, while BuildDirect’s general guidance recommends delivery at least 72 hours before installation. Neither elapsed time proves that a different product is ready. Follow the selected manufacturer’s packaging, stacking, sampling, and moisture-equilibrium method.
Before delivery and installation:
- Enclose the building and control exterior moisture entry.
- Complete wet construction far enough in advance for the site to dry.
- Install and operate normal heating, cooling, and ventilation.
- Stabilize the room within the flooring manufacturer’s limits.
- Keep conditions representative of expected occupancy.
- Protect cartons from slabs, garages, and uncontrolled storage spaces.
If concrete testing exceeds the selected system’s limit, stop. The next step may be further drying, a separate moisture-control treatment, or a documented adhesive system rated for the measured condition. A moisture-control adhesive is not permission to install over any damp slab, and it does not make engineered wood waterproof.
For quality control, record:
- Test method and instrument
- Verification information required by the test procedure
- Test locations and individual readings
- Room temperature and relative humidity
- Date and time
- Substrate description
- Flooring and adhesive identifiers
This is a practical project record, not a substitute for warranty requirements. Check the exact flooring, adhesive, and mitigation warranties to determine which records, tests, photographs, or installer credentials are mandatory.
Choose the adhesive, primer, trowel, and cleanup system
There is no universally best engineered-hardwood adhesive. Compatibility depends on the flooring construction and dimensions, substrate, measured moisture condition, factory finish, grade level, site environment, and manufacturer approvals.
Chemistry names are only a starting point. Barlinek recommends one-component PU, MS, or MSP adhesives designed for factory-finished engineered wood and excludes solvent and dispersion adhesives from its system. Other commercial guidance mentions acrylic or urethane products. This difference shows why chemistry alone cannot establish compatibility.
Use an adhesive that:
- Is approved for the exact flooring and dimensions
- Is approved for the substrate and grade level
- Accepts the measured moisture condition or specified mitigation system
- Is compatible with the primer, patch, and leveling materials
- Provides suitable working time for the layout and crew
- Has a cleanup method approved for the factory finish
- Meets applicable radiant-heat or acoustic requirements
- Is within its shelf-life and storage limits
The specified trowel is part of the system. Barlinek gives a B11 notched trowel for its described installation, while a supplier demonstration used a 1/4-inch-by-1/4-inch V-notch trowel with a particular adhesive and engineered floor. Neither example is a general recommendation; use the notch, trowel type, angle, and technique stated in the selected adhesive documentation.
Check the notch during work and replace the tool when it no longer creates the required profile.
Understand the timing terms used in the adhesive data sheet:
Definitions can vary. Use the selected product’s wording rather than treating the terms as interchangeable.
Primer and moisture-control requirements are equally product-specific. Prepare, apply, and allow it to become ready exactly as directed.
A practical materials and tools list includes:
- Approved engineered flooring
- Approved adhesive
- Approved primer or moisture-control product, if required
- Compatible patch or leveling material
- Manufacturer-specified trowel
- Required moisture-testing equipment
- Straightedges and substrate-inspection tools
- Tape measure, square, chalk line, and marking tools
- Spacers or other clearance controls
- Saws and cutting tools
- Holding blocks or row-restraint materials
- Approved tape, weights, or roller if specified
- Approved wet-adhesive cleaner and cloths
- Waste containers and protected staging surfaces
Read the selected adhesive’s current safety data sheet before opening the container. Follow its product-specific instructions for personal protection, ventilation, storage, handling, spill response, and disposal.
Prepare the room and plan the plank layout
After grinding, repairing, patching, or flattening, clean the substrate again. Dust from final preparation can create a weak boundary between the adhesive and the substrate. Use the cleaning method permitted by the preparation and adhesive manufacturers, and allow any wet-cleaned surface to reach the specified condition before bonding.
Do not correct unevenness by applying extra adhesive. High and low areas must be addressed through an approved preparation method.
Before spreading adhesive:
- Inspect boards under good light.
- Blend acceptable boards from multiple cartons where permitted.
- Set aside finish, milling, color, joint, or dimensional defects.
- Check whether the room and walls are square.
- Choose the visual starting line.
- Plan transitions, doorways, columns, cabinets, and fixed objects.
- Calculate the first and last row widths.
- Dry-fit difficult cuts and transition details.
- Establish routes for board delivery and waste removal.
A visible wall may not be straight enough to control the installation. Snap reference lines and, if approved, install a temporary holding block or other restraint. Wet adhesive allows rows to drift, and small alignment errors can accumulate across the room.
Avoid leaving an impractically narrow final strip at a prominent wall or doorway. Adjust the starting line or divide the difference between the first and last rows while preserving the visual plan and required clearances.
Maintain the flooring manufacturer’s perimeter and structural expansion clearances around walls, columns, pipes, thresholds, cabinets, and other fixed elements. Published examples include about 1/2 inch, 3/4 inch, and 10–20 mm in different guides; that variation is precisely why none should be treated as an automatic default.
Identify any movement joints required within the field.
Finally, arrange the work area so installers can reach dry-laid boards, cutting tools, cleaner, and waste containers without stepping through adhesive or walking over newly placed flooring.
Install the floor in controlled, workable sections
Begin from the planned reference line or approved holding block rather than assuming the nearest wall is straight.
Mix or prepare the adhesive only as directed. Spread it uniformly with the specified trowel, held at the prescribed angle and moved with the required technique. Keep the ridges consistent, preserve a clean working edge, and check that the trowel still produces the required profile.
Spread only what can be covered within the adhesive’s working window under actual conditions. Published examples illustrate how much systems can differ:
- Barlinek describes spreading enough adhesive for no more than two rows.
- Wagner Meters suggests a strip no wider than 36 inches in its general guide.
- BuildDirect recommends an area that can ordinarily be covered in about 30 minutes.
These are source-specific examples, not alternative universal limits. Temperature, humidity, airflow, substrate porosity, installer speed, and adhesive behavior can change the usable window.
For each section:
- Spread adhesive without contaminating the reference line or escape route.
- Place each plank during the permitted application window.
- Engage or align the joint according to the flooring instructions.
- Press the plank into the adhesive using the approved motion.
- Preserve the required perimeter or structural clearance.
- Check row straightness frequently.
- Watch for squeeze-out and adhesive transferred to the finish.
- Lift a newly placed plank when the adhesive instructions require a transfer check.
- Correct contact problems while correction is still permitted.
- Leave a clean, usable adhesive edge for the next section.
Follow the flooring manufacturer’s end-joint layout rule. BuildDirect’s general guide specifies at least 6 inches of stagger, but the required offset may differ with plank length, width, pattern, and joint profile.
Do not edge-glue tongue-and-groove joints by default. Full-spread underside bonding and edge gluing are separate instructions. Edge adhesive may interfere with joint closure or intended movement when the flooring system does not call for it.
Use tape, weights, straps, or a roller only when the flooring and adhesive documents permit the method. Published roller recommendations vary, while some systems use distributed weights instead. The selected documentation must determine the equipment, load, timing, and number of passes.
Control squeeze-out rather than spreading through it. Adhesive on tools, gloves, footwear, or clothing can migrate quickly across a factory-finished floor. Keep the approved cleaner and clean cloths within reach. Remove fresh residue immediately using the documented method, then wipe or buff only as permitted by both the finish and adhesive manufacturers.
Keep expansion space open at the perimeter. Fasten baseboard or quarter-round to the wall rather than through the flooring in a way that pins the floor.
Stop immediately if:
- The adhesive skins before flooring is placed
- Planks will not remain aligned
- Required transfer or contact cannot be achieved
- Adhesive repeatedly enters unintended joints
- Contamination or weak substrate is exposed
- Temperature or humidity moves outside product limits
- Installation falls behind the adhesive’s working time
Remove affected adhesive only by an approved method, restore the substrate as required, and correct the cause before continuing.
Protect the installation during cure and avoid preventable failures
The adhesive’s current technical data sheet determines when restraints may be removed and when the floor can receive foot traffic, furniture, rugs, cleaning, heavy loads, or radiant heat.
Published general guidance differs. BuildDirect advises waiting 24 hours before traffic or furniture, while Twenty & Oak advises avoiding walking for 2 days in its general concrete-installation guide. That disagreement is not a range to average. It demonstrates why the selected adhesive’s cure schedule must control.
During cure:
- Keep people and pets off the floor for the required period.
- Do not drag appliances or furniture across it.
- Delay rugs and protective coverings until permitted.
- Avoid wet cleaning and maintenance products.
- Maintain the specified temperature and humidity.
- Keep approved restraints in place for the required time.
- Follow the documented radiant-heat restart procedure.
- Protect the surface without trapping moisture or disturbing planks.
Common preventable failures include:
- Installing flooring not approved for glue-down
- Skipping or misapplying moisture tests
- Bonding over dust, weak material, sealer, oil, or old adhesive
- Ignoring flatness and trying to compensate with glue
- Using an incompatible primer, patch, or moisture-control layer
- Selecting the wrong trowel or using a worn notch
- Spreading beyond the adhesive’s working time
- Failing to verify transfer when required
- Allowing rows to drift
- Omitting required expansion clearance
- Applying unapproved edge glue
- Using an unapproved pressure or rolling method
- Allowing residue to cure on the finish
- Opening the floor to service too soon
Repair and removal are generally harder than with a floating floor because every plank is bonded to the substrate. Do not jump directly to injection, face fastening, heat, solvents, or plank cutting when a hollow area, loose board, cured residue, or damaged plank is discovered.
Seek professional evaluation for widespread hollow areas, active slab moisture, moving cracks, weak substrate, extensive finish damage, radiant-heat complications, or uncertain warranty responsibility.
For project quality control, retain:
- Moisture and environmental readings
- Descriptions of substrate repairs
- Product labels and available lot information
- Photographs taken before covering the substrate
- Technical documents used for the installation
- Installation dates
- Cleanup products used
- Recorded traffic and cure milestones
Treat this as a troubleshooting record. Consult the exact warranties separately for any documentation required to maintain coverage.
Decide whether glue-down is worth the added work
No installation method is universally superior. Compare the method against the flooring, substrate, room, schedule, desired feel, repair plan, and total lifecycle cost.
| Factor | Glue-down | Floating | Nail- or staple-down |
|---|---|---|---|
| Attachment | Planks bonded to an approved substrate | Planks joined to one another rather than attached to the substrate | Planks mechanically fastened |
| Typical substrate categories | Approved concrete, wood, or screed systems | Approved concrete, wood, or existing surfaces | Approved wood fastening base |
| Underfoot feel | Commonly firmer with less movement | May feel more resilient | Commonly firm |
| Potential sound character | Less potential for a hollow sound when well bonded | May sound more hollow; underlay affects the result | Depends on fastening and subfloor |
| Installation speed | Slower and time-sensitive | Generally faster | Depends on fastening pattern and layout |
| Preparation demand | High for flatness, moisture, strength, and cleanliness | Still requires flatness and moisture control | Requires a sound fastening base |
| Repairability | Individual-board work is more invasive | Often easier to disassemble or replace | Local replacement can still be involved |
| Future removal | Usually difficult and substrate-intensive | Usually easier | Labor-intensive but mechanically attached |
| Typical skill demand | High; adhesive timing and transfer are critical | Often more accessible to experienced DIY installers | Requires fastening tools and technique |
| Directly over concrete | Possible only when the full system permits | Possible for approved products | No; an approved fastening-base assembly is required |
Consider glue-down when the exact flooring permits it, the substrate is approved and properly prepared, moisture is controlled, a direct-bond feel is desirable, and difficult future removal is acceptable.
Consider floating installation when the product permits it and speed, simpler installation, or future removal matters more than direct attachment. Floating changes the attachment method; it does not eliminate flatness, moisture, environmental, or expansion requirements.
Nail-down may suit approved engineered flooring over a suitable wood fastening base. It is not a direct-to-concrete method. Adding plywood or sleepers over a slab creates a separate assembly with its own height, moisture, fastening, and warranty implications.
Radiant heat requires particular caution. Direct adhesion may reduce the air space beneath the flooring, but that does not establish compatibility or performance. The flooring, adhesive, substrate, moisture-control system, and heating assembly must be approved together, including installation conditions and shutdown or restart procedures.
Do not compare methods by flooring price alone. Budget for:
- Moisture and environmental testing
- Crack evaluation
- Grinding and surface preparation
- Patching and leveling
- Moisture mitigation
- Primer and adhesive
- Trowels and cleanup materials
- Specialty tools
- Professional labor
- Cure-related downtime
- Future board repair
- Eventual removal and substrate restoration
As viewed in September 2026, Lowe’s listed glue-down-rated engineered products in multiple species, finishes, thicknesses, widths, and price points. That retail assortment can change and does not prove that any listed floor is compatible with a particular slab, adhesive, room, or warranty.
Hire a qualified installer or substrate specialist when slab moisture is elevated, mitigation or extensive flattening is required, cracks may be active, the layout is complex, radiant heat is present, or product documents conflict. Professional review is most valuable before adhesive is spread; correction becomes slower and more expensive after bonding begins.
Frequently asked questions
Can engineered hardwood be glued directly to concrete?
Yes, if the exact engineered-hardwood product permits glue-down, the adhesive approves both the flooring and concrete, the slab passes the required moisture testing, and the surface is sound, clean, and flat within the stated tolerance.
Concrete alone does not establish suitability. Elevated moisture may require additional drying or an approved mitigation system.
Do you put underlay beneath glue-down engineered hardwood?
Generally, no conventional floating-floor underlay is placed between the plank and adhesive in a direct-bond installation. The adhesive contacts the approved substrate or a specifically approved bonded primer, membrane, or moisture-control layer.
Do not add foam or loose sheet underlay unless the complete system expressly requires it.
What is the best adhesive for glue-down engineered hardwood?
The correct adhesive is one approved for the exact flooring, plank dimensions, substrate, measured moisture condition, grade level, finish, and any radiant-heat or acoustic requirements.
Also confirm the associated primer or mitigation system, trowel, application rate, working time, pressure requirements, cleanup procedure, and cure schedule. Adhesive chemistry or brand reputation alone is not enough.
How long before you can walk on a glued engineered-hardwood floor?
Wait until the selected adhesive’s current technical data sheet permits foot traffic under the actual jobsite conditions. General guides give different waiting periods, so there is no safe universal cure time.
Furniture, rugs, cleaning, heavy traffic, and full service may each have separate later milestones.
Can glue-down engineered hardwood be installed over radiant heat?
Sometimes, but only when the flooring, adhesive, moisture-control layer, substrate, and heating system are mutually approved.
Follow all documented surface-temperature limits and shutdown, installation, curing, and gradual-restart procedures. Do not infer radiant-heat approval merely because the product is engineered wood or the adhesive has moisture-control properties.
Final manufacturer-first checklist
Before committing to glue-down:
- Confirm that the exact flooring permits full-spread glue-down.
- Verify compatibility among every layer in the assembly.
- Test and document concrete or wood-subfloor moisture.
- Repair cracks and correct weak, contaminated, or uneven surfaces.
- Stabilize room temperature and humidity.
- Acclimate the flooring by its manufacturer’s method.
- Use the specified trowel, application rate, and working time.
- Maintain all required perimeter and structural clearances.
- Remove fresh residue with the approved cleaner and method.
- Observe the documented cure and service schedule.
- Check the exact warranties for mandatory tests and records.
If product approval, moisture results, substrate condition, or radiant-heat requirements remain uncertain, stop before spreading adhesive and obtain product-specific written guidance.