
20 min read ·
Find the Weak Link in a Failing Tape Bond
Match no initial grab, lifting edges, delayed release or sliding to likely causes, then check contamination, material, temperature, dwell time and load.
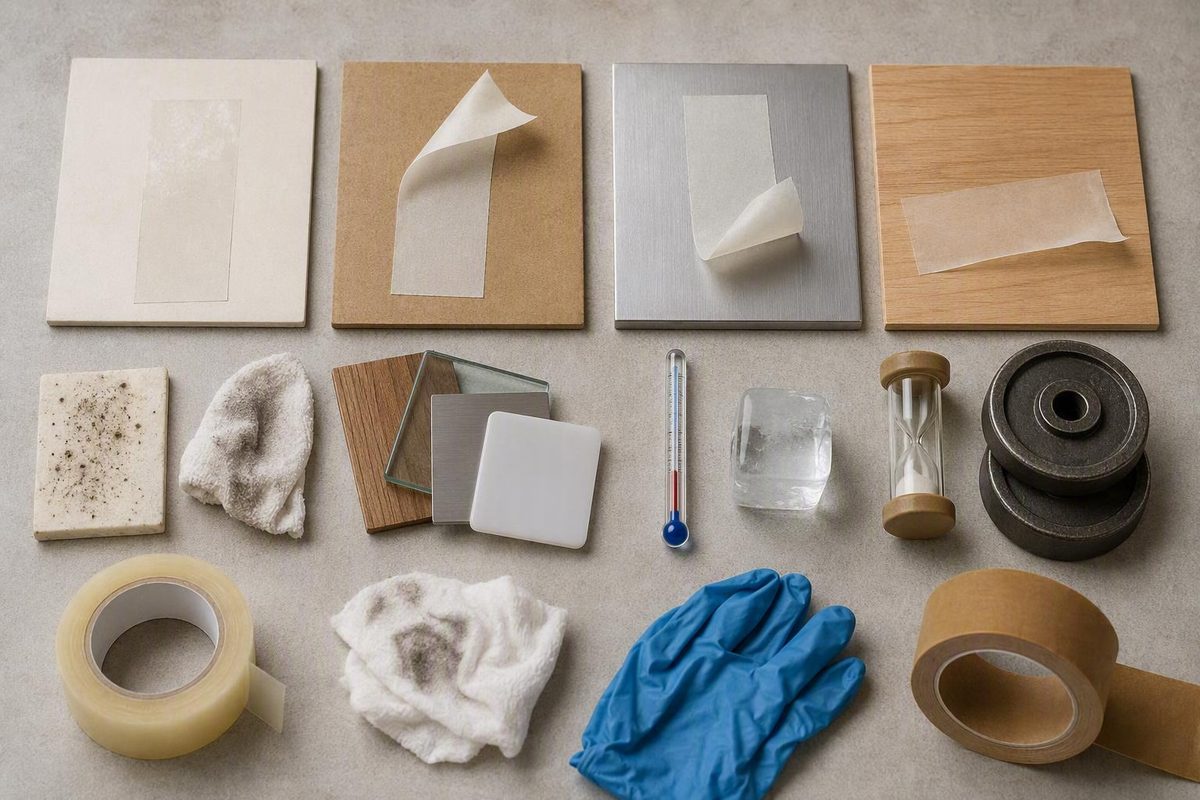
Why is your adhesive tape not sticking properly? Start with the failure pattern instead of assuming either the tape or the installer is at fault. Pressure-sensitive tape needs close surface contact, compatible materials, correct application, enough time to develop its bond, and a load it can realistically carry.
A strip that will not grab at all requires a different diagnostic path from one that sticks for a day and then releases. Likewise, tape that slides down a wall may have adequate initial tack but insufficient resistance to sustained shear.
Start with the symptom: when and how is the tape failing?
The symptom does not prove one root cause. It simply tells you which possibilities to investigate first.
| Symptom | Likely causes to investigate | First checks |
|---|---|---|
| No initial grab | Contamination, moisture, cold tape or substrate, low-surface-energy material, touched adhesive, unsuitable tape, or liner left in place | Confirm the liner is fully removed; inspect for dust, oil, fingerprints, condensation, wax, silicone, or cleaner residue; check the product’s application-temperature range |
| Edges lifting | Roughness, a curved surface, trapped air, wrinkles, tape stretched during application, moisture entry, temperature changes, or concentrated edge stress | Look for bubbles and gaps; check whether the strip crosses a corner or curve; inspect the leading edge and determine whether the backing is trying to spring back |
| Delayed release | Too little dwell time, humidity, water, UV, chemicals, temperature cycling, plasticizer or oil migration, or incompatible adhesive chemistry | Review when the bond was loaded and what it encountered afterward; identify the substrate, coating, and environmental exposure |
| Sliding under sustained load | Insufficient shear strength, too little bond area, excessive weight, high service temperature, downward loading, or loading before bond development | Support the item, inspect for adhesive creep, compare the load and tape area with the manufacturer’s design data, and check the required dwell period |
If there is no initial grab
First confirm that the release liner has actually been removed. Double-sided and transfer tapes can have liners that are difficult to distinguish from the adhesive or carrier.
Next, look for barriers between the adhesive and the surface: dust, grease, moisture, oxidation, silicone, wax, fingerprints, or cleaning-product residue. Also consider temperature. Some pressure-sensitive adhesives become firmer and less able to make contact when cold. A tape that works on clean glass at a suitable temperature may barely grab a cold, oily, textured plastic.
Do not keep pressing a contaminated strip in the hope that it will recover. Once exposed adhesive has contacted fingers, dust, residue, or the wrong surface, a fresh strip provides a more controlled retry.
If the edges lift
Edge lifting often begins where the tape has the least contact or the greatest stress. Common starting points include a wrinkle, trapped bubble, unsupported end, sharp corner, curved surface, or textured valley.
Check whether moisture can enter through gaps and whether the object or substrate moves as temperature changes.
If it releases hours or days later
Delayed failure shifts attention from initial cleanliness alone to dwell time, exposure, and material compatibility. Humidity, condensation, water, sunlight, chemicals, or repeated heating and cooling can reveal weaknesses that a quick hand-pull will not.
Flexible PVC and some rubbers may also release plasticizers or oils that migrate into certain adhesives, causing delayed softening or loss of performance. Tape selection therefore needs to account for the substrate, environment, and intended bond duration—not merely how sticky the roll feels initially (TPC Converting’s pressure-sensitive adhesive selection guidance).
If the item slides down
Immediate tack and shear strength are not the same property. A tape can grab instantly yet creep under the constant downward force of a wall-mounted object. Check:
- The weight of the object
- The usable tape area
- Whether the load acts mainly in peel or shear
- Whether heat is softening the adhesive
- Whether the item was loaded before the bond developed
- Whether the surface coating itself is moving or separating
More tape area may distribute the force, but it cannot correct unsuitable adhesive chemistry, a weak coating, severe edge peel, or an unsafe attachment design.
Record the variables before trying again
For persistent or consequential failures, write down:
- Exact tape manufacturer, product, width, and thickness
- Substrate and any paint, powder coating, plating, varnish, or other finish
- Surface texture and porosity
- Tape, substrate, and room temperature during application
- Expected minimum and maximum service temperatures
- Load weight and direction
- Humidity, water, UV, chemical, vibration, and impact exposure
- Tape age, package information, and storage history
A strip sticking briefly establishes only that some initial contact occurred. It does not prove long-term compatibility, environmental durability, or structural capacity.
Why pressure-sensitive tape needs clean, intimate contact
Pressure-sensitive adhesive works by making sufficiently close contact with the substrate under applied pressure. The adhesive deforms slightly and “wets out” the surface, filling small irregularities while retaining enough internal strength to resist removal or sliding.
The visible footprint of a strip is its apparent contact area. Its real contact area may be much smaller. A strip laid across rough timber may touch only the high points, leaving air-filled valleys underneath. The same strip on smooth glass may make much more continuous contact.
Dust, grease, oil, cleaner residue, oxidation, fingerprints, and moisture form weak intervening layers. The tape may be attached to contamination rather than to the underlying material. Trapped air, folds, and wrinkles cause a similar problem by preventing adhesive-to-substrate contact.
Smooth, rough, porous, and fibrous surfaces
Smoothness is generally helpful because it lets a pressure-sensitive adhesive make continuous contact. Roughness creates peaks and valleys that a thin tape may not bridge. A thicker, foam-backed, or otherwise conformable construction can sometimes follow texture better, although it still must be compatible with the material and load.
Porous and fibrous substrates create another difficulty. Unsealed wood, concrete, and particleboard may not present one stable, unified surface. Loose fibers, dust, pores, and weak surface particles can become the actual bonding layer. In some applications, sealing creates a more suitable interface; in others, a mechanical fastener is the better solution.
Tack, peel adhesion, and shear strength
These terms describe different behavior:
- Tack is the tape’s immediate grab under relatively light pressure.
- Peel adhesion is its resistance to being pulled away from the surface, usually from an edge.
- Shear strength is its resistance to forces acting parallel to the bonded surface, such as an object trying to slide down a wall.
High tack can be useful for immediate positioning, but it does not guarantee resistance to sustained shear, heat, edge peel, water, chemicals, or UV. Conversely, some tapes may feel less aggressive initially but develop a stronger bond after sufficient pressure and dwell time.
A failure is not automatically the installer’s fault. The tape may be unsuitable, defective, aged, degraded, or contaminated, or it may be operating outside its specified conditions. Diagnosis means checking the entire bond system: adhesive, carrier, substrate, coating, preparation, application, environment, geometry, and load.
A safe step-by-step reset for a failed tape bond
Do not simply place another strip over the failed one. Reset the bond methodically.
- Unload or support the item. Remove sustained force before inspecting or replacing the tape. Avoid placing yourself beneath an attachment that could fall; consequential or overhead applications may require mechanical support rather than general-purpose tape (GTSE’s material-specific tape guidance).
- Remove the failed tape carefully. Use only removal methods permitted for the tape and finish; surface treatments and removal can damage or weaken some materials (tesa’s surface-preparation guidance).
- Identify the substrate and coating. Glass, bare metal, powder-coated metal, painted drywall, polyethylene, rubber, and silicone require different decisions.
- Read the tape instructions and technical data. Confirm approved substrates, preparation, application temperature, pressure, dwell time, service environment, and load limitations.
- Remove old adhesive and contamination safely. Choose a method compatible with the substrate and finish.
- Clean the bonding area. Remove loose debris, grease, oil, wax, silicone, oxidation, and cleaning residue as appropriate.
- Let the surface dry completely. Do not trap rinse water, solvent, or condensation under the tape.
- Keep the prepared area untouched. Fingers can transfer skin oils back to the surface.
- Apply fresh tape. Do not reuse a strip that has touched fingers, dirt, residue, or another surface.
- Remove the liner completely. For double-sided tape, keep the second adhesive face protected until the mating part is ready.
- Lay the tape without stretching, folding, wrinkling, or trapping air.
- Press evenly across the entire strip. Use fingers, a roller, or the specified application tool.
- Wait before loading. Support the item for the product-specific bond-development period.
Cleaning without creating a new problem
For light, loose dust, begin with a clean, lint-free cloth. Oil or heavy grease may require a compatible degreasing step followed by final residue-free cleaning. The cleaner must be suitable for the substrate, coating, and tape instructions, and it must evaporate cleanly or be rinsed away as directed.
Household sprays, waxes, silicone-containing products, glass cleaners, and some detergent or rubbing-alcohol formulations may leave a film. A surface can therefore look cleaner while becoming less suitable for tape.
There is no universally correct solvent or isopropyl-alcohol concentration. For most 3M VHB applications, 3M recommends a clean, dry, unified surface and generally specifies a 50:50 mixture of isopropyl alcohol and water. Its guidance also describes additional preparation for heavy grease, porous materials, and difficult substrates (3M’s VHB surface-preparation guidance). That recommendation belongs to that product family and should not be applied automatically to every tape, plastic, paint, or delicate finish.
Test an unfamiliar cleaner on a small, inconspicuous area. Solvents and preparation treatments can damage some plastics, rubbers, paints, and finishes. Follow the product labels and the manufacturers’ handling, ventilation, and protective-equipment directions; industrial preparation guidance specifically calls for appropriate ventilation and, where necessary, respiratory protection when using primers (Fustier’s industrial surface-preparation guidance).
Applying pressure correctly
Pressure is not merely a final pat on the strip. It helps the adhesive establish close contact over the whole area. Press from one end toward the other so air is expelled rather than trapped. Give edges, corners, and textured areas particular attention, but do not stretch the tape while pressing it down.
The required force is product-specific. Use the manufacturer’s stated method rather than treating a pressure figure published for one industrial foam tape as a universal rule.
Match the preparation and tape to the surface
The same tape can work on one material and fail on another because substrates differ in texture, porosity, surface chemistry, contamination, coatings, and movement.
| Substrate | Main bonding challenge | Practical direction |
|---|---|---|
| Glass | Oils, fingerprints, moisture, cleaner film; possible edge exposure to water | Clean and dry thoroughly; avoid touching the prepared area; choose tape for expected moisture and UV exposure |
| Bare metal | Machining oil, grease, fingerprints, oxidation | Degrease if necessary, perform final compatible cleaning, and dry completely |
| Coated or oxidized metal | Weak oxide, powder texture, release additives, or poorly anchored coating | Verify that the coating is sound; use product-approved preparation or primer if specified |
| Painted surfaces | Unknown paint chemistry, weak paint-to-wall bond, cleaner sensitivity | Verify that the paint and underlying bond are sound; test application and removal in an inconspicuous area |
| Rough wood | Contact only at high points; dust, fibers, porosity | Consider thicker or more conformable tape; seal only with a compatible tested system; use fasteners for demanding loads |
| Concrete | Dust, porosity, weak surface particles, moisture | Remove loose material; consider an approved sealer; verify moisture and coating compatibility |
| Polyethylene or polypropylene | Low surface energy and poor wet-out with many adhesives | Select tape designed for these plastics or use an approved adhesion promoter |
| Flexible PVC | Plasticizer migration and surface additives | Use a tape validated for flexible PVC and the expected service period |
| Rubber | Low surface energy, oils, plasticizers, and flexibility | Test a compatible specialist formulation under realistic conditions |
| Silicone | Difficult surface for many general-purpose adhesives | Use tape specifically designed to bond silicone or an approved specialist system |
Clean glass and clean bare metal are often comparatively straightforward because they can provide smooth, continuous surfaces. That does not eliminate preparation: fingerprints, oil, water, oxidation, and cleaner residue can still prevent a reliable bond.
Greasy metal normally needs more than a dry wipe. Use a degreasing process approved for the particular metal and finish, complete the specified final cleaning, and allow it to dry. Do not assume one strong solvent is safe for painted metal, aluminium, plated parts, or plastics.
Oxidized metal may present a weak layer that separates from the sound substrate. Powder coating can add texture or surface chemistry that a general-purpose tape does not handle well. The solution may be an approved primer or tape selected for that finish—not simply harder pressing.
Wood and concrete
On rough wood, thin tape may touch only raised grain. A thicker or foam-backed tape can improve conformity, but it does not strengthen loose fibers or make a small bond suitable for a heavy permanent load.
Wood and concrete are porous and may need a compatible sealer to create a unified surface. Test the sealer and tape on a small area before treating the full substrate. Abrasion also requires caution because it can damage a material rather than automatically improving adhesion.
Concrete additionally requires scrutiny for moisture, dust, crumbling material, weak surface deposits, and previous coatings. Tape attached securely to a weak surface layer can still fail when that layer breaks away.
Difficult plastics, PVC, rubber, and silicone
Polyethylene and polypropylene are low-surface-energy plastics. Many ordinary pressure-sensitive adhesives do not wet them out readily, even when the surface is visibly clean. Choose a tape formulated for the specific plastic or an adhesion promoter explicitly approved for the tape and substrate.
Flexible PVC and some rubbers create a different long-term concern: plasticizers or oils can migrate into the adhesive. A strip may grab initially and later soften, become gummy, creep, or release. Silicone generally requires specialist adhesive chemistry. These material-specific limitations and treatments are described in 3M’s technical substrate guidance for VHB systems, but compatibility must still be verified for the exact tape and application.
When abrasion is—and is not—appropriate
Controlled abrasion may remove oxidation or a weak surface layer and can sometimes improve flatness or contact. It is conditional, not a routine first step. Coarse abrasion can create deep scratches and reduce the real contact area available to thin tape. Unnecessary sanding may also damage glass, protective coatings, corrosion-resistant finishes, or delicate substrates.
If abrasion is permitted, use the product-approved grade and method, remove all resulting dust, clean again, and test the complete process. Any primer, sealer, or adhesion promoter must be compatible with the adhesive, substrate, finish, and service environment.
Check application temperature, service conditions, and bond-development time
Three temperatures matter, and they are not interchangeable:
- Application temperature is the temperature of the tape, substrate, and work area while the bond is being made. It affects initial wet-out.
- Service temperature is what the installed bond encounters in use.
- Storage temperature is what the unused roll experiences before application.
Cold can make some adhesives firmer and less able to conform during installation. Excessive heat can soften an installed adhesive, increase creep, or exceed its service rating. A tape may therefore be suitable for cold service after correct installation but difficult to apply while cold—or it may apply easily at room temperature yet fail near a heat source.
There is no universal application or service-temperature range. Find the data sheet for the exact product code, not merely the tape family or retailer category.
Exposure can cause delayed lifting
Humidity, condensation, direct water, sunlight, chemicals, and repeated temperature changes can turn an apparently secure bond into a delayed failure. Moisture may enter through an open edge or gap. Heat can increase creep.
If the current tape is not rated for outdoor, wet, chemically exposed, or high-temperature service, repeated cleaning will not correct the mismatch. Change to a formulation designed and validated for the environment.
Allow the bond to develop
Initial tack is not final strength. Some acrylic pressure-sensitive adhesives develop greater adhesion as they remain in contact with the substrate.
For 3M VHB tapes specifically, 3M reports approximately 50% of ultimate bond strength after 20 minutes, 90% after 24 hours, and 100% after 72 hours at room temperature (3M’s product-specific VHB guidance). Those figures must not be generalized to every acrylic, foam, mounting, masking, or double-sided tape.
FindTape’s retailer guidance gives a typical 1–24-hour maximum-adhesion period for acrylic adhesive (FindTape’s general application guidance). Separately, TPC Converting states that acrylic pressure-sensitive adhesives may require dwell time of up to 72 hours, depending on the system and application. The variation is precisely why the exact product specification must take priority.
Support vertically mounted objects during the stated dwell period. Avoid the intended sustained load, vibration, impact, water, or other demanding exposure until the manufacturer says the bond has developed sufficiently.
Inspect the tape itself: age, storage, handling, and contamination
Unused pressure-sensitive tape does not remain unchanged indefinitely. It has a product-specific shelf life, and its performance may deteriorate when its age or storage history is unknown.
Potentially damaging storage conditions include:
- Dust and uncovered storage
- Dampness or condensation
- Direct sunlight
- Extreme heat
- Extreme cold
- Generally uncontrolled storage conditions
Check the packaging, batch information, manufacture or expiry date where provided, and the manufacturer’s storage requirements. Do not rely on a generic claim that all mounting, masking, acrylic, rubber, or double-sided tapes last the same number of months.
Handling can contaminate a sound roll
A usable roll can still produce a weak bond if the exposed adhesive is:
- Touched with bare fingers
- Laid on a dusty bench
- Left uncovered
- Folded onto itself
- Dragged across residue
- Applied and removed repeatedly
- Left with the release liner attached
Handle tape by its edges where practical and expose the adhesive only when ready to bond. Keep unused rolls in their packaging or another clean, controlled location.
Compare suspect tape with a fresh roll
When practical, compare the suspect roll with a fresh, correctly stored roll of the same specified product. Prepare two small, equivalent test areas and use the same application method, pressure, and dwell time.
If the fresh roll works and the old roll does not, age, contamination, or storage damage becomes more plausible. If both fail, reassess the substrate, cleaner, application conditions, adhesive chemistry, and load. When a new roll fails after correct preparation and application, contact the supplier or manufacturer (tesa’s tape-failure troubleshooting guidance).
A visual inspection alone cannot prove that adhesive has expired, suffered UV degradation, or absorbed migrating additives. Treat storage history as evidence to investigate, not a conclusive diagnosis.
Make sure the bond is large enough and loaded in the right direction
Good surface preparation cannot compensate for an undersized bond, excessive weight, or mechanically poor design.
Peel acts by pulling an edge away from the surface.
Shear acts parallel to the bonded surface. A vertically mounted object creates sustained shear as gravity encourages it to slide downward.
Why more tape is not always the answer
Greater width or contact area can distribute load, provided the additional tape makes genuine contact with a sound substrate. But more area does not automatically make a bond safe. It cannot resolve:
- Tape incompatible with the substrate
- A coating separating from the underlying material
- Adhesive softening in heat
- Persistent edge peel
- Excessive leverage from a projecting object
- Water or chemical attack
- A load beyond the product’s design data
Delayed sliding can indicate insufficient shear strength, inadequate bond area, heat-softened adhesive, or loading before the bond developed. Use the manufacturer’s load and joint-design data rather than estimating capacity from finger tack.
Support the item during dwell time and avoid vibration, impacts, and sustained loading until specified. For heavy, overhead, valuable, long-term, or safety-critical attachments, use mechanical fasteners or a properly engineered bonding system rather than general-purpose tape alone; retailer material guidance likewise recommends mechanical fastening for demanding long-term loads on difficult surfaces such as rough timber (GTSE’s material-specific tape guidance).
When to change tapes, add surface treatment, or stop relying on tape
Escalate from the least invasive remedy to the most consequential:
- Verify the exact instructions. Confirm substrate compatibility, preparation, temperature, pressure, dwell time, service exposure, and loading.
- Retry with fresh tape. Use a new strip on a properly cleaned, completely dry, untouched area.
- Select a more compatible tape. Consider a different adhesive chemistry, greater conformity, or a product intended for the substrate and environment.
- Test a compatible sealer, primer, or adhesion promoter. Use only a system approved for the tape, substrate, coating, and service conditions.
- Consider careful abrasion where permitted. Follow product-specific preparation instructions and clean away all debris afterward.
- Change the attachment method. Use mechanical fastening or an engineered adhesive system where tape remains unsuitable or failure has serious consequences.
A thicker or foam-backed tape may improve contact on a textured substrate. A specialist adhesive may be necessary for polyethylene, polypropylene, silicone, flexible PVC, rubber, high heat, strong UV, persistent moisture, or chemicals.
Nor can it strengthen loose paint, crumbling concrete, weak wood fibers, or an unstable coating.
Test every higher-intervention treatment
Before applying solvent, sealer, primer, adhesion promoter, heat, or abrasion across the full area, test it in an inconspicuous location. Such treatments—and tape removal itself—can damage or weaken some finishes and substrates, so follow product-specific compatibility and handling guidance (tesa’s surface-preparation guidance).
Flame and corona treatment are industrial surface-modification processes, not routine DIY fixes.
Reproduce the real conditions in a test
A useful test should mimic:
- The exact substrate and coating
- The proposed preparation method
- Application temperature and pressure
- Required dwell time
- Tape width and bond geometry
- Load magnitude and direction
- Sustained loading, vibration, or impact
- Service temperature and cycling
- Humidity, water, UV, and chemical exposure
- Intended duration of use
It does not reproduce sustained shear, edge peel, heat, humidity, or long-term migration.
Before final application, confirm:
- The tape is compatible with the substrate and coating.
- The substrate is sound, not loose, oily, dusty, or crumbling.
- The bonding surface is clean and completely dry.
- Tape and substrate are within the specified application-temperature range.
- The release liner is fully removed.
- Neither the adhesive nor the cleaned surface has been touched.
- The tape is applied without stretching, wrinkles, gaps, or trapped air.
- Firm, even pressure reaches the full bond area.
- The bond area and geometry suit the load.
- The specified dwell period passes before loading.
- The attachment remains safe if the tape eventually fails.
Most cited technical recommendations in this guide come from tape manufacturers, suppliers, or retailers rather than independent comparative testing. The technical data and safety directions for the exact tape, cleaner, primer, substrate, and application therefore take priority over generalized online guidance.
Frequently asked questions
Why does adhesive tape stick at first and then fall off?
Initial tack shows only that the adhesive made some immediate contact. Later failure can result from loading too soon, insufficient real contact area, moisture, heat, temperature cycling, UV, chemicals, edge stress, or movement in the substrate. Flexible PVC and some rubbers may also release additives that interfere with certain adhesives.
Identify what changed between installation and failure rather than assuming the surface simply became dirty afterward.
How long should adhesive tape sit before it carries weight?
Use the dwell period stated for the exact tape. Acrylic systems vary: retailer guidance describes 1–24 hours for some acrylic tapes, while manufacturer and converter guidance for particular acrylic systems extends to 72 hours. Product, substrate, pressure, temperature, and environmental conditions determine which schedule applies.
Keep vertically mounted items supported and avoid the intended load until the stated period has passed.
Why will tape not stick to polyethylene, polypropylene, PVC, rubber, or silicone?
Polyethylene and polypropylene have low-surface-energy surfaces that many general-purpose adhesives struggle to wet out. They commonly need tape designed for those plastics or an approved adhesion promoter.
Flexible PVC and some rubbers may contain plasticizers or oils that migrate into adhesive and contribute to delayed softening, creep, or release. Silicone is particularly difficult for many ordinary pressure-sensitive adhesives and generally requires a compatible specialist tape.
Should I clean a surface with isopropyl alcohol before applying tape?
Only if the tape instructions permit it and the mixture is compatible with the substrate and finish. IPA can remove some light oils and fingerprints, but it is not a universal answer to grease, wax, silicone, oxidation, or every cleaner residue.
The frequently quoted 50:50 IPA-and-water recommendation is 3M guidance for most VHB substrates, not a rule for all tapes. Test the cleaning method on an inconspicuous area and let the surface dry completely.
Can I press lifting tape back down, or should I replace it?
Replace the strip when exposed adhesive has picked up dust, oil, moisture, residue, or fingerprints, or when it has folded, stretched, or remained detached for an unknown period. Pressing contaminated adhesive back down may create a temporary grab without restoring a controlled bond.
For a reliable repair, remove the failed strip, correct the cause, prepare and dry the surface, and apply fresh tape according to the exact product instructions.
Most tape failures can be narrowed down in a disciplined order: symptom, surface, contamination, temperature, application, dwell time, tape condition, environment, and load. Reapply only with fresh tape on a compatible, fully prepared surface. If the substrate is difficult, the exposure severe, or the consequence of failure significant, move to an approved specialist system or mechanical fastening rather than trying to rescue an unsuitable tape bond.